Blood Pact: Hellbreach and Halls of Blood for Warlocks
After the recent July 20 hotfix for Affliction Warlocks’ Drain Soul and Haunt damage, Affliction may be not so bad for single target. Top-notch Warlocks like Midwinter’s Furty are displaying impressive single-target numbers as Affliction in Hellfire Citadel’s Mythic fights, but those numbers require more investigation and contextual details than just a simple number one damage bar.
While I’m investigating if it’s Furty’s set bonuses and Archimonde trinket or his skill doing the work in those numbers, here’s a breakdown of the first two Hellfire Citadel LFR wings of bosses for Warlocks.
Hellfire Assault
The adds in this fight, when tanked together, provide a great Immolate bed of embers for Destruction or a field of Hand of Gul’dan shadowflame for Demonology, but you’ve got to be focused on the target priority: Mar’tak > Siege Weapons > Felcasters/Terrors > Hulks > everything else.
There are classes with better speed boosts for running the Hellfire Munitions back to the cannons, but if you need to drop a Demonic Gateway to help, do it. For positioning, everyone might stand in front while Mar’tak is out, but I like to stand in the back of the room so I can start damaging the siege weapons as soon as they come rolling out.
Destruction really excels at this fight as it can use the many adds as a base for ember generation and it can use Havoc to hit a secondary priority target while damaging its first priority. Demonology ranks high with ample but padding AOE damage while Affliction likes to use the longer-living Hulks as Soulburn: Haunt anchors while applying pressure elsewhere.
Iron Reaver
This fight is about movement and positioning. The boss is huge and sometimes you might get crushed by misreading a mechanic’s animation direction, but pay attention and move promptly to survive. Warlocks can use the level 100 talent Kil’jaeden’s Cunning or their Demonic Circle: Teleport to aid their movement.
Stand close enough to the group so that you can be healed during the Pounding mechanic. Otherwise, spread out around the boss herself, anywhere in an arc of about 180 degrees on her backside. You don’t want to be near an exploding Artillery tank, but you want to minimize your movement due to avoiding Barrage or Blitz, because standing near other ranged increases your chances of being in the target Barrage area. Blitz is a narrower width to dodge, but it can be difficult to read the exact direction when she’s across the room. Don’t chase a Blitz — you won’t get in range before she turns around and Blitzes back.
If targeted with Artillery in the air phase, run to the side and have a personal cooldown ready. If you haven’t glyphed into the passive damage reduction, use Unending Resolve before the Artillery hits to mitigate the damage. If you’re using Grimoire of Sacrifice, you can use the voidwalker sacrifice ability after the Artillery hits to help boost your health while healers heal you back up.
Affliction does better than Destruction on this fight, primarily because DOTs care less about heavy movement mechanics than Chaos Bolt does. Well-chosen spots and a bit of luck let Drain Soul channel those hard-hitting DOT ticks, too.
If you’re running LFR, you’ll want to spend a bonus coin here, since the Intellect/Mastery trinket drops off Iron Reaver. For Normal and beyond, Iron Reaver still drops a trinket, but it’s Intellect/Crit/Haste.
Kormrok
Mr. Palindrome is mostly single target with crucial AOE moments and predictable strategic movement. The main attentions beyond single-target boss damage are the three abilities he derives from the three pools.
Empowered runes hurt more than the regular runes do, but Warlocks can survive with a personal CD or just simply having a lot of health for clothy. Remember to face the direction you want the rune to go (most strats face the center) when you step on it!
Dodge the pool waves like an advanced game of Frogger. For empowered waves, I try to stand between two pools close to the edge, so I can get behind one pool’s wave, then the second as it starts to pass me, and then the third’s wave as it finally reaches me. You should be able to staggercast or find spots to stand to cast while dodging waves.
Grasping Hands are best dealt with some serious AOE. Demonology ends up rocking this fight due to its toolkit strengths of movement and on-demand AOE damage, but Destruction can hold its own with its boss damage and on-demand AOE damage. Both specs want to pool resource up for a Grasping Hands phase to unload on the hands with either double Chaos Wave or a Fire and Brimstone’d Chaos Bolt/double Conflagrate before they get very far. Kil’jaeden’s Cunning isn’t necessary here; you are free to cast while the Empowered hands are dragging you back.
Kormrok is worth a coin when he’s dead — he drops a tier helm whether you’re in LFR (Felfume Hood) or in Normal and beyond (Deathrattle Mask).
Hellfire High Council
All Warlocks love a little meter padding with council-style fights! These bosses do not share health and there is a priority order (usually, Gurtogg > Jubei’thos > Dia), but Warlocks will want to hit all three periodically to take advantage of resource building. Heroism will likely be used when Gurtogg hits 30%, so you can use a Doomguard cooldown here when he hits 20% to help buff your Doomguard’s damage.
Standing in the center of a circular room and little movement makes this meter-padding fight even more pleasureable. Stand near Jubei’thos for Fel Rage so the raid can cleave into the two bosses and just sidestep blade boomerangs and shadow ghosts. Intelligent positioning will net you more DPS on this fight than relying on Kil’jaeden’s Cunning to get out of bad positioning. Dia’s Mark of the Necromancer may require a personal cooldown like Unending Resolve if you get to a high stack, but it’s more important if you have the Mark to drop the Reap circle out at the edge of the room, not in the center. Use your Demonic Circle: Teleport to get back to the group after the Reap.
Affliction will make the most of the damage meter by keeping DOTs rolling on all three bosses while Destruction will be Havoc-happy with the fast-dying copies of Jubei’thos in addition to the bosses themselves. Spend a coin when you get here! There’s a cool-looking sword on all difficulties and the best trinket outside of Archimonde if you’re on Normal or above.
Kilrogg Deadeye
Priority targets are the game here, and Destruction loves the Havoc fun here. All specs will likely use Kilrogg or the Hulks as an anchor for damage and buffs like Soulburn: Haunt, Havoc, and Doom. Clever Destruction Warlocks will be able to Havoc two priority adds, such as a Blood Globule and a Salivating Bloodthirster instead of an add and Kilrogg. Destruction and Demonology will add more help to the Vision of Death realm than Affliction with the AOE involved, but even un-Visioned Affliction can rock the meters. Conflagrate and Hand of Gul’dan slows work wonders on the adds.
Demonic Gateway is useful to your raid team here, especially if you have two or more Warlocks to cover two sides of the room for a split raid strategy. Have one end of the Gateway near your group and the other end at the stairs, so raidmates can either get away quickly for the Heartseeker mechanic or get back quickly. You can use your personal Demonic Circle as a way to get back from dodging green swirlies or a Heartseeker.
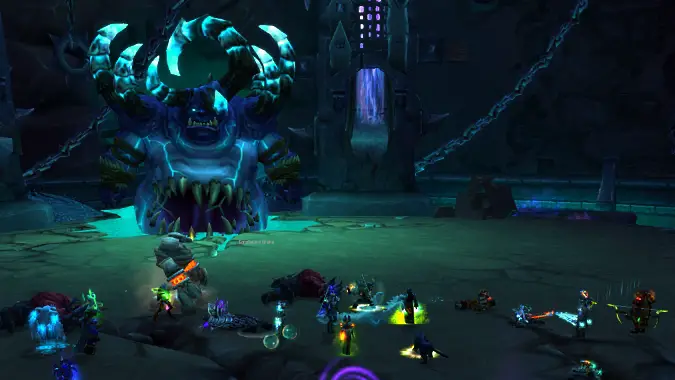
Gorefiend
Gorefiend has a lot of adds running around, so it sounds like a multitarget festival, but no, sorry, we’re still in priority target mode where adds die quickly one by one. As a ranged DPS, you’ll want to focus on Essences > Constructs > big Spirit > Gorefiend. Essences do a raid-wide AOE; Constructs chase and blow up ranged DPS; Spirits like to hit and kill your off-tanks; and well, Gorefiend keeps trying to eat you which is just plain rude.
Much like Hellfire High Council, there’s a debuff that you need to drop off at the back of the room in a circle, but the fight can vary in amount of movement depending on your luck. If your raid is smaller (so a higher chance of being your problem) or if you just plain have bad luck, drop your Demonic Circle somewhere in either the center or on one side of the room so you have a spot to go to when things get rough.
You’ll want to save at least one Dark Soul charge (preferably both) for the Feast of Souls phase, which lasts 60 seconds. At this point you’ll be able to stand still and just tunnel on Gorefiend, including Heroism and a potion in one of these phases.
Gorefiend drops tier legs for LFR (Felfume Pantaloons) and beyond (Deathrattle Leggings), as well as a decent Mastery staff on Normal and above until you get to Archimonde.
Please consider supporting our Patreon!
Join the Discussion
Blizzard Watch is a safe space for all readers. By leaving comments on this site you agree to follow our commenting and community guidelines.