Totem Talk: Shaman healing in Nighthold

I’ve been looking forward to The Nighthold for a while now. Not only does it continue the story of Legion and Suramar, but the aesthetic is something that really appeals to me. There’s just something about dark elves in a magical city.
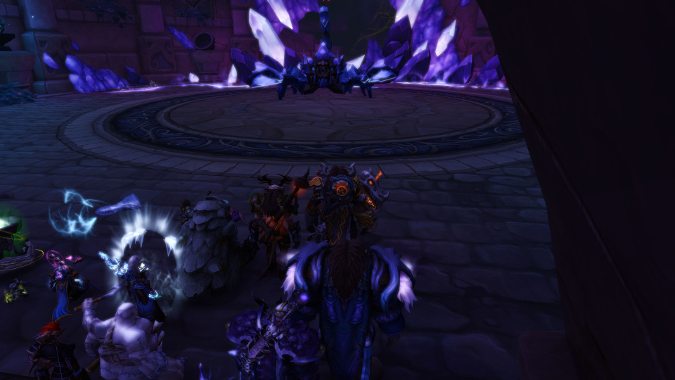
Coming hot on the heels of the Halls of Valor, we’re finally attempting to take back Suramar from the clutches of Gul’dan and the Legion. Magical constructs, empowered elves and demonic cohorts await. This week we’ll start taking a look at the encounters. As always, these won’t be in depth guides, but tips and tricks that have helped me.
Skorpyron
The raid starts with an assault from the sewers to get to the hold proper. The first boss along the way is Skorpyron, or as my guild has named him Skorpy Ron. He isn’t quite an alligator in the sewer, but I assure you he has plenty of bite, as well as several faces. The fight is a pretty straight forward one, and it tends to work well with our healing kit.
The area where the boss is divides into two distinct areas. The inner circle’s where the main bulk of the fight happens. Everywhere outside the circle, Skorpy Ron has a ton of smaller scorpion allies eager for a meal of raiders. For the most part, players stay within the central circle of the room. It isn’t quite small enough to have everyone standing inside of Healing Rain, but we can actually position it well enough to catch a decent amount of players. It’s definitely most effective used in melee.
Healing Wave and Healing Surge are all stars to help catch anyone blasted into the scorpids by Shockwave, or to help top off tanks. Undulation was particularly useful in this regard, and helped for some quick top offs. Due to how close most of the raid is in this fight, Cloudburst Totem is incredibly useful if you can get it near the middle of the room.
Pay attention to Acranoslash on tanks and give them some love. When Boon of the Scorpid is active, whichever tank has the adds will take increased damage. Besides healing them, a well placed Spirit Link Totem helps between the damage reduction and health re-balancing.
As the fight continues, Crystalline Fragments fall off the boss and find their way onto the ground around the room. Players need to hide behind these to avoid getting knocked away by Shockwave. I’m not sure if it’s a bug or intended, but the shards don’t seem to block line of sight for healing right now. Healing wise, it’s a pretty straight forward fight. There aren’t a lot of surprises on normal, and I find it a good warm up for what’s to come.
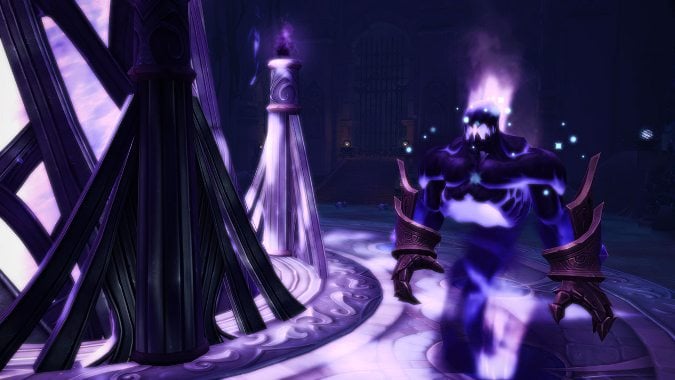
Chronomatic Anomaly
The main gimmick of this fight is that the flow of time fluctuates throughout the encounter. Passage of Time has three levels, Normal, Slow and Fast. Normal speed, everything happens without any changes. Slow gives a 30% increase to casting time, attack speed, and cooldowns. Pay attention when this is active, as it’ll have an impact on our healing. Fast makes everything 30% quicker.
Riptide combined with Torrent is handy for the slow phase. I’m sure it’s fairly obvious, but with everything taking longer to cast, instant healing is incredibly useful. Echo of the Elements is a good choice here for the extra riptide, as well as the extra Healing Stream Totem. We need to pay attention to Time Release. The effects and frequency vary, based on what phase of Passage of Time the encounter is in.
The spell places a healing absorb debuff on a raid member. If the debuff expires before being healed away, it’ll deal damage to the targeted player equal to the amount of healing absorption remaining. In the slow phase, it’ll be cast every 43 seconds — two times during the phase. The trick is that it’ll target all players in the raid except for one tank. While slow, the absorb is small, and takes 25 seconds to expire.
During normal time, it’ll be cast every 20-30 seconds, and last for 20 seconds. This places a moderate absorb on four targets that needs to be cleared. In the fast phase, two players are targeted every 13 seconds. This is a big absorb shield that only lasts for 15 seconds.
There are a lot of damage sources to pay attention to in this fight. When the anomaly casts Power Overwhelming, it’s a good time to use cooldowns like Healing Tide Totem or Ascendance. In the fast phase we need to keep an eye out for Temporal Orb — it’s also a good time to burn a cooldown.
Honestly, the challenge of this fight is keeping track of everything as a healer. There’s a lot going on. The sheer amount of damage going out, and the constant shifting of speed, really adds a new wrinkle for healers to contend with. The slow phase lends itself well to instant heals. Things like Spirit Link Totem can be useful for the damage reduction, and to help stabilize from Time Release. Healing Wave comes in handy in the fast phase due to the decrease in casting time, and Spiritwalker’s Grace helps keep up with the raid as it moves from add to add.
Overall, the first two fights are a lot of fun, and pretty great introductions to The Nighthold. They set the pace for what is probably one of favorite raid zones in a long time.
Please consider supporting our Patreon!
Join the Discussion
Blizzard Watch is a safe space for all readers. By leaving comments on this site you agree to follow our commenting and community guidelines.