Heroes of the Storm map guide
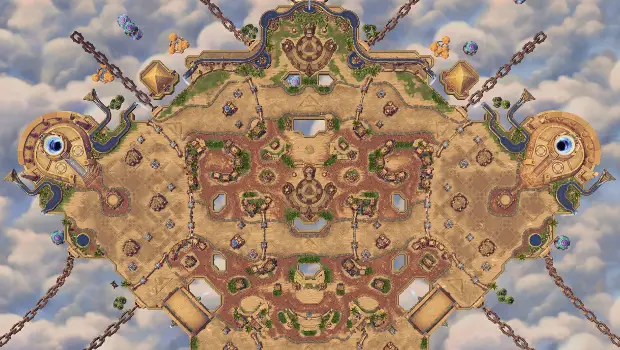
The object of the game is simple: Just destroy the core and you win. The basic path to get there is similar, but each Heroes of the Storm map has unique mechanics designed to crush your opponent. This is a discussion of both those basics and the mechanics.
There are a few characteristics common to all Heroes of the Storm maps. You and your team need to make your way down several lanes. Those lanes are blocked by gates, which are flanked by two towers that fire on you. To progress, you must destroy them. To help you in the assault you get waves of minions, which absorb tower attacks as long as they’re alive. When all the minions die, you have to get out of range and wait for the next round of minions or your hero is probably toast. After you break through each gate, there’s an even larger tower called a fort to demolish, though this one you can skirt around for a kill or two. After breaking down the very last fort, even stronger minions begin to spawn, really boosting your offense. Then, all that’s left between your team and victory is that core.
Also common to all maps are mercenary camps. Stand inside the circle to capture it and those mercenaries (also called mercs) will begin a march down a nearby lane on your behalf. There are three basic types. The ogre camp which is the easiest to defeat — two ogres throw boulders slowly at a long range, making them excellent for picking off towers. The bruiser or knight camps are slightly more difficult — they assault your enemy’s defenses head on, with a lot of HP and good offense. Lastly are boss camps. Capture those to gain a massive boss which absolutely destroys anything in its path. While many heroes can solo an ogre camp, and several can solo a bruiser camp, there are few which can solo the boss.
Each map has a unique mechanic that is absolutely vital to success in the Nexus. I cannot stress enough how important it is that you drop what you’re doing in order to try to complete them. I know you’re dominating that lane, but the reason you can do so is that both teams are fighting hard over the objective, and your team is doing it 4v5 without you.
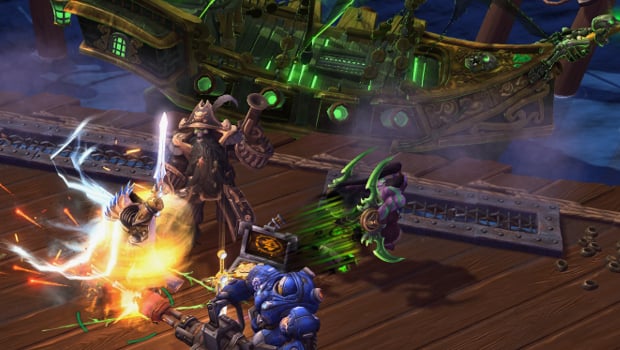
Blackheart’s Bay
The objective for this pirate-themed map is multifaceted. Your team needs to collect gold doubloons and hand them in to the undead sea captain Blackheart. You can find coins by defeating mercenary or special pirate camps unique to this map for 2 apiece, or inside one of two chests filled with five doubloons each. You turn them in by speaking to Blackheart in the middle of the map with an interruptible channel. If you give Blackheart the number of doubloons he asks for, he will turn the cannons of his ghost ship on the closest structures your opponent still has standing. Later in the game, you may end up shelling down a lane you’ve ignored all game, but it’s usually still a good idea to turn in your coins regardless. Whenever a player is killed they drop all their coins, and high-numbered doubloon carriers make for juicy targets. Use caution when turning in your coins, though. There are pillars of smoke near Blackheart where an enterprising Assassin can hide.
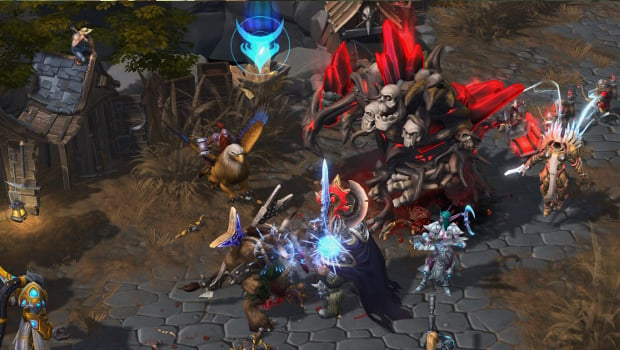
Cursed Hollow
Cursed Hollow is one of the biggest maps, and one that is very much prone to 5v5 team fights. A tribute to the Raven Lord will spawn in one of six locations all over the map. If you right click the tribute, after an interruptible channel you will collect it for your team. Collecting 3 tributes will give the opposing team a very powerful curse. Their minions are all reduced to 1 HP (though an enterprising Support character can heal them), and their towers stop firing while the curse persists. Lane pushes in this phase are intense. Enterprising teams will sometimes sacrifice a bit of time after the last tribute is captured to take a couple mercenary camps for all but game-ending pushes.
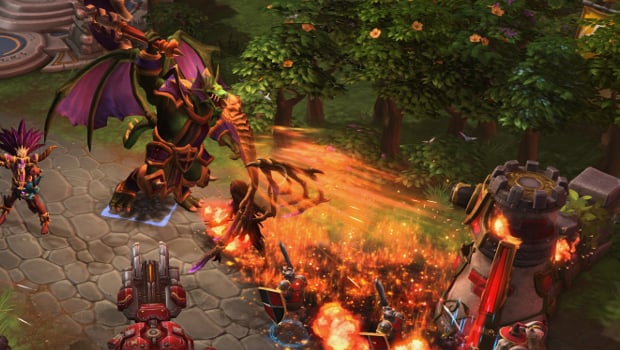
Dragon Shire
This map revolves around the huge Dragon Shrine in the middle of the map. In order to activate the Dragon Shrine for your team, you have to hold both the Moon and Sun Shrines at the top and bottom of the map at the same time. If your team isn’t holding both, the Dragon Shrine remains dormant. The Dragon Knight is a very powerful siege tank. If you’re controlling the Dragon Knight your buttons will change into an ability that punts a single opponent halfway across the map, and another strong fire AOE ability to dispatch minions. The Knight’s autoattacks are extremely powerful against enemy structures. When the Knight is defeated, all the shrines go dormant, and you have to wait to battle it out again.
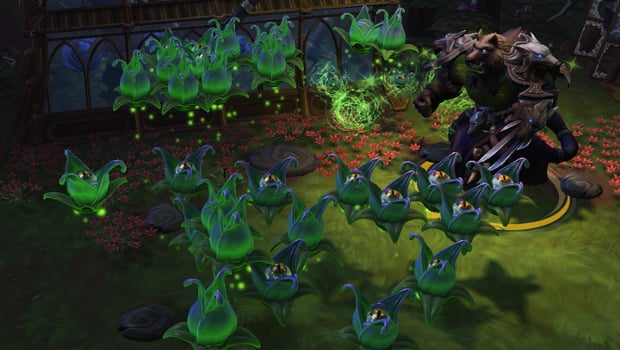
Garden of Terror
I hope you have a green thumb, because this map centers around growing a huge plant. When the sun sets on the garden, small camps of flowers spawn that would love nothing more than to eat your face, including two huge goliaths that will take multiple people to beat. When defeated, these plants drop seeds. The night cycle turns back to day after all the plants are defeated. If your team collects 100 seeds, a plant near your base begins growing, and the clock starts ticking. When your seeds are ‘ready to harvest’, one member of your team must go and become the garden terror before time runs out and your terror is lost. The terror has 3 abilities. One will polymorph opposing players into plants. They can still move their characters, but can’t use any of their abilities. This is targeted on the ground, so move out of the circle if you’re defending against one. Another ability spawns a pot which wraps opposing structures in vines, but can also be killed. Vines both deal damage and prevent towers and forts from firing. The last ability is a sprint, to get your terror where you need it more quickly.
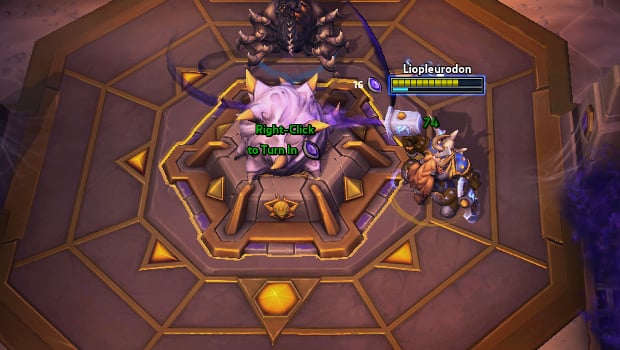
Haunted Mines
This map is crawling with undead. It’s the only map with just 2 lanes, but this is because the majority of the fighting is going to take place down below, in the Mines. When the mines open, you and your team need to rush down and kill as many of the undead as you can. Be careful though, because the mines are a twisting labyrinth of blind corners and ambush points, and your opponents are after the same thing you are. The undead drop skulls when they die. Run over the skulls to collect them. Once all the undead are re-dead and all the skulls collected, huge Grave Golems for each team will begin to make their way inexorably toward the core. Their strength is scaled based on how many skulls your team collects: the more skulls, more powerful the golem. Depending on how the mines are going and how many opponents you’re facing, it’s usually an excellent idea to time mercenary pushes with golems, if possible.
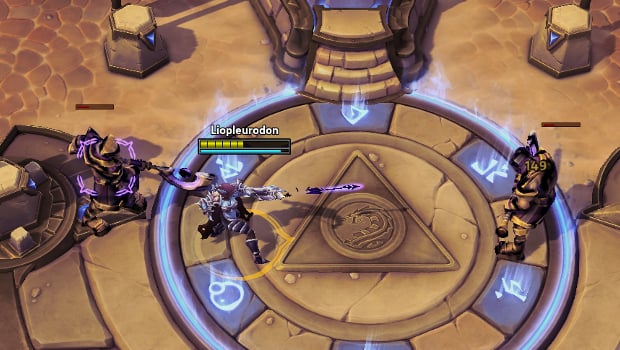
Sky Temple
Another direct assault map, Sky Temple has three temples to activate: Crocodile, Snake, and Jackal. Standing on the circle to claim the temple for your team will spawn some aggressive mobs to deal with. The first couple of rounds, these mobs are pretty tough for most heroes to solo, but they get easier over time. Claiming a temple shoots bolts of energy directly toward the least-progressed lane’s defenses, and slowly takes them out. These bolts are ‘paused’ the second the opposing team enters the circle, and will ‘pause’ if nobody’s in it, too. As the temple’s energy is expended, five very powerful bolts shoot out toward the opponent of the team currently holding the temple. It’s critical, if possible, to fight inside the circle. This map is made for ranged players with good spacial awareness. Two or fewer temples will be active at any given time, making this another great map for team fights.
Tomb of the Spider Queen
Tomb of the Spider Queen is the newest map in the Heroes family, and it’s the only one thus far that encourages staying in the lanes as a part of the map mechanic. The back row of each wave of minions will each drop a gem, for three gems per minion wave, which your hero runs over to collect. Right click the spider nests to turn these in. Like Blackheart’s Bay, if you die you drop all your gems, and both teams can recover some of them. These gems are designated for a team by color and despawn very quickly. When your team reaches the appointed number of gems, huge siege spiders drop down in every lane to assist you. The mercenary camps here, with the exception of the boss at the top of the map, are largely ignored.
Please consider supporting our Patreon!
Join the Discussion
Blizzard Watch is a safe space for all readers. By leaving comments on this site you agree to follow our commenting and community guidelines.


