Lightsworn: Tanking tips and strategies for the Bastion of Shadows

As we make our way through Hellfire Citadel, the Orcs start to fall by the wayside and the Burning Legion’s influence within the citadel’s walls intensifies. Who said there can’t be an upside to a demonic invasion?
In the Bastion of Shadows we begin to run up against some of the strongest forces that the Legion has brought to bear upon Draenor. Each of the encounters here features someone who has betrayed their home — or adopted home — world and thrown their lot in with the Legion’s roadshow. These bosses also feature very important roles for the tanks that dare to stand against them; these are not simple tank-and-spank encounters!
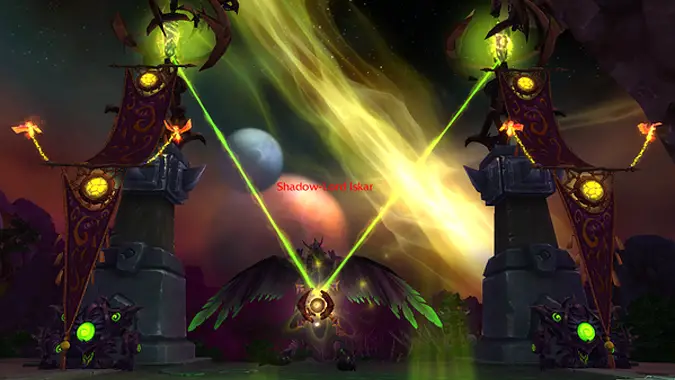
Shadow-Lord Iskar
Is Divine Protection glyphed? Yes, most of the damage you’ll be worrying about is physical
Speed boost talent? Long Arm of the Law, to counter frequent Fel Chakrams
When to tank swap? On Fel Chakram, or if Phantasmal Winds will drag the active tank away
First and foremost, it’s important that you have a keybind for the extra action button. (A super-basic macro to accomplish this is just /click ExtraActionButton1.) Either way, it’s critical that you can quickly throw out the Eye of Anzu when you do not need it anymore, and there will be two occasions where this will be necessary.
The fight begins on the ground and you should drag Iskar back towards the doorway that leads onto the balcony. You could give the raid the entirety of the room to work through Phantasmal Winds, but that will make it a pain to pick up the adds during the air phase. Find the happy medium where there’s enough ground for the raid to clear everyone’s Phantasmal Winds debuff, but not so far that you can feel the doorknob digging into your spine while you tank.
During ground phase you and your co-tank will be switching off at each Fel Chakram. Don’t stand close enough to splash the damage onto other players when you run it out. When he hits 70% health, Iskar will book it and the adds will appear.
Now, the add phases get progressively difficult each time they happen. The first add phase involves burning down the only “big” add and then dispatching the little guys. During this first air phase you will not have to worry about any of the extraneous stuff that is going on, like Fel Bomb. The healers will be taking care of that. Once the phase ends, reposition the boss and go through another ground phase.
During the second air phase, after 45% health on Iskar, there will be an additional Fel Warden in the add pile. This add needs to be interrupted by whoever is holding the Eye of Anzu, so it does not cast Fel Conduit, and depending on your raid’s strategy that may very well be a tank (ie, you). Once you interrupt make sure to quickly get the Eye into the hands of who is supposed to have it to counter other mechanics.
Then finally at 20% there the third and final air phase which features everything from before as well as a Fel Raven. For this phase one of the tanks will likely be charged with handling interrupts of any Fel Conduit casts, as well as making sure to hold onto the Eye for when the raven attempts to debuff the tank with Phantasmal Corruption. If you are not holding the eye and you get debuffed with that, you need to immediately get away from the raid so you do not explode. Otherwise, get the Eye to a healer after both those abilities have been cast, so they can handle what they need to counter. After this air phase is complete, Iskar’s demise will soon follow.
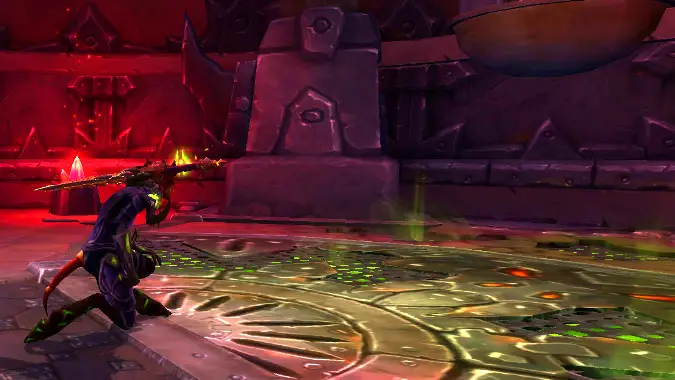
Soulbound Construct/Socrethar the Eternal
Is Divine Protection glyphed? Yes
Speed boost talent? Long Arm of the Law
When to tank swap? Three stacks of Shattered Defenses
This might be my favorite encounter thus far in Hellfire Citadel if only because it features two very interesting mechanics. In a turn of events that should come as a surprise to exactly none of you, there are two phases to this encounter. Thankfully, the two phases do not repeat; you go through the Construct phase, and then you go through the Socrethar phase (and that’s where the real fun begins).
The biggest focus on the Construct phase for the tanks is managing the Reverberating Blows. This ability is interesting because it gives you options in how to deal with it. Each time it strikes, those in the cone that get hit split three stacks of Shattered Defenses between themselves. If a tank is the only one hit, they get three stacks all at once. Add two melee DPS and the tank will get one stack and each DPS will get one to call their own. Realistically, though, you want to get some DPS into the mix so you can space out how long the tank takes to get their stacks. Successive Reverberating Blows attacks will do more damage with each additional stack, so be sure to use cooldowns to help with the damage spikes.
Swap after the active tank gets three stacks. Avoid tanking the Construct in either the Felblaze Residue or Fel Prisons so melee doesn’t get killed.
Once the Construct is defeated, one of the tanks can take it over and drive it for the remainder of the encounter. At the same time, three portals open up — red, purple, blue. The Socrethar tank will move the boss and the raid to the red portal and tank Socrethar/any Sargerei Dominators there while the Construct tank is in charge of handling/controlling/whittling down adds that emerge from the other two as they appear.
At the Construct tank’s disposal are the same abilities that Socrethar used against the raid in phase one. Keep the blue portal locked down by dropping a Fel Prison underneath it and run Felblaze Charge in a line from the portal to the raid, so that any Haunting Souls are slowed and damaged as much as possible before they can reach the raid. Do not let any reach the Construct as they will do damage to it. Use Volatile Fel Orb to damage any Shadowcallers from the purple portal (do note these cannot be tanked), as well as the Dominators from the red portal. Finally, use Reverberating Blows on cooldown to keep stacks on the Dominators, to make it easier for the raid to kill them. The Construct tank can also help out by meleeing the Dominators or even the boss. Keep all the balls in the air and eventually Socrethar will succumb and finally give up the ghost.
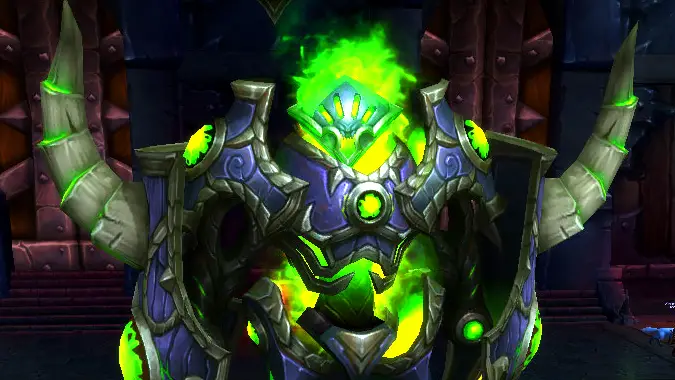
Tyrant Velhari
Is Divine Protection glyphed? No, lots of frequent magical damage on this fight
Speed boost talent? Long Arm of the Law
When to tank swap? No more than three stacks of Seal of Decay, and maybe as few as two during phase two
While this fight is particularly intense, I can’t help but be excited because it subjects the whole raid to the glories of paladins – even if in this case it’s a fel-paladin that is being fought. As part of fighting essentially a big, angry green-charged pally, the mechanics of this fight will seem familiar to you. In each phase, Velhari will emanate an aura that debuffs or affects the raid in a critical way. In phase one, Aura of Oppression deals damage for every .5 seconds you are moving. In phase two, Aura of Contempt limits how much you can be healed (and the effect gets more intense as the phase continues). In phase three, Aura of Malice essentially starts a lightning round where you deal more damage, but also take more damage, and so it’s a race against the clock to kill the boss before your raid wipes.
Throughout the fight you need to be mindful of the Seal of Decay mechanic. Just like our own seals, there’s a chance whenever the boss melees you that you take a stack of Seal of Decay. This will necessitate a tank swap during the fight and you need to be especially mindful because of how the debuff will interact with Aura of Contempt in phase two.
Again related to paladin mechanics, Velhari has “Holy Power” stacks of her own, although hers are called Corrupt Power. She’ll perform her generator three times to get three stacks of Corrupt Power, and then spend those stacks in one large attack on the whole raid. In phase one, her generator is called Annihilating Strike, and her spender is called Infernal Tempest. In phase two, her generator is Tainted Shadows and her spender is Font of Corruption. In phase three, her generator is Bulwark of the Tyrant, and her spender is Gavel of the Tyrant.
Every time the raid chips away 10% of the bosses health for the first time in a phase, an add will spawn that needs to be tanked. If you are not actively tanking the boss, you’ll need to pick up the add and tank it next to the boss. The phase one add needs to be faced away from the rest of the raid and you need to watch out for its Roaring Flames ball-of-doom when it spawns. The ball will travel in the direction the add is facing when casting it, so just side-step the cast and you should be fine. For the phase two add, help on interrupts with Harbinger’s Mending. The third add doesn’t do anything that affects tanking, so just assist in burning it down.
So now that we know what’s in her toolbox, let’s talk about how to actually tank this fel facsimile.
Save unglyphed Divine Protection for the frequent bursts of magical damage that will be coming your way. In phase one, this especially includes anytime you need to spread out a bit to counteract Infernal Tempest. Do not move more than you actually need to, because Aura of Oppression will eventually become very damaging. Related to this, in phase one, watch out for the cone that tracks where Annihilating Strike is pointed and do not stand in the way.
In phase two, watch out for the damage from Tainted Shadows and try not to stand near other players to avoid splashing damage onto them. Be mindful of how Aura of Oppression is affecting your health bar, and be prepared to use cooldowns to avoid spikes that will hurt more than usual. The tail end of this phase is going to be particularly stressful.
In phase three, Aura of Malice is going to make for a particularly stressful race to the finish. Watch your health and don’t get comfortable with how much damage you are taking, as it’s going to ramp up the closer you get to the end of the fight. Watch out the void zone that Bulwark of the Tyrant will leave under your feet, and similarly be prepared for the knockback from Gavel of the Tyrant — don’t let yourself get punted somewhere dangerous.
There’s a lot going on in this encounter, but it’s definitely something you can handle! Keep your head on straight and you’ll be able to handle every mechanic she throws at you as if they were your own abilities and attacks.
Please consider supporting our Patreon!
Join the Discussion
Blizzard Watch is a safe space for all readers. By leaving comments on this site you agree to follow our commenting and community guidelines.