How to get the Lucid Nightmare mount
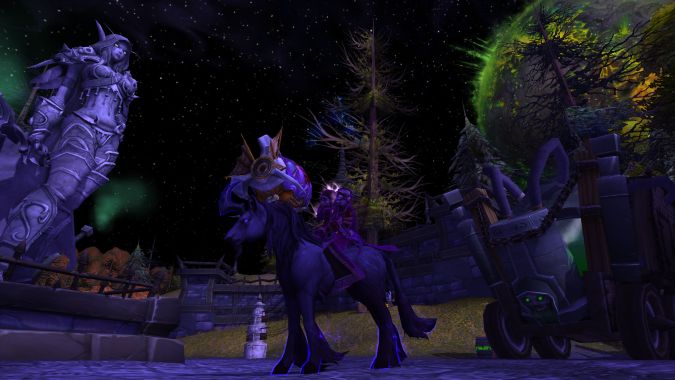
You’ve probably seen that the secret behind obtaining the Lucid Nightmare mount was recently discovered thanks to the Secret-Finding Discord. But if you haven’t had a chance to take a look at all the steps yourself, we’ll be going over what exactly it takes to get your own purple unicorn mount.
And hey, even if you do have it, you might get a kick out of how each step was actually solved. Some of the steps were incredibly difficult, and it really is truly amazing to see them solved.
And finally, at any time, if you log out and can’t remember where you last left off, you can use this command to track your progress:
/run local N,t,d={“DAL”,”ULD”,”AQ”,”DEEP”,”GNOMER”,”VAL”,”MAZE”,”MOUNT”},{47826,47837,47841,47850,47852,47863,47881,47885} for s,k in pairs(N)do d=IsQuestFlaggedCompleted(t[s]) print(k,”=”,d and “124cFF00FF00” or “124cFFFF0000NOT”,”DONE”)end
This will show you a quick breakdown of which steps are done and which are not done. Now, onto the riddle itself!
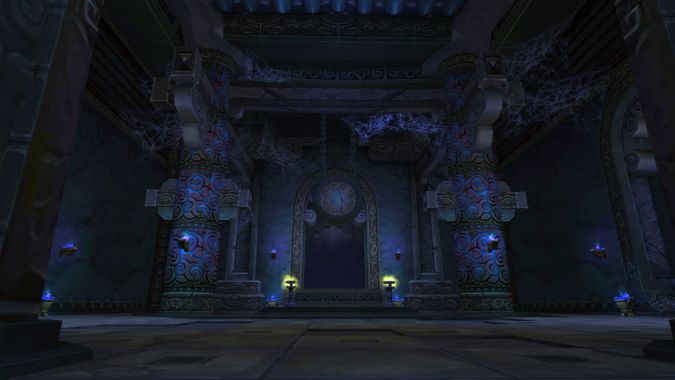
Step 1: The Inconspicious Note
Before we get too deep into this guide, I want to point out that this mount does not fly. That doesn’t make it any less cool looking, or take away the fun of the riddle, but I know that fact will be a deal-breaker for some.
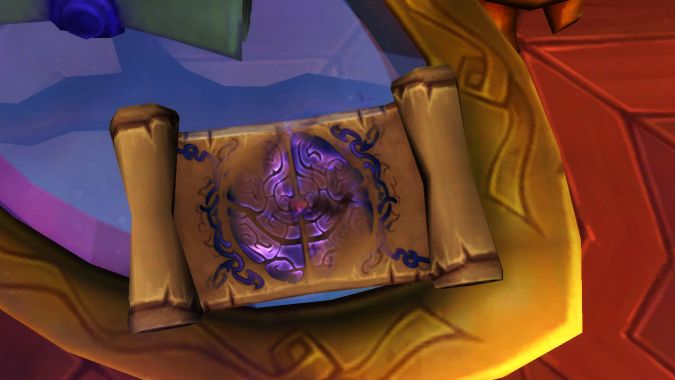
Now that that’s out of the way, your journey starts in the upstairs area of Curiosities and Moore in New Dalaran. This shop is across from the fishing fountain, and all you have to do for this step is head upstairs and read the note. When you read it, you get your first clue:
It begins in the 2104059.
With a most pleasing sign.
(These letters will not always rhyme.)
This will lead you to Ulduar.
How the heck? Those numbers are actually an anagram for 4/15/2009 — the release date of Ulduar.
Step 2: Uldu-are you ready for this?
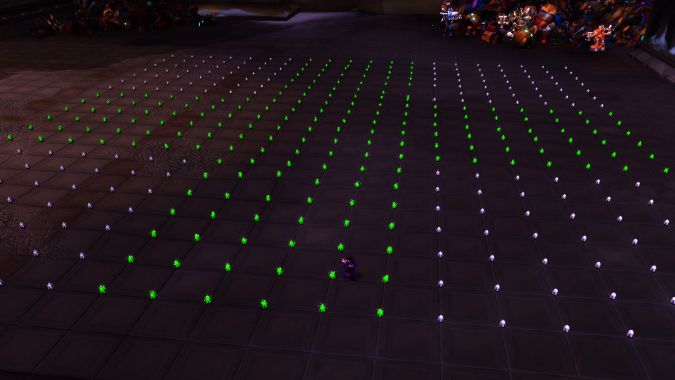
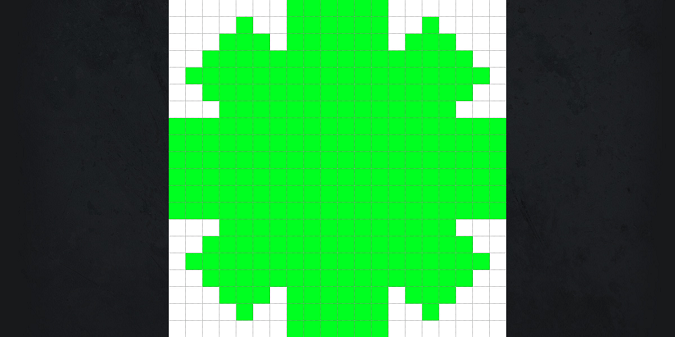
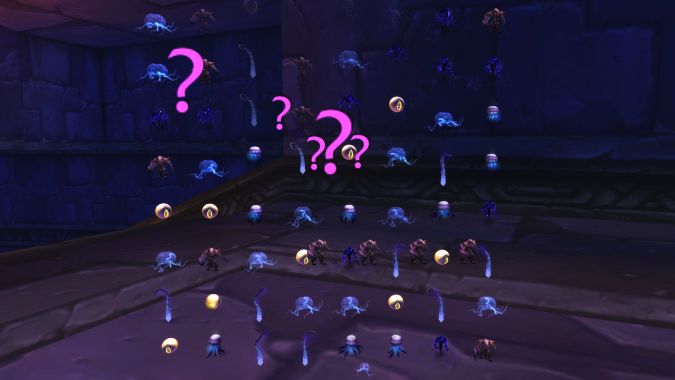
The next step requires you to go to Ulduar and find the lever in XT-002 Deconstructor’s room. If you’re facing the boss, the lever is located in the top-left corner of the room. Clicking it causes a 20-by-20 grid of lights to appear.
You need to click specific lights to make the following pattern:
The reward note:
1000 years imprisoned.
Surely it weighs on the mind.
How the heck? Remember the “most pleasing sign” line in the original note? Well, Mimiron happens to be the creator of Flame Leviathan and XT-002 Deconstructor (the two bosses you’ll want to clear before doing this step). To him, a most pleasing sign is, of course, his sigil.
What you’re doing when you click the lights is actually drawing a pixelated version of Mimiron’s sigil. Neat!
Step 3: Be jeweled, my exploding heart
After the Mimiron puzzle, the next step is pretty straightforward. Head on over to AQ40 and make your way to the end of the instance, over by the Vault of C’Thun. The next clue isn’t in C’Thun’s room itself, but is past it, where you find the imprisoned NPCs. On the right side of the room and up some stairs, you’ll find a Mind Larva on an altar. Click this to start the next puzzle.
It might be easy to miss if you’re zoomed out very far, but zooming into first-person mode reveals an Old God-themed Bejeweled puzzle. Yes, those are real words that I just typed. To solve this step of the puzzle, you just need to get five in a row of any given icon. If you don’t feel like actually playing the game, you can probably get away with mindless clicking until things literally fall into place.
The reward note:
Deeper than deep.
Awaits your seat.
How the heck? Okay, this one wasn’t too hard. The Vault of C’Thun was sealed away 1,000 years ago — given the “imprisoned” and “mind” portions of the riddle, it’s not hard to figure out where this clue wanted you to go.
Step 4: “Get Shrekd”?
The next part of the puzzle — at least initially — was a bit of a riddle-within-a-riddle situation. If you’re not interested in the background, here are the salient details: You need to go to the Crumbling Depths (58, 25) in Deepholm wearing a Shadoweave Mask. Make your way to the back of the cave, in the room immediately following the giant leyworm that will eat you. Find the clickable fissure on the ground and click it.
Notes:
- You have to be wearing the headpiece — transmog does not appear to work — and it must be equipped before entering the secret room.
- You cannot be in a group.
- Similarly, you must be on your home realm.
If you go to the cavern and aren’t wearing the Shadoweave Mask, you’ll still be met with a riddle, courtesy of the plaque on the back of the chair.
The plaque riddle:
<The plaque is old and barely legible. You can only make out fragments of each line of text.>
Supremacy?
Get…
Shirk…
… eke…
However, if you visit the room while wearing the mask, the skull on the chair becomes an object with which you can now interact. Doing so causes a new note to appear, your next hint in the puzzle.
The real reward note:
Where the shaded delegate may appear.
How the heck? This one is where things really ramped up in difficulty. When players first went to Deepholm and were met with the plaque, they were stumped for a long time. However, thanks to a note on the puzzle from Jeremy Feasel, they realized that the plaque was an anagram that could be translated into the same phrase no matter which language you were playing in. The text was an anagram for “RACKSUM GREEP IS THE KEY.”
Who is Racksum Greep? A Goblin hanging out in the Barrens. Why is he special? Well, take a look at his outfit. After figuring out which gear he was wearing, players tested the Deepholm room using the specific armor from his wardrobe. As it turns out, his headpiece was the key.
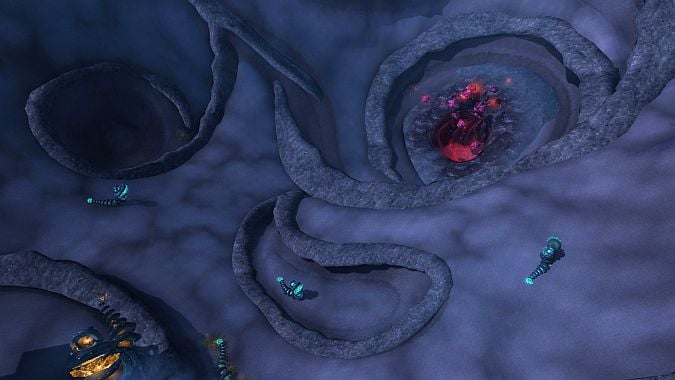
Step 5: Engineer of nightmares
The previous clue led secret-hunters to Gnomeregan. Once you make your way there, you’ll want to head to the Engineering Labs. In the northwest hallway (above), you’ll find 10 consoles and an inscription above them — interacting with a console gives you the option of raising or lowering its number, which starts at 1. The inscription, meanwhile, is your clue to actually setting each console to the right number.
The inscription’s clue:
01110111 00100 10010110 10101
11110111 01100 01111111 01000
011010111001011010010110 10111101
11001 00111111 10010 01001001
10000 011010010110100111010110
01011011 11110 11110001 11111
11100000 00010 11111111 01000
10110111 10101 01111111 00001
10101110 11111 00110000 01000
101101010010101110010110180
+1111111111
Spoiler alert: The clue tells you to set the consoles in the following numerical order: 1222176597. Your reward for solving this is… yet another note.
Reward note:
Games and toys are left behind.
When you awaken screaming.
How the heck? Uhh… Okay, this one’s a long one, and frankly, waaaaay above my level of comprehension. The Games Detectives Wiki has a much more in-depth analysis that you should absolutely check out, but the short version is that the binary led to letters which led to pet-battle abilities which led to more numbers.
Once they found those numbers, they used “180” as a cue to reverse them. Finally, “+1111111111” gave them the idea of adding one to each number. The result? 1222176597 — the console’s solution.
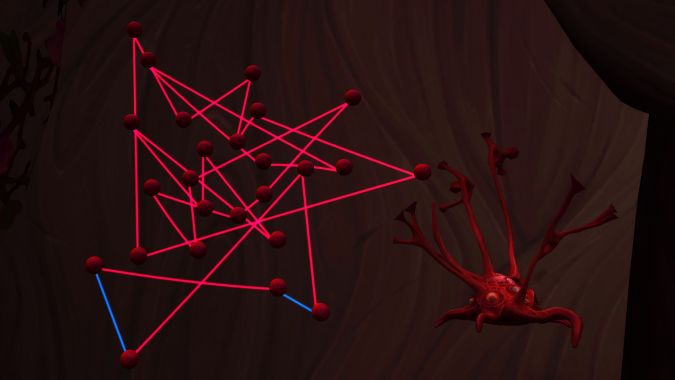
Step 6: Tangled tumor
As cryptic as the last note was, it still led some player or another to Val’Sharah — the site of the next puzzle. There’s a Nightmare Tumor located at (66, 36), inside a house that’s slanted thanks to the Nightmare’s effect on the land. Clicking on the Tumor activates something similar to the Bejeweled puzzle from earlier. Oh, and it causes Il’gynoth to whisper to you.
Creepy whispers:
AL’KSH SYQ IIR AWAN? IILTH SYTHN AQEV.
(Is this real or an illusion? You are going mad.)
This puzzle is similar to the Blingtron Circuit game — all you need to do to solve it is “untangle” the lines. In this case, that means finding a way to turn all red lines blue. Doing so reveals another note, and the clue to the hardest puzzle yet.
Reward text:
What you seek is buried within.
How the heck? To be honest, I’m not sure how exactly the secret-finders got to this one, but the “awaken screaming” bit is very “Old God,” and that leaves only a few places.
Step 7: The endless step
Warning: This step will take you a long time to complete. Don’t consume the evil-sorcerer ashes until you have a few hours free. For some people, it’s taken under an hour. For others (like myself), it’s taken three hours. But given how long it has the potential to be, it’s better to err on the side of caution and assume it’ll take several hours rather than assume you’ll master it quickly, only to find you need to leave and start over later.
You need to head to Kun-Lai Summit and go into the tomb located at (53, 49). Toward the back of the tomb, you’ll find an urn holding the ashes of an evil sorcerer. As explorers are wont to do, you decide to consume these ashes.
Doing so teleports you to the Endless Halls. And believe me, they truly do feel endless.
Your goal in these halls is simple enough in concept: Find the red, blue, yellow, green, and purple orbs and take them to their corresponding runes. In reality, this is made infinitely more difficult thanks to the Lost Woods-style design of the halls. Each room has up to four directions in which you can travel — usually one or more will be blocked by rubble, however.
There’s… really not a “good” way to approach this one, truth be told. Several people have drawn out maps so as to not backtrack, but the dungeon appears to have multiple floors, which can get confusing. I would still recommend drawing it out — and making sure to keep track of which direction you’re facing when you do so. There’s also apparently an addon to help you with this one. I haven’t used it personally, but any help here will be welcome.
After you have matched all five orbs with their runes, simply walk through any door and you’ll be teleported to the final room, which contains one last clue.
Reward text:
The way is now open.
To the greatest secret never told.
A fitting end to your journey.
How the heck? I don’t even know, man.
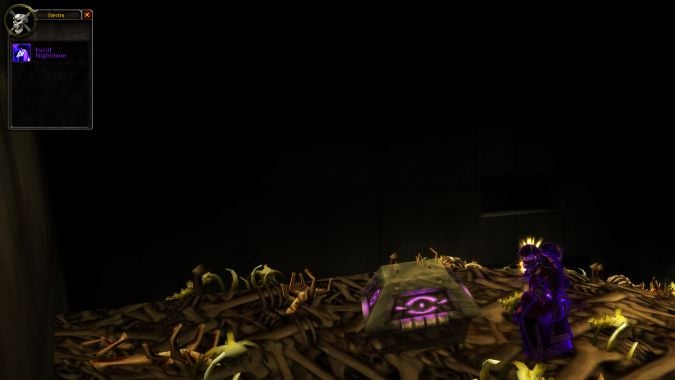
Step 8: Claiming your reward
The final clue leads you to the Karazhan Crypts, where your mount awaits. You’re looking for the room with the pile of bones, on top of which is a chest containing the Lucid Nightmare mount.
Congratulations! You’ve now completed WoW’s latest riddle.
Two notes on the last step before you gallivant away on your purple unicorn:
- Yes, this does open Karazhan Crypts permanently for your character! It’s worth exploring in full — there’s more to it than just the area you need to go for the mount.
- Certain quests (e.g., the Affliction Warlock Artifact quest) phase you in a way that makes the Crypts inaccessible. You’ll need to drop or complete these before you can grab the mount.
Congrats once again on completing this. Personally, I love these sorts of riddles in-game — it was a treat to watch the Secret-Finding Discord in real time as they worked through the puzzles. But even if the riddle-solving itself isn’t your thing, it’s still fun to see parts of the world — like Ulduar — in new ways.
Please consider supporting our Patreon!
Join the Discussion
Blizzard Watch is a safe space for all readers. By leaving comments on this site you agree to follow our commenting and community guidelines.