How to survive as a Necromancer in Diablo 4

Diablo 4‘s version of Sanctuary is out to get you — quite literally — and as a Necromancer, you’re not exactly known for your survivability. There are enemies everywhere, not to mention the possibility of cursed shrines and healing wells. So how do you, a wee level 1 Necromancer, survive this onslaught?
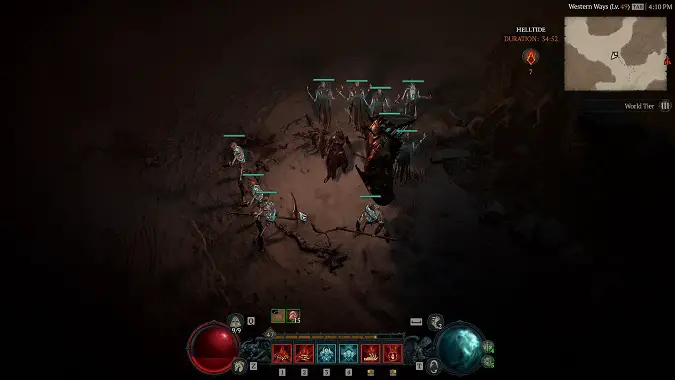
Let’s get the bad news out of the way — as a starting Necromancer, you have about as much direct survivability as a wet paper towel. The key word here is direct — you begin with four skeletons ready to murder enemies on your behalf while you stay nice and safely away from the melee. Additionally, while you may lack Active Skills providing mobility (helpful for escaping damage), you have some useful nodes in the tree that ease the pain. Let’s explore the options.

Understand the game mechanics that’ll keep you alive
Some new defensive mechanics added in D4 help you defend your health pool from the onset. First up is Evade — a short dodge to escape enemy attacks. While this is helpful against any mob, it is fantastic for escaping telegraphed boss abilities. Evade has a cooldown, so keep your eye out for boots that offer an additional charge or reduce this cooldown to extend its usefulness further.
Next is your potion. Like Diablo Immortal, your potion has use charges (four to start), which can be replenished by picking up potion orbs dropped from enemies or at a healing well or town healer. As you level, you can increase the amount healed by upgrading the potion with the Herbalist (in all major towns across the continent of Estuar). Don’t forget to do this so your potion scales with your health pool. In the same vein, unlock your first two Renown levels in each major region — Renown level 2 grants you an extra charge to your potion! After you’ve earned your Renown in all five regions, that’ll take you from four charges to nine, which you’ll want as you tackle bigger boss fights. Finally, you can gain charges of potion on gear (similar to Evade), but with nine potion charges you’re ready for most big battles.
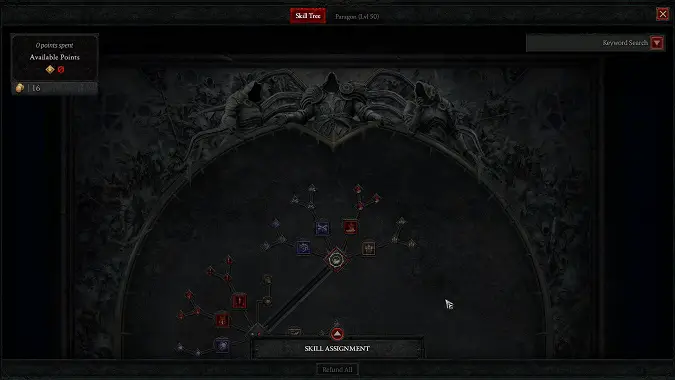
Finally, pay attention to Skill Tree; you should look for terms like Fortify, Immune, and Unstoppable. These are Status Buffs that provide various levels of damage and debuff mitigation. Mouseover the skill to view the tooltip and an explainer on the specialized mechanic.

Necromancer build options for survival
As you’re starting, your first Skill Tree investments can only go one place — your Basic Skills. These are your resource-generating skills, but they each confer a Necro-themed bonus. Start with a Basic skill like Reap (which grants damage reduction) or Hemorrhage (which can spawn a blood orb that heals you). After you’ve made it further down the tree, you can always swap to another Basic. But remember to check out the skills’ passive increases. For a point in Enhanced Hemorrhage and a point in Initiate’s Hemorrhage, you start adding Fortify to your toolkit very early!
Similarly, while only three abilities directly help keep you alive, many branch variations can improve the skill with a survivability element. Consider the following node branches that will improve your ability to stay alive — the node that improves your survivability is bold, and its bonus is included next to it:
- Reap for damage reduction
- Hemorrhage for blood orbs > Enhanced Hemorrhage > Initiate’s Hemorrhage to Fortify
- Blood Surge > Enhanced Blood Surge for healing > Supernatural Blood Surge to Fortify
- Blood Lance > Enhanced Blood Lance > Supernatural Blood Lance for blood orbs
- Blood Mist grants Immune and heals > Enhanced Blood Mist > Dreadful Blood Mist to Fortify
- Bone Prison > Enhanced Bone Prison > Dreadful Bone Prison to Fortify
- Iron Maiden > Enhanced Iron Maiden > Abhorrent Iron Maiden for healing
- Decrepify enemies so they deal reduced damage
- Corpse Tendrils > Enhanced Corpse Tendrils > Blighted Corpse Tendrils for blood orbs
- (Ultimate) Blood Wave > Prime Blood Wave > Supreme Blood Wave for blood orbs
So you definitely have some build options here. And remember — early on, your cost for rearranging skill points is reasonably low. Take advantage of this!

Passive skills to improve survival
Your Skill Tree unlocks linearly as you invest points — from Basic Skills to Core Skills, then your first class section. After Basic Skills, each category contains one or more passives. These nodes are showing as a circle instead of a square and confer some benefit to your build, but passives that improve your survivability take a while to show up and are pretty minimal. Look for the following:
- Death’s Embrace (Curses section) reduces the damage that close (melee-range) enemies do to you.
- Gruesome Mending (Macabre section) boosts healing received when you are under 50% health
- Drain Vitality (Macabre section) is a Lucky Hit passive, where hitting enemies with Blood Skills has up to a 25% chance to Fortify you.
- Necrotic Carapace (Macabre section) Fortifies you whenever your skills or minions form a corpse.
- Stand Alone (Ultimate section) increases Damage Reduction by 6% (for each rank), reduced by 2% for each active Minion.
- Rathma’s Vigor (Key Passives section) increases your Maximum Health by 10%. After being Healthy (above 80%) for 15 seconds, your next Blood Skill Overpowers. You can only have one Key Passive, so don’t stress if this doesn’t work with your build.

To sacrifice, or not to sacrifice (your Minions)
None of your minions directly buff you just by existing. However, a few options are scattered through your Book of the Dead for active minions and sacrifices that will increase your survivability. Keep an eye on the following options if you find yourself dying a lot:
- Skeletal Defender Warriors — Sacrifice them to gain 15% resistance to Non-Physical damage.
- Skeletal Bone Mages — Option 2 means your mages will Fortify you for 11% of your Base Life when they die.
- Bone Golem — instead of options, the base golem taunts enemies to attack it (which keeps the heat off you!).
- Blood Golem — you have two possibilities! Option 1 has your Blood Golem absorb 15% of the damage you would take while Sacrificing the Golem increases your Maximum Life by 10%.
Play around with these options often; the only cost is corpses to resummon your skeletal minions! You may also find yourself tuning for specific fights or builds: Sacrificing Skeletal Reaper Warriors for increased Shadow damage on Shadowblight builds or taking the Iron Golem for its Stun and enemy vulnerability options. All these pieces come together in a complete build.
To sum it all up: understand your base game mechanics, pick survival skills and passives that integrate well with your build, and find the minion combination that works best for you, your playstyle, and (of course) survival. You want your Necromancer to be a master of life and death — not constantly dead. See you in Sanctuary!
Please consider supporting our Patreon!
Join the Discussion
Blizzard Watch is a safe space for all readers. By leaving comments on this site you agree to follow our commenting and community guidelines.
 @lizexmachina


