Shadow Word: Surviving Argus and understanding the Netherlight Crucible
Argus has been floating in the sky for some time now, but it wasn’t until recently that we could actually go there. Now that we’ve had a chance to make the trek onto the green, shattered world, we’re realizing that it’s not very forgiving. Then again, it’s the Legion homeworld. Were you expecting something nice and easy?
Fortunately, there are ways to make solo play on Argus less deadly. Some come from talents, some come from clever playstyle, and others come from understanding the Netherlight Crucible. That last one won’t always have a noticeable effect on solo play. However, it’s a confusing, RNG-filled system worth exploring — and hopefully understanding in some capacity.
Talents for soloing in Argus
When it comes to talents, Shadow Priests seem to either have options that are close together in power (e.g., Auspicious Spirits and San’layn), or options that are so far apart the choice is simple (Twist of Fate and… those other two). However, there are a couple talent choices you may want to take for solo content that you might otherwise skip over.
Namely, I really like taking Misery in the level-90 tier. Doing so allows me to cast Vampiric Touch — and Shadow Word: Pain — on every enemy in sight without worrying about using two GCDs per enemy. Depending on your survivability, this also makes picking up San’layn more beneficial. The two complement each other well.
If you don’t have survival issues — and/or you’re overflowing with Crit — Auspicious Spirits should be your choice here. Personally, I’ve been running Auspicious Spirits, using mass-DOTing to keep my Insanity high and my time between Voidform casts low.
But utilizing a few specific talents isn’t going to take you from “Oh no, I just pulled two mobs!” to “I’m going to solo all of Antoran Wastes no sweat.” Talents are the beginning. How you use them in conjunction with the rest of your kit is where we start to see what Shadow can really do.
Surviving the Legion homeworld
Soloing only goes so well if you don’t know how to utilize your ability kit. Let’s discuss some ways to make it go better.
Using Fade
This is my favorite trick to use while soloing, because it can be used often, and gives you valuable survival and damage time. Fade can be used to drop aggro onto something else. What makes it nice for solo play is that you can use it with Shadowfiend, Void Tendrils, or a Bodyguard. If any of those are present, using Fade will send the enemies running toward them.
There are a few approaches you can take here. One is casting Shadowfiend — or noticing a Tendril is up — and using Fade for a chance to gain some distance between you and the enemy. Another trick I like is casting Mind Bomb, running, and casting Fade right as they’re about to reach me. This works best with a Tendril or Bodyguard. The result is the enemy running toward you, then away, then back again, all while doing little to no damage to anyone.
In general, though, maximizing your usage of Fade + [something else] will make surviving easier. Once you get the feel for it, you’ll be able to time Fades, Mind Bombs, Void Tendrils, etc. in a way that keeps enemies off of you most of the time.
(Note: Enemies prioritize Void Tendrils over Shadowfiend. This can muck up positioning if you’re trying to gain some distance.)
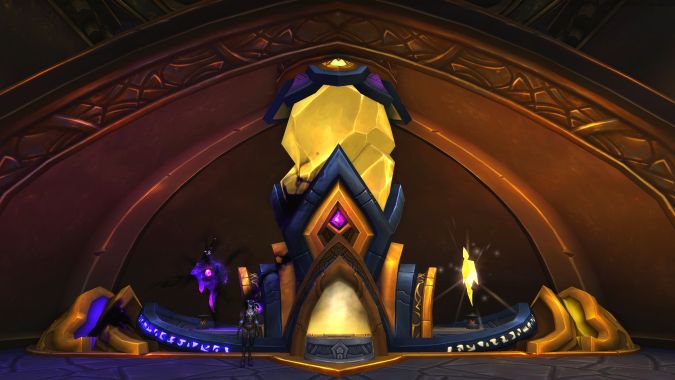
Vindicaar abilities
When it comes to the abilities from the Vindicaar, I stick to Light’s Judgment. My personal reasoning for this is that I opt for Misery so I can get my DOTs rolling on multiple targets at once and do large pulls.
By positioning myself as far away from as many enemies as possible, I can DOT several up without worrying about the first reaching me before I DOT up the last. Then I cast Light’s Judgment so its explosion is timed for when they’re close. Even if a few do reach me, I have Vampiric Touch on so many targets that I’m healing myself enough to make up for it. {PB}
Granted, this method relies on having Light’s Judgment off cooldown, but it’ll still work if it’s on cooldown. The trick is to get a Mind Bomb off when it’ll hit enough enemies. Speed away with Power Word: Shield, and use your Fade trick to get damage on all the enemies. Worst case, never forget to use Dispersion and Vampiric Embrace.
Why not use the Lightforged Warframe? I tend to use the Group Finder if I’m going to take on an elite. If you’d rather solo the big-name enemies, however, you can take that option.
Prioritize your targets
This last one is brief, but important. If you have ranged targets, gaining distance doesn’t mean as much, which makes them a priority over melee. If you have a mix of big and small adds, it might seem easier to nuke the little adds and then go one-on-one with the large. But doing so also means missing out on potential healing from Vampiric Touch, more Insanity generation, and high uptime on Twist of Fate.
It’s a balance, but it’s important to remember that there’s more to taking on enemies than just nuking them down one by one.
Making sense of the Netherlight Crucible
Okay, here’s where things get… annoying. The Netherlight Crucible is the pinnacle of RNG in an expansion whose main criticism has been its level of RNG. If you don’t really care about min/maxing, then you’ll probably find the Netherlight Crucible much nicer than most. But if you do min/max, buckle up.
I’m going to be very clear here: The Netherlight Crucible has too many variables to simulate in their entirety. Everything below was made using specific character stats. They’re not bad as signposts, but shouldn’t be taken as end-all, be-all rankings.
The following comes courtesy of HowToPriest. I recommend checking out the full post if you like numbers and want an in-depth breakdown. For those of you looking for a simplified, rough-estimate version, read on.
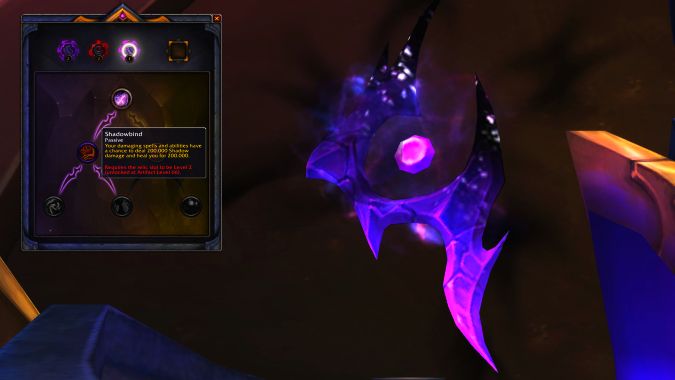
The Netherlight Crucible has three tiers of Traits to modify your Relics. The first Trait gives you +5 item levels no matter what. Determining your Relic’s overall usefulness comes down to the second and third tiers. The overall usefulness is determined by the total value of those last two tiers. In other words, you may have a second-tier choice between a “Meh” or “Good” Trait, but the “Meh” Trait may be better if it leads to an excellent third-tier Trait.
Before I get too far ahead of myself, it’s worth looking at what Traits you can earn from each tier. The second tier has the following 12 possible Traits:
- Your best choices (~5 item level equivalent): Torment the Weak, Shadowbind, Chaotic Darkness, Secure in the Light, and Infusion of Light.
- Middle-of-the-road choices (~3 item level equivalent): Master of Shadows, Shocklight, Light Speed, Murderous Intent, and Dark Sorrows.
- Choices with no DPS gain at all: Refractive Shell and Light’s Embrace.
While the third tier has 8 possible Traits:
- Your best choice (~3 item level equivalent): Fiending Dark.
- Second-best choices (~2 item level equivalent): Creeping Shadows, Touch of Darkness, and To the Pain.
- Not-quite-the-worst choices (~1 item level equivalent): Mind Shattering and Unleash the Shadows.
- The worst (i.e., no DPS gain) choices: Death’s Embrace and Void Corruption.
Again, my goal here isn’t to go into as much detail as the HowToPriest post, but rather give you some signposts to follow when choosing between relics. But the overall idea is to find the route that leads to the highest overall item-level increase.
For example, let’s take a Relic with Shadowbind (~5 item levels) and Light Speed (~3 item levels) as the second-tier Traits, with Death’s Embrace (no DPS gain), Void Corruption (no DPS gain), and Fiending Dark (~3 item levels) as your third-tier Trait options.
At first, Shadowbind might seem like the best choice because it’s worth roughly 5 item levels. However, when you look at the third-tier Traits Shadowbind will lock you into, it becomes clear that 5 item levels is the maximum that Shadowbind’s path offers you. Choosing Light Speed in the second tier can lead to an overall 6 item-level increase.
Got the general idea now? Good, because we’re about to go into all the caveats that could make the above meaningless for you:
- You’re not using Mangaza’s Madness and Sephuz’s Secret.
- You don’t have 36% Haste, 34% Critical Strike, and 50% Mastery with raid buffs.
- This will severely affect the value of the tier-two Traits that provide secondary stat boosts.
- If you don’t have the Tier-20 4-piece bonus.
- Your gear is below item-level 930.
- Probably like ten other things because RNG.
…Isn’t this fun?
Why bother with any of this?
Honestly, unless you’re a very serious min/maxer, a lot of this is — in my opinion — unnecessary complexity for a couple item levels’ worth of damage. This breakdown’s meant to serve as a signpost for obviously good or obviously bad Traits. There are some Traits at the top and some at the bottom, and those are good ones to keep in mind if you’re choosing between two Relics of the same item level.
Similarly, it’s important to know your own stats and playstyle when choosing your tier-two Trait. If you’re low on Haste, you want more Haste. If you’re low on Crit, you want more Crit. I wish I had a better outlook on the Netherlight Crucible, but it’s honestly just a big cluster. Hopefully some of this has helped, however — and if it has, be sure to give a shout-out to HowToPriest and company for doing the math (albeit not all 3,000 years of it).
Please consider supporting our Patreon!
Join the Discussion
Blizzard Watch is a safe space for all readers. By leaving comments on this site you agree to follow our commenting and community guidelines.


