How to complete the Revisited Horrific Vision of Orgrimmar

Orgrimmar is widely considered to be the easier of the two cities for Horrific Visions, so if you’re just getting started or you’re still gearing up, this is a good week to get it done. All that stands between you and more alt catchup gear than you can shake a stick at is a metropolis full of Eldritch horrors, potions you can’t trust, and monsters that have somehow crammed themselves into mailboxes. Somehow, they never seem to be the monster you want.
When the Orgrimmar Horrific Vision is available, you can dive in by visiting Soridormi in Dornogal, just south of the Coreway (marked on your map by an orange eye). You’ll have to do a quest chain starting with Truly Horrific to Behold to unlock Horrific Visions, but after that you can enter at any time. Here’s what you’ll find inside.
Entering the Orgrimmar Horrific Vision
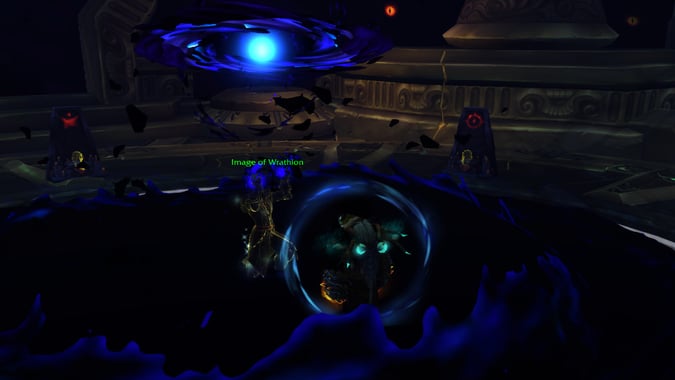
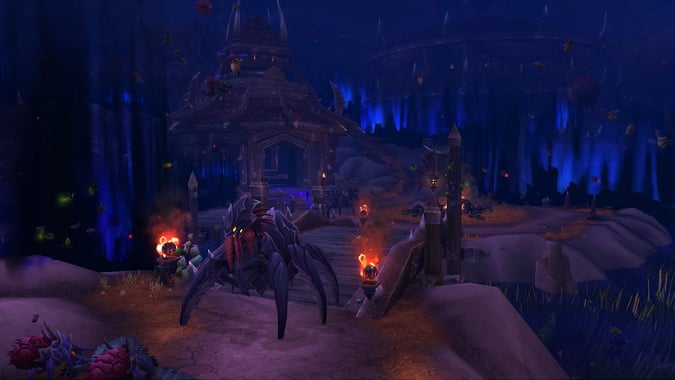
You enter at the threshold of the Valley of Strength, Orgrimmar’s central district. This zone has relatively easy enemies and low sanity drain; you should be pretty safe even if you haven’t picked up upgrades yet like Orb Operation Manual or ranks in Steeled Mind. If this is your first visit and you’re just looking to complete the Vision for the introductory quest, head straight to Thrall, who’s in the building at the center. You’ll have to deal with minimal trash and the two guards outside the building, but that’s it; you should have plenty of time to kill Thrall, who will also be missing most of the abilities he gains from you clearing side areas. Stealth classes can ignore all trash barring the guards at the door.
With better gear, more research, more completed tributes, and more completed side areas — each time you complete a side area, you’ll decrease your sanity drain in the entire Vision, mimicking what the legendary cloak did in Battle for Azerith — you’ve got more time to explore and familiarize yourself with some Vision mechanics. One thing that will pay dividends in the future is to get used to checking the hut next to the Blacksmith’s shop, down the path to the left after you enter. There will be a corpse there with a potion next to it. Take note of the potion’s color; it always corresponds to the color of potion that will drain your sanity and that you’ll want to avoid elsewhere in the Vision. We’ll talk more about the potions later.
Check the mailbox that will be ahead and off to your right outside the Auction House. Clicking this will always spawn an enemy, and sometimes you’ll get the Mail Muncher, which has a 100% chance to drop the Mail Muncher mount. The mob isn’t too tough to fight so it’s worth your time unless you’re going straight to Thrall. On the other side of Grommash Gold, near where the trading post sits in real-world Orgrimmar, you’ll want to keep an eye peeled for a pile of trash; this has a chance to spawn a Nesting Swarmite, a new mount.
If you’re interested in collecting the Horrific Masks to enable more challenging (but more rewarding) Visions, you’ll want to also head to the right of the entrance to the inn. On the lower floor, the rightmost table will have an axe lodged in it; clicking this axe will spawn Gamon, who is one of two targets you’ll need to defeat to build the Faceless Mask of the Nemesis. (The other, Hogger, is in the Horrific Vision of Stormwind instead.)
If you’re playing a tank class or are otherwise well-geared, there are lots of places in the Valley of Strength to line-of-sight mobs and force all those pesky casters into an area you can AOE. I’ve found the Blacksmith shop to be among the most useful; just run counter-clockwise around the Valley, collect mobs, tuck yourself into the shop, and then blow everything up once it’s conveniently collected. Conveniently, there is also sometimes a rare enemy in here, Noros, who will give you a +10% damage done buff when defeated.
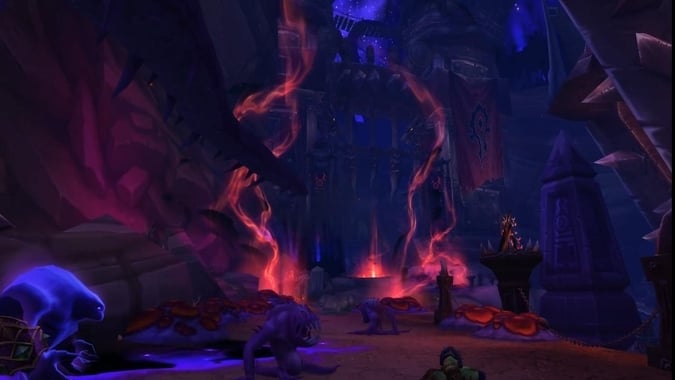
Corrupted Areas: The Drag and the Valley of Spirits
With better gear and advancing research levels, it’s time to venture further afield. Corrupted Areas will drain your sanity by 8 per second; this will seem quick at first, but once you’ve cleared them once, and slotted a few upgrades into the bronze dragons’ research tree, you’ll find this not much different from the Valley of Strength.
The Drag is the most immediately accessible Corrupted Area, and if you’re heading for the Valley of Wisdom you are required to path through here anyway. Your first responsibility is to defeat Annihilator Lak’hal, a big Faceless mob you’ll find toward the beginning of the Drag fighting Garona. Lak’hal isn’t too difficult, but does have two abilities to watch out for: Dark Force will push you away from him (you can run back against it to stay in range if you’re melee) and Orb of Annihilation is a bouncing orb with a huge splash zone that should be avoided as much as possible, as it will drain sanity if it hits you. It’s a big purple circle on the ground and telegraphed well in advance.
Once you’ve rescued Garona, it’s time to rescue civilians. You’ll run down the Drag alternating between fighting mob packs and clicking on boarded-up buildings to see if anyone’s still alive. Again, if you’re a tank or have significant AOE capabilities, it may be more efficient for you to run around collecting the mobs and then line-of-sighting behind a shop to mow them all down at once. With the mobs dead, there are five places to check: the traveling goods shop, the cloth goods shop, the orphanage, Nogg’s machine shop, and the leatherworker’s shop. At each building, click the barricade. The tailoring shop will spawn a fight against Snang, one of the trainers. If you’re looking for the clickable trash pile for the Nesting Swarmite, you’ll find it in the traveling goods shop.
The first building on the right, where the transmog and void storage Ethereals normally hang out, may have a clickable ethereal portal that will spawn a rare you can kill for a crit buff. Also, if you’ve clicked the Worn Wolf Saddle in the Valley of Honor and the Bag of Wolf Tack in the Valley of Wisdom, duck into the Leatherworking shop and click the sparkling rug on the floor to spawn a wolf rare that will drop the Void-Scarred Pack Mother’s Harness.
Once all the survivors are out, it’s time to fight Inquisitor Gnshal, who will be found at the end of the Drag just past the pond. He doesn’t have much health but does have two mechanics you’ll have to worry about: Cry of the Void will shield him at 65% and 30% health (DPS through it as fast as you can, because he’s trying to cast a spell that will rock your sanity if it goes off), and Void Torrent will stun you, lift you in the air, and cost you sanity if it hits. Void Torrent is irritating because it follows you around and can be difficult to avoid if you’re not rocking much (if anything) in the way of additional run speed or mobility skills. Running around Gnshal as the cast starts should help, but in practice I’ve found it very frustrating.
Once he’s dead, you’ve officially completed the objectives and will be rewarded with an additional chest at the end of the run. If this is the only Corrupted Area you are doing, there’s a totem up the hill to your right that you can click that will take you back to the Valley of Strength — you don’t have to ride all the way back! The mailbox for this zone is located outside the entrance to the Valley of Honor (a Lost area) and is easily accessible once you’ve finished fighting Gnshal.
The Valley of Spirits is the other Corrupted Area, and your first responsibility is to help Zekhan defeat the non-elites he’s fighting. Once you’ve freed him, you gain access to the Valley by defeating the elite Decimator Shiq’voth. Shiq’voth has a charge you can avoid (just side-step it) and an ability called Decimator. This is a bolt of void energy he shoots back and then pulls back in, growing it larger the whole time; make sure you don’t get hit by it as it will cost a boatload of sanity.
With Shiq’voth down, follow Zekhan into the Valley. You’ll have to rescue four Shaman from corrupted totems and mobs. The first will be located immediately on the path in front of you; the subsequent three will be located on/off the path on your left. It’s a little tougher to do mass pulls in the Valley of Spirits as the mobs’ Mental Assault casts tend to hurt, and it also means a lot of back-tracking to click totems, so I’ve found it more efficient to do each pack of mobs totem by totem. Do whatever works best for you! Also keep an eye out for Bwemba across the little circular boardwalk area from where you enter; she provides a haste buff if you can defeat her, but she also will briefly polymorph you (with no cast time) so if you pull other enemies with her, or are low on sanity or hit points, it can get dicey.
Once you’ve rescued all four Shaman, it’s time to fight the Oblivion Elemental. At 80% and 40% he will cast Hopelessness, which forces you to get a shiny orb to continue attacking him. You don’t have to stay in the location the orb spawns; just run over to pick it up, and this eliminate the silence effect of Hopelessness. His other ability is a series of purple waves that will move toward him from all directions; avoid these as much as possible as they will stun you and drain sanity.
With the Oblivion Elemental dead, you’ve completed all the objectives in the Valley of Spirits, so it’s time to head elsewhere. Fortunately, if you’re still after the Mail Muncher mount, the mailbox for the Valley of Spirits is located outside the Embassy, so it’s very convenient once you’ve killed the Elemental. If you’re looking for the clickable trash pile, it’s to the left of the Orgrimmar Embassy, near where Chromie usually sits.
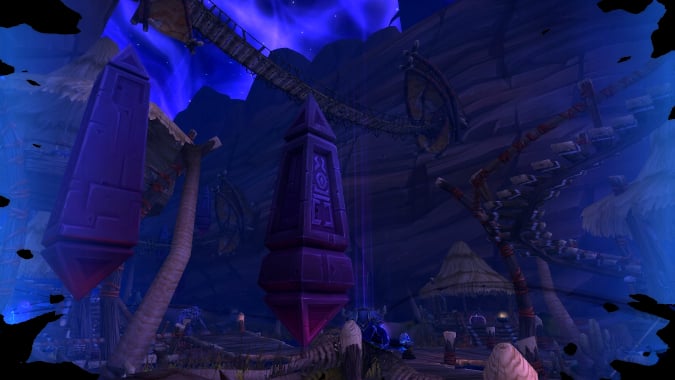
Lost Areas: The Valley of Honor and Valley of Wisdom
These are the toughest areas that Orgrimmar can offer, and accordingly should be avoided until after you’ve gotten some upgrades in the tech tree and cleared the other areas on previous runs to build up your Steeled Mind buff. You will want to have as much of the Elite Extermination tribute as you can. Because a certain amount of sanity loss on the bosses here is almost completely unavoidable, you do not want to pull either unless you have a comfortable sanity margin (and/or the failsafe Emergency Cranial Defibrillation available). This margin will depend on your DPS and how well you handle the mechanics, so there’s no hard-and-fast rule, but going in with at least half your sanity is advisable (unless you’re depending on the failsafe).
The Valley of Honor is probably the more dangerous of the two areas overall. Your first hurdle is Misha, whose two abilities are Desperate Retching and Maddening Roar. Desperate Retching will apply a disease to you that will periodically leave green goop pools; stay out of these (and dispel the disease if you can). Maddening Roar is a purple circle around Misha that will damage and drain a lot of sanity from anyone within it, so stay out.
There’s an abundance of trash in the Valley of Honor, and this will slow you down. You may not want to pull it en masse, either; almost every enemy here packs Aqiri Mind Toxin, which will stun you for a short duration at 5 stacks. However, save your big cooldowns for Rexxar. Keep pulling and killing until you reach the next elite, the Aqir Mindhunter (who will be on the hill to the right of the Auction House). Its mechanics are similar to the trash that preceded it; stay out of its frontal cone and away from green stuff on the ground. If you’re hunting mounts and you have at least one Faceless Mask equipped, you’ll also want to go into the Auction House and click the Worn Wolf Saddle — this is one of two pieces of a hidden mount.
With the Mindhunter down, continue up the hill. You’ll have one more trash pack, and then Rexxar’s waiting for you in the hunter’s hall. This is a very movement-heavy fight with a lot of area-denial tools. He’ll cast a bunch of purple circles on the ground; stay out of these to avoid a stun and 120 sanity loss. Being Rexxar, he’s also accompanied by animal companions — namely, four boars that will periodically charge you and cast Void Quills (which can be interrupted). At 40% health, the movement requirement ratchets even further, as Rexxar will cast Stampeding Corruption. This sends a wave of small void minions across the hall; keep dodging them to avoid damage and sanity loss.
The mailbox for the Valley of Honor is located outside the Auction House (to the left of the hill on which you’ll find the Mindhunter), so pick that up on your way. Meanwhile, the clickable pile of trash for the Nesting Swarmite is to the left of the bank, sort of against the wall — it’s very hard to see here. Lastly, before you head up to fight Rexxar, mount hunters will want to go to the right to the Jewelcrafting shop to fight Big Keech. He’ll drop a Void-Bound Orb of Mystery — and, if you’re a Jewelcrafter, the plans for the Void-Crystal Panther. (Everyone else will just have to work order theirs.) You can’t start collecting parts for this until you get the Void-Bound Orb in your bags, so it’s worth stopping by to kill Keech ASAP.
On your way to the Valley of Wisdom, look for any chests near the Barber Shop, which have a chance to drop Coifcurl’s Close Shave Kit.
The Valley of Wisdom (more colloquially known as “Tauren Town”) is fairly straightforward: You kill trash until the end boss, Vez’okk the Lightless, spawns. The Faceless and tentacle mobs here are fairly easy; just be sure to avoid Dark Smash (purple circles on the ground) and other ground effects. Also be extremely careful dealing with K’thir Dominators — they have a cast, Touch of the Abyss, that is a five-second stun if it goes off; normally you’ll only run into one of them at a time, but one group near the center of the zone (that you can avoid, luckily) has two of them, and if you’re using the Faceless Mask of Multitudes there are other two and even three Dominator pulls. Have a plan to burst these down, stun them, interrupt them, or otherwise interrupt this dangerous cast. You’ll also be “assisted” in this zone by Overlord Geya’rah; be extremely careful if you’re running here undergeared, because she can and will sometimes charge trash packs on her own and cause problems.
The two elites present will each give 25% progress toward spawning the boss and are worth doing for both that and extra sanity. Down the hill to your right and across the bridge is the Coagulated Horror. It has both a frontal cone and a ground effect that should be avoided if at all possible; if it’s red, stay out of it. If you’re looking for the clickable pile of trash for this area, it’s on a little hill to the left of where the Horror normally waits for you.
The Voidcrazed Hulk is up the hill to your left in the area with the inn. It will toss you away from him and then attempt to jump on you with Explosive Leap. The sanity loss from the initial hit is unavoidable unless you are using an immunity or are a ranged pet class who is standing at nearly max range (in which case he won’t throw you), but make sure you’re not in his way (telegraphed by a brown swirl on the ground) when he lands. His second ability is Howling in Pain and will interrupt all casts for four seconds. After doing both elites and the trash on the way to them, you should hit 100% easily. If you’re still looking for the Mail Muncher, you’ll want to kill the Hulk because the Valley of Wisdom mailbox is located outside the inn; the Bag of Wolf Tack for the Void-Scarred Wolf is also here, right outside the inn next to the Hulk, visible if you’re wearing at least one Faceless Mask.
Vez’okk will spawn on the path in which you zoned in, slowly walking towards the intersection in the center of the subzone, and has three abilities of note. The first is a frontal line, which you can side-step (and should; it will stun you and cost sanity if you don’t). At 80%, 50%, and 30% health, he will cast Unleash Corruption, which creates swirls on the ground that drain sanity and spawn adds. His third ability is Ring of Chaos, which spawns a series of black circles around him which will then move outwards. Getting hit will drain sanity and stun you. When he spawns the Ring, run a little away from him and position yourself between the orbs; alternately, if you can stand in melee range, just stick to him like glue and you’ll find yourself inside the circle of orbs, completely safe. It’s best to fight Vez’okk in one of the more open areas in the Valley of Wisdom to give yourself adequate space to handle these mechanics, i.e., don’t fight him on the bridge or on the hill if possible as you’ll box yourself in. Once Vez’okk is dead, the totem to return to the Valley of Strength is on the hill leading to the area with the inn/Auction House.
Before you leave, though: if you are wearing at least two Faceless Masks, you’ll want to head past the center area where the Druid trainers normally sit and up to the elevator to the Skyway, which is now open. Up there, you’ll find a small pack of Void-Scarred Cubs. Attacking these wind riders will spawn more cubs, then adult wyverns, and finally the Void-Scarred Wyvern Matriarch, who drops a mount when defeated.
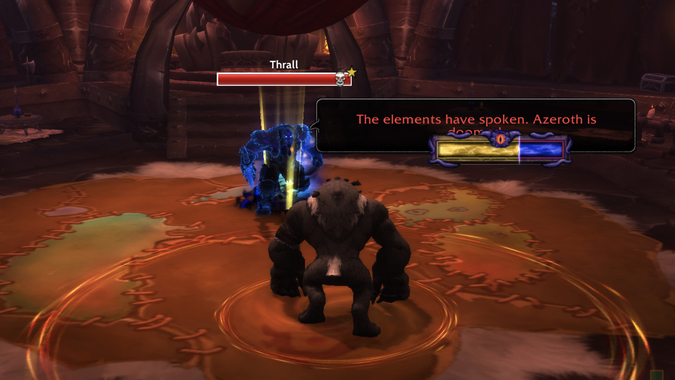
Final Boss: Thrall
In his simplest form (i.e., the version of him you’ll encounter if you run straight to him), Thrall is a very straightforward encounter: Side-step his frontal cone, and stay out of dark stuff on the ground. However, as with Alleria, he’ll gain 10% additional health and abilities for each area you’ve cleared in the Vision:
- If you’ve cleared The Drag, he will gain Cries of the Void, the shielding ability from Inquisitor Gnshad. DPS through it to break his shield before he can finish his big cast.
- If you’ve cleared the Valley of Spirits, he will gain Hopelessness, the shiny orb ability from the Oblivion Elemental. You will be silenced until you run through the orb.
- If you’ve cleared the Valley of Honor, he will gain two Void Boars, Rexxar’s adds. Prioritize damage on them (they should die quickly) and interrupt Void Quills whenever possible.
- If you’ve cleared the Valley of Wisdom, he will lose his ordinary frontal cone and gain Defiled Ground, the frontal line cast by Vez’okk. Side-step it and try to make sure you’re always aiming it toward the outside of the room, as it leaves permanent sanity-draining splotches of bad stuff on the ground. At the very least, don’t box yourself into a bad spot.
While this sounds complicated, Thrall is still easier than Alleria overall, particularly if you’re melee.
Orgrimmar Horrific Visions Rewards and Secrets
We’ve mentioned the location of all the mailboxes if you’re still on the hunt for the Mail Muncher and trash piles for the Nesting Swarmite, as well as the mounts you can find at one and two masks, but there are a few additional goodies you may find at the end of the run. If you complete the Valley of Spirits, Zekhan’s chest has a chance to drop both the Void-Scarred Toad and the Void-Touched Souvenir Totem. If you complete the Valley of Honor, Rexxar’s chest has a chance to drop C’Thuffer. Garona’s chest has a chance to drop a Void-Scarred Scorpid. Geya’rah’s chest can yield an egg containing a Void-Scarred Tallstrider Chick. Thrall’s chest has a chance to drop the Void-Scarred Pup.
When you see them, potions are generally worth your time to stop and drink. There are five potions that you’ll find scattered all around Orgrimmar:
- Sickening Potion
- Sluggish Potion
- Spicy Potion
- A nameless potion that will give you 100 sanity
- A nameless poison that will drain your sanity
So most of these sound great, but there’s a catch: They’re all associated with a different color potion, and the color changes each run. The only way to know for sure which one is the bad potion is to investigate the dead body in the hut next to the Blacksmith’s shop in the Valley of Strength. The color of potion located next to this corpse should be avoided, but all the rest are safe.
Additionally, you can talk to an Ethereal hanging out behind a shop on the right-hand side as you pass Grommash Hold to find out that he’s looking for Odd Crystals. These small orange crystals are hidden around the entire city in buildings and tucked away in corners; if you find them and return them to the Ethereal before killing Thrall, you’ll get a frankly paltry amount of Displaced Corrupted Mementos. I’m not sure it’s worth it, but if you’re looking to maximize your Memento gains, maybe you’ll be interested in hunting for his tiny orange rocks; Wowhead has a decent guide on where to find them.
Updated June 3, 2025, with contributions by Phil Ulrich
Please consider supporting our Patreon!
Join the Discussion
Blizzard Watch is a safe space for all readers. By leaving comments on this site you agree to follow our commenting and community guidelines.


