How to conquer the Scosglen Strongholds in Diablo 4
In Diablo 4, the Strongholds in the northern region of Scosglen are perilous and teeming with powerful enemies. There are three Strongholds in Scosglen, and each presents its own unique challenges and objectives. You’ll encounter the terrifying Beast of Moordaine, the restless spirits of Tul Dulra, and the Tidewitch of Hope’s Light. If you are brave enough to venture into the forests, the mountains, or the coastline, these Strongholds will reward you for your efforts through gear, experience, gold, and +100 Renown.
Tips for clearing Strongholds
Every Stronghold will be teeming with enemies, strong mini-bosses (Elites), and a major boss fight at the end. If you are a solo player, Strongholds are particularly challenging due to the high level of enemies and the massive groups of mobs. While there’s no level requirement for any Stronghold in the game, you’ll want to have strong AOE damage and some crowd control to manage the packs you run into. No matter what class you’re playing, unlocking your Ultimate ability before trying any Strongholds can be a big power boost that will help you tear down enemies. It’s easy to get overwhelmed by waves of mobs, so take it slow and be careful.
On the defensive side of things, boots with an extra evade charge can be extremely helpful to let you jump out of the way of boss (and mini-boss) abilities. But any movement abilities will help you out here since dodging big attacks will keep you alive. Elixirs, too, can make a difference: look at what you have in your inventory and bulk up your resistances to damage done by enemies in the Stronghold or increase your damage to enemies in the Stronghold. Even if it’s not a huge buff, it will help.
If you want to clear these Strongholds quickly, however, it is best to run them with a friend or two. Going with a group makes this challenging content much more forgiving. If you’re still leveling up, you might also want to consider dropping to World Tier 1 to conquer them; they’re still going to be two levels higher than you, but it doesn’t seem like as much of a challenge when you’re on the game’s easiest mode.
And one very important thing: after you clear the Stronghold, be sure to interact with the Wanderer’s Shrine, which officially “conquers” the Stronghold. If you leave without hitting the shrine, the Stronghold will reset and you’ll have to start over.
Scosglen Strongholds
Here are the details on the three Strongholds in Scosglen:
- Moordaine Lodge
- Tul Dulra
- Hope’s Light
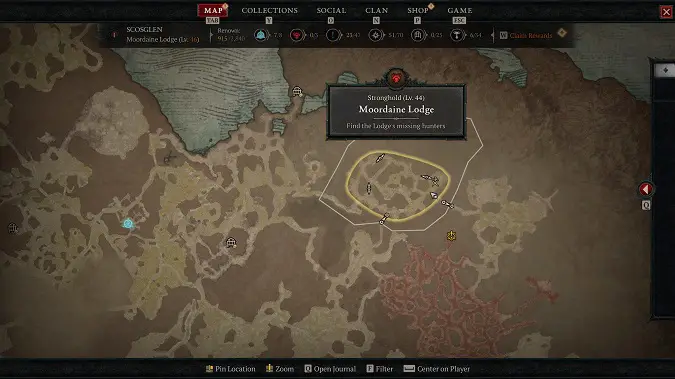
Moordain Lodge
- Location: Far north of Tirmair
- Objectives:
- Find the Lodge’s missing hunters
- Slay the Beast of Moordaine
- Slay Fionnir, the Mad Druid
- When conquered: Remains hostile; unlocks the Twisted Hollow and Feral’s Den dungeons.
Find the Lodge’s missing hunters
When you enter Moordaine Lodge, you’ll need to investigate the hunting grounds to find the missing hunters. You’ll find the body of a dead hunter with a note on him that mentions other hunters in the area. As you explore, you will find dead animals along the path; interact with them, and each will provide a clue as to what happened. You need to find three hunters in total, and each time you find one several elites will pop up to attack you.
Slay the Beast of Moordaine
In the center of the Lodge, you’ll find a Blood-soaked Journal and the body of another dead hunter… and notice that bite marks on the hunter are human. Then the Beast of Moordaine will burst in. When you fight it, it will run off and you have to pursue it by following the blood trail. You’ll soon enter the Lair of the Beast where you need to fight the Beast of Moordaine again. After inflicting enough damage, the beast will shift into Fionnir, the Mad Druid.
Boss: Fionnir, the Mad Druid
Fionnir is a tough battle. He will summon Bloodhawks, Wargs, and Thirn Beasts to his side. He will summon a powerful tornado to a single spot or send rocks in a specific direction. He also has an attack that will send waves of rocks in three directions at once. Dodge what you can and strike quickly. Take care of the additional enemies as soon as you can, or you’ll be overwhelmed.
Fionnir will switch between his human form and the bear form throughout the fight. His bear form has a powerful ground slam that does a lot of damage as well as sends a wave of rocks in five different directions. This will stun you briefly if you are struck, so it’s crucial to dodge.

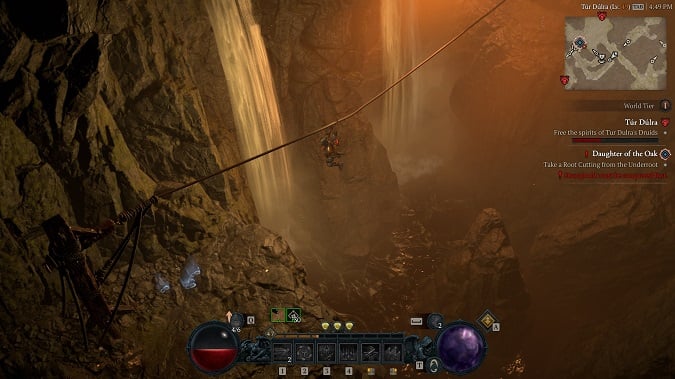
Tul Dulra
- Location: Northwest of Cerrigar
- Side Quest: Daughter of the Oak, Spirits of the Lost Grove (Druid Spirit Boon quest)
- Objectives:
- Speak to the Druid Spirit
- Find the Druid Spirits
- Free the spirits of Tul Dulra’s Druids
- Slay the Infernal Tormentor
- When conquered: Becomes a town with vendors and quests; unlocks a waypoint and the Underroot and Wretched Delve dungeons.
Speak to the Druid Spirit
To reach Tul Dulra, head to the northwest of Cerrigar. The main entrance will be blocked, but there is an entrance around it from the east side of the Stronghold. Once you gain entry, talk to the memory of Brighde. After watching the druids go up against Astaroth, you’ll need to find the druid spirits within the stronghold.
Free the spirits of Tul Dulra’s Druids
There are three druids that you will need to find: Eanan, Odhran, and Brighde. In order to free them, you will have to defeat them. Start by heading towards the east side of the Stronghold and down the stairs, where you’ll see another memory of the druids facing Astaroth. Keep following the path along the outer edge of the Stronghold; eventually you’ll find enemies surrounding a spirit. When you free the spirit of Eanan you’ll have to face Eanan, the Poisonous Druid.
- Mini-Boss: Eanan, the Poisonous Druid. Eanan will throw poison pools on the ground that will bubble in five directions. Fight off the adds that come with Eanan while dodging the poison. Keep striking until he is defeated, then move forward and traverse the large gap in the path.
- Mini-Boss: Odhran, the Tormented Earth Druid. Head south to face the Dreadful Balrog, a terrifying enemy who will scare you away at times. Watch out for the adds that spit fire. Once Balrog is defeated, free the spirit of Odhran, then defeat Odhran the Tormented Earth Druid and the adds that come with it. Odhran will attack you with abilities that reach out from the ground in five directions. Try to stay behind Odhran and attack him until he’s defeated.
- Mini-Boss: Brighde, the Tormented Wind Druid. Keep following the path, and you’ll see another memory of Astaroth defeating the druids. Climb up, head east, and then climb up again: here you’ll find the soul of Brighde, the Tormented Wind Druid. Watch for her tornados and the adds. Once she’s defeated, head back to the Great Oak. There you will have to face Baelgemoth, Infernal Tormentor.
Slay the Infernal Tormentor
Baelgemoth, Infernal Tormentor is a difficult fight, but as long as you continue to dodge out of the way of his fire attacks, you should be fine. These fire attacks are fairly powerful, especially if you get caught in the flames, so try to stay behind Bael when he uses flame breath. He also has a sweeping strike that does considerable fire damage. And if you get too close, he has a stomp that will knock you back.

Hope’s Light
- Location: Northernmost part of Scosglen
- Objectives:
- Find a way to the Lighthouse
- Find the missing winch
- Return the Winch to the Broken Mast
- Survive the Drowned Assault
- Ignite Hope’s Light
- When conquered: Remains hostile; unlocks the Flooded Depths dungeon.
Find a way to the Lighthouse
To reach Hope’s Light, head to Marrowen. From there, head northeast to the northernmost part of Scosglen in the Cursed Bay where you’ll need to find your way to the Lighthouse. The way forward is blocked, so head left to find a way across. Next you’ll need a winch in order to fix the broken mast that is blocking you from making your way into the lighthouse.
Find the missing winch
You’ll find what you need on the shipwreck to the far east of the Stronghold, but unfortunately, the path forward is guarded by a Brine-Maw.
The Brine-Maw will drop ice orbs on the ground and will terrify you when possible. There are also two first Mates and other adds that will also need to be defeated. Once the Brine-maw is taken care of, make your way across the shipwreck to the other side: continuing along the path, you’ll see a secondary shipwreck. This is where you need to go to fix the broken mast, but first you need the winch. Head south and then go right to find it.
Even if you have the winch, you can go south to face another elite, the Hullsmasher, who has a powerful melee attack and can slow you. He will also bring his heavy weapon down, causing splash damage. After the Hullsmasher is defeated, head left to face another Seascourge elite. This elite will drain you to heal himself and will attack you will some shadow damage. Defeat the Seascourge and the adds around him.
Return the Winch to the Broken Mast
With the winch in your possession, head back to the broken mast to fix it. When you do, a handful of enemies will appear, including a Deadeye and Mastbreaker.
Survive the Drowned Assault
- Mini-Bosses: Deadeye and Mastbreaker. Watch for the lightning orbs on the ground and the heavy attacks from Mastbreaker. They conjure Hellbinder statues in the ground that will bind you to that area and severely limit your movement. There will also be pools of water that will cause significant damage if you step in them. You will have to survive the assault for 40 seconds, which can be a particularly tough battle. With the Mastbreeaker’s powerful melee attacks and the Hellbinders keeping you in place, You will need to take down Mastbreaker as soon as possible and then deal with the adds that come. The Deadeye will throw down three lightning spikes that will throw lightning energy between them, damaging you if you are caught in the middle.
Ignite Hope’s Light
Go up the steps to face Tidewitch Ne’Gana. Ne’Gana has two main attacks. One attack is a sweeping attack that does water damage, and for the second attack, she will drop pools of water at your spot to do more damage. Do what you can to keep behind her to avoid her sweeping attacks and direct wave attacks. She will also cast a buff on the adds that make them attack faster and move quicker. When you see her shake and store up power, she will conjure powerful water spurts.
Please consider supporting our Patreon!
Join the Discussion
Blizzard Watch is a safe space for all readers. By leaving comments on this site you agree to follow our commenting and community guidelines.


