The Last Architect gives you a quest for a Decor Treasure Hunt every day. Here are the solutions to his maddening riddles.
The Last Architect’s daily quest Decor Treasure Hunt is a great source for decor for your Player Housing. This neighborhood NPC presents you with one of several dozen riddles every day, though it’s not clear whether these will recur eventually, like Daily Quests. These myriad quests are designed to send you around the map, getting to know all its features and where to do things like buy food or repair, or just point you toward cool vignettes. In exchange, he gives you some decor. Most of the decor he gives is fairly accessible, purchased from the NPCs around town, but free is free. However, like all treasure hunts, some of these locations are easier to find than others. You can do this quest every day on all your alts, but note that each solution is discrete for each character — you can’t collect several of these quests and just find one point to complete them all at once.
Here is a list of all the solutions we’ve been able to decipher so far, categorized by the subzone of the solution. If you’re really at a loss, you may want to control+f to search the text for your riddle.
Note that this list was made in part during the alpha and beta, so locations may have been shifted and wording altered. If you have a riddle where this is the case, please let us know!
Alliance
Arcane power thrums.
Journey home with a mere step.
Dig beside the roost.
coordinates (56.65, 27.51)
This dig spot is right next to the gryphon master next to the entrance portal.
Sentinel of Stone.
First to greet each new neighbor.
Seek out the deep shade.
coordinates (58.13, 30.08)
As you enter the zone for the first time via the Founder’s Point portal, there is immediately to your left a stone watchtower. The dig spot is around the side, in the shade, next to the tower.
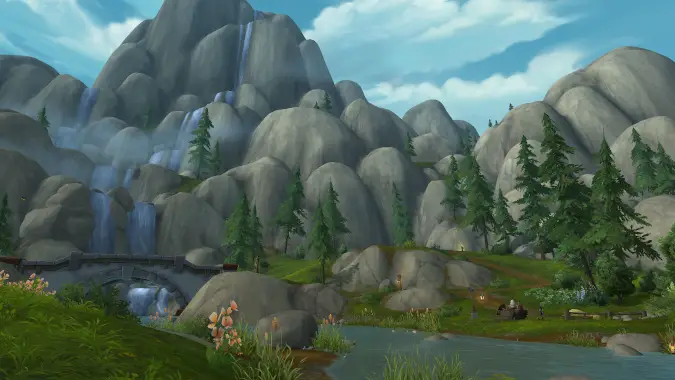
Lush trees grow skyward.
A stream threads through leafy glades.
Look where waters churn.
coordinates (49.72, 42.42)
Just north along the river from the cluster of houses with Plot 54 is where your dig spot is, on the bank next to the waterfall. If you hit the gryphon master in town, you went too far north!
Cool waters unfed.
Still against blue sky and green.
Sheltered by the cliff.
coordinates (49.18, 27.13)
Between plots 44 and 27, just to the north, there’s a small lake visible on the world map. The dig spot is on the north side of the pond, underneath a half-fallen tree.
Covered connection.
Over the lilied waters.
Search the banks below.
coordinates (42.47, 44.76)
The covered bridge is visible on the world map, just west of the Small Aerie flight point. The dig spot is below, but a bit more north than you might expect, on the east bank of the river.
Town Center subzone
Where trees have no roots.
A gate has no door or hinge.
Will call for treasure.
coordinates (55.34, 39.96)
The gate referenced in this riddle marks the entrance to the open air theater, and the trees are cutouts flanking the gate. You’ll find it if you follow the road leaving the town center to the east. “Will Call” refers to the booths where you get tickets you paid for in advance before you enter the theater. Tricky.
Azure and gold sway.
While beneath pretenders play.
Investigate stage left.
coordinates (57.34, 39.26)
Another at the open air theater. If you weren’t an obnoxious theater kid, luckily for you, I can tell you “stage” direction is based on facing out toward the audience, so “stage left” is on the right side if you’re coming from the town.
Where roses are red.
The perfect venue waits.
Throw some rice, then dig.
coordinates (57.81, 42.04)
A path from the open air theater near the town center leads back toward the mountain, and there’s a nice little vignette with a gazebo, roses, and lined up benches. The dig spot is next to the gazebo.
Earth, fire, smoke, and steam.
Blade or plow, the shaper’s choice.
Look where metals bend.
coordinates (53.65, 39.79)
This one is in the blacksmithing area of Founder’s Point, which is where Jorvan Longmoor, the General Contractor who will level up your house, is facing. The dig spot is over by some blacksmith stuff in a corner.
Seek the smallest house.
Where pawsteps mark the sand.
Now dig where dogs lie.
coordinates (53.60, 41.94)
The tiny house is, of course, a doghouse, behind one of the houses in the center of town. It’s next door to Trevor Grenner, an NPC who sells landscaping decor.
Six sides, but no walls.
Afloat above chill waters.
Secrets wait below.
coordinates (52.44, 28.80)
The road north from the town center follows a river. Following it north out of town, there’s one small waterfall, and then a pond with a small open-sided gazebo before another small waterfall. The dig spot is deep in the pond on the other side of the gazebo.
Brumewood Hollow subzone
Mushrooms mark the ring.
Deep within the shadowed wood.
Dig where fireflies swarm.
coordinates (60.31, 56.82)
This one is slightly down a small hill by Plot 6, across the road from a small fishing pond. The dig spot is indeed in the center of a ring of mushrooms, with lots of fireflies swarming above it.
Fireflies glow and flit.
Falls feed the whispering wood.
The drowned cave awaits.
coordinates (66.88, 57.02)
This one is both deceptive and pretty cool. The pond between Plots 6 and 21 hides a secret. Underneath the waterfall, you’ll find the pond is very deep, and there is a large, dry cavern carved out. The dig spot is inside the cavern.
Near the twilit wood.
Falls give a cave’s mouth its roar.
Look beneath a torch.
coordinates (59.24, 44.93)
Directly north of plot 0 is the cascading river with lots of waterfalls. On the north bank, upstream from the fallen tree covered in red mushrooms, is a small cave next to one of the waterfalls. Inside the cave, under the torch is the dig spot.
Aboveground tunnel.
Lights mark where life’s blood once flowed.
Look atop the falls.
coordinates (55.05, 50.71)
Along the river separating Brumewood Hollow from the rest of Founder’s Point, directly east of plots 16 and 11 is a neat little covered bridge marked on the world map. It’s a fallen tree with lights hung inside, as mentioned in the riddle. The dig point is on the falls next to the fallen tree/bridge.
Names worn down by time.
Stone weeps where the water sings.
Drop a coin, then dig.
coordinates (58.34, 65.04)
Between Plot 20 and Plot 33, in the center of the graveyard full of mausoleums, there is a long-dry fountain. The dig spot is next to the fountain.
Tribute to the lost.
Where seaspray climbs ancient cliffs.
A lonely bell tolls.
coordinates (55.41, 71.50)
To the south of Plot 8, there is a marked path to the sea. If you follow it, you’ll see a torch, which marks a fork in the path. Taking the road that leads a little up and to the east, you’ll see a vignette featuring a bell, with a few seafaring artifacts. The dig spot is on the seaward side of the bell.
Cart lost in the dark.
Growth consumes all that remains.
Search beside the road.
coordinates (56.82, 52.29)
Follow the road next to Plot 0 down the hill. Turn right, and you should see the ivy-covered cart referenced in the riddle, with the dig spot right next to it.
Pale moonlight rises.
Wisps guard what the dusk holds dear.
Look where roots rise up.
coordinates (49.89, 56.61)
Along the river between Brumewood and Gilded Oaks, almost directly across from the Gilded Oaks waterwheel, is the only moonwell in the zone, surrounded by wisps. The dig spot is up the hill toward plot 15 from the moonwell, among a tangle of tree roots.
No leaves, yet it blooms.
Still limbs cradle gentle glows.
Wade where violet grows.
coordinates (59.59, 52.44)
The tree described in this riddle is the one that stands on the island in the center of the small pond next to Plots 0 and 17. On the south side of the island is a patch of purple lily pads in the water, and deeper below them is where you’ll find the dig spot.
Trellis frames the Torch.
A seat above misty shores.
Seek the ledge below.
coordinates (52.82, 66.83)
In plot 8’s side yard, there’s a lovely little vignette with a purple rose arbor and a bench looking out to sea. The dig spot is just below it.
Awnings span river’s flow.
Gold to the west, darkness east.
Look beneath stunted tree.
coordinates (47.69, 61.97)
The awning refers to the covered bridge over the river between Brumewood Hollow and Gilded Oaks, near the sea. The dig spot is on the Brumewood side, next to a small tree by the bridge.
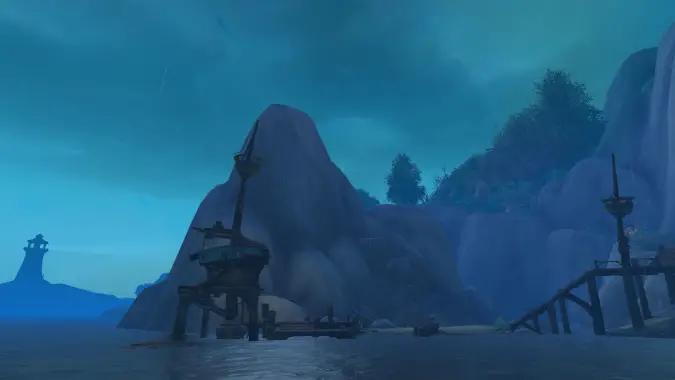
Breakwater Bight subzone
This is not a bight, and I want to fight whoever named this subzone.
Beyond smugglers cove.
Wrecks hide a sunken saloon.
Look for the good stuff.
coordinates (61.88, 82.54)
To the southeast of Plot 41, there’s a small path to the sea, which leads to a cool little area with a crow’s nest and pier labelled Breakwater Blight. This is where you find the smuggler NPCs which sell basic cross-faction decor. Your dig spot is far underwater, behind a screen in a tortollan pub at the bottom of the sea. If you find the lone barrel from the shipwreck, it is immediately beneath that.
Salt clings to old wood.
Crow’s nests watch the tide retreat.
A cave holds secrets.
coordinates (61.61, 79.44)
In the same cross-faction vendor smuggler area as the riddle directly above, but in a cave just before you get to the house on stilts. They must really want to make sure you know where to get off-brand decor.
Across from the bight.
The oyster shuckers have gone.
Search the lonely dock.
coordinates (64.56, 85.59)
Across the water from the area with the decor vendor smugglers discussed in the previous two riddles is an island with a single dock. Next to the dock is the dig spot.
A weary roof sighs.
Ships rot just beyond the reach.
Look beneath the bow.
coordinates (54.18, 73.63)
Down the path to the shore from Plot 8, you’ll see the shipwrecks to the right, and the small shack to the left. The dig spot is underneath the bow of a rowboat sitting on the shore, right next to the dock.
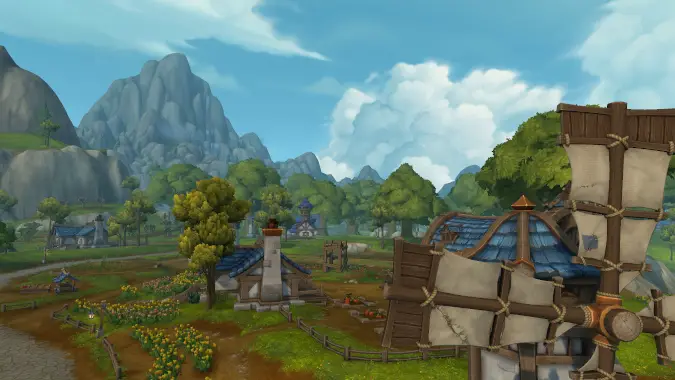
Gilded Oaks subzone
Water Flows Below.
While fresh cider flows above.
Dig where the wheel churns.
coordinates (46.32, 57.97)
The water wheel is on the cider distillery, which in on the river east of the main town, between Brumewood Hollow and Gilded Oaks. The dig spot is at the northernmost corner of the building, right by the river.
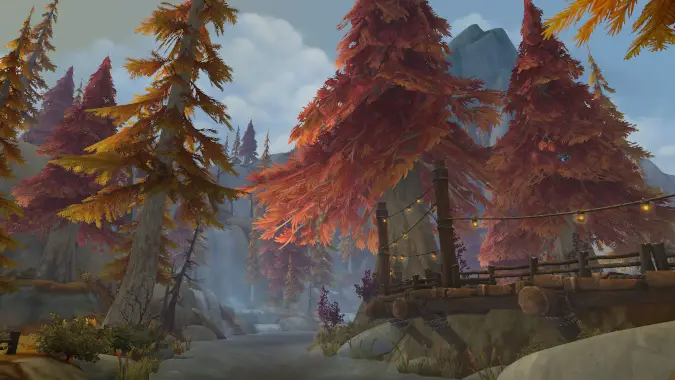
Harvest hangs from boughs.
Crimson against autumn gold.
Trust the lantern’s light.
coordinates (36.60, 54.12)
Between plots 13 and 14, there is a small apple orchard. This riddle is a little deceptive, as many of the apple trees in this small grove have a lantern hanging from them, but it isn’t too tough to find once you find the grove.
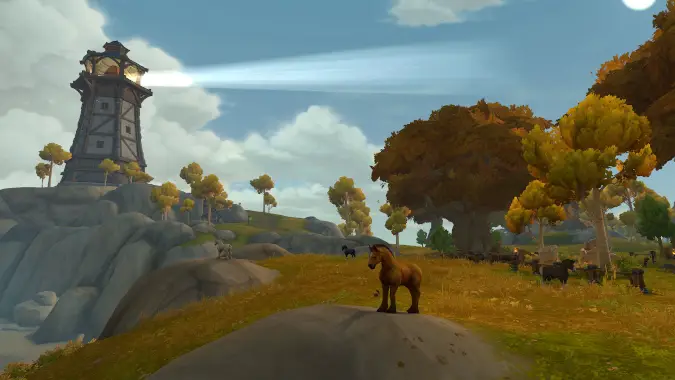
Light sweeps open sea.
A beacon upon the bluff.
Look behind its back.
coordinates (33.99, 72.68)
Faldir’s Torch is the huge lighthouse at the southwestern tip of the map. You can’t miss it. The dig spot is next to the face of the tower pointing southeast.
Blades turn in the wind.
Amber leaves drift toward the sea.
Check beneath the stairs.
coordinates (34.61, 60.43)
Next to plot 5 is a windmill on the coast — the only true windmill in this subzone, actually. The dig spot is under the stairs to the windmill.
Beneath gryphon’s wings.
On the small aerie’s low slopes.
Find the broken tree.
coordinates (42.69, 53.92)
Just north of Plot 1, there’s a small mountain where gryphons roost. Next to the small pond at the base of that mountain is a fallen tree. The dig spot is between the stump and the toppled trunk.
Small farmer’s homestead.
Where cows bask in golden light.
Dig between the rows.
coordinates (39.10, 59.95)
This farm is practically in Plot 30’s backyard. There are rows of wheat but the dig spot is in between the rows of corn on this small farm.
Cows low in their pen.
Leaves fall on the roundabout.
Treasure waits within.
coordinates (40.85, 61.31)
Not far down the road from the Gilded Oaks flight point, you should see the roundabout described on the map. There’s a gazebo in the middle and some lovely roses, and off next to a cart is the dig spot. There are also a huge group of cows nearby, but note that you cannot pet them (we have bug reported this).
Below autumn soil.
Gargled seaweed and dead fish.
Stone mouth drinks the sea.
coordinates (45.42, 64.34)
This dig spot is in a cave on the shore, basically directly beneath plot 37.
Hollow nurse log yawns.
Waters reflect gold above.
Dry leaves hide riches.
coordinates (36.61, 57.85)
Just north of Plot 5 there’s a small lake with a lot of trees growing mushrooms, including a hollow one. The dig spot is under the tree across the pond from the fishing dock.
Mear’s Farm subzone
Petals sway in the breeze.
Wooden arms sweep floral scents.
Look where pink meets gold.
coordinates (36.92, 32.93)
Just up the hill from the Mear’s Farm flight point there are a pair of windmills with an arc of tulips between them. The dig spot is closer to the northwest windmill, between the row of pink and the row of yellow tulips.
Twin silos stand watch.
Meandering rows slumber.
Search among the rocks.
coordinates (39.95, 31.95)
This spot is west of Plot 39. The twin silos are near a field with carrots, cabbage, and corn growing in it. The dig spot is in a grassy, rocky raised area in the middle of the field.
Vines climb the hillside.
Their yield crushed in tubs of wood.
Look where juice stains earth.
coordinates (41.00, 28.37)
The grapevines are in the northern part of Mear’s Farm. On the opposite side of the house with the cute dining patio, you’ll find a grape stomping setup. The dig spot is next to it.
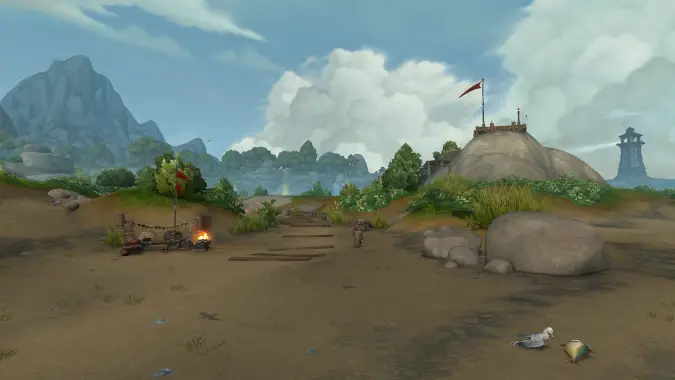
The Outer Banks subzone
Stairs snake up the bluffs.
A pier juts over shallows.
Seek the shade below.
coordinates (29.04, 28.17)
Going down from the plateau of plot 28 on the north side cliffs is a winding set of stairs that ends in a short pier at the bottom. The dig spot is underneath the short pier.
Prism of the cove.
Where worn stone endures the roar.
Dive deep to prevail.
coordinates (37.09, 45.92)
There is a cove south by southeast of the flight point in Outer Banks. The river there makes a rainbow, the prism referred to in the riddle. At the base of the waterfall, underwater, is the dig spot.
Watcher on the shore.
Where ships drop anchor and make berth.
Look where crabs scuttle.
coordinates (29.85, 48.32)
Near the Outer Banks flight point is a watchtower on a big dock over the sea. On the quieter side of the watchtower, down below on the shore where there’s a small dock and no NPCs except some crabs, is where you’ll find the dig spot.
Gulls scream for free meals.
Salt clings to fingermonger scales.
Seek the barnacles.
coordinates (28.62, 46.71)
On the western side of the island with the flight point to The Outer Banks is a large dock with several sea-themed vendors, including Kul Tiran Emielle who sells seashells on the seashore. The dig spot is in the sand underneath the big dock out over the water.
Boardwalk lies broken.
Sand bars cradle what remains.
Seek out the lone plank.
coordinates (28.33, 40.14)
The boardwalk is the stretch between the Outer Banks flight point and the island with Plot 25. The dig spot is roughly halfway between both islands, on a raised sandbar with only one plank.
A lone flag flutters.
Covered bridge over dry ground.
Sift the sand beneath.
coordinates (30.86, 31.12)
The bridge described is the one between Plot 43 and Plot 28. The dig spot is on the sand below the bridge.
Outside outer banks.
Where crabs claim an island shore.
Sift through the driftwood.
coordinates (21.12, 30.06)
This one is technically outside Outer Banks, on the island to the west off the coast. In the middle of the small cove teeming with crabs is a small flag and a camp vignette. The dig spot is in the middle of a few planks near the flag.
An old flag flutters.
A platform grants ocean views.
Look below the stairs.
coordinates (26.20, 37.91)
On the west side of the Outer Banks, between plots 25 and 12, there is a lovely observation deck with a flag on it. Like the riddle says, the dig spot is under the stairs.
Stoneveil Ridge subzone
Stone laid by lost hands.
Bridging the mountain runoff.
Look where lilies listen.
coordinates (62.23, 38.30)
The bridge referenced in the riddle is the one between Plot 31 and the Stoneveil Ridge flight point. The dig spot is directly beneath the bridge on the northwest bank of the river.
Highland rime meets mists.
Gateway to the dusky wood.
The dead point the way.
coordinates (63.12, 46.74)
Next to Plot 3, there is a huge stone gate across the road that leads from Stoneveil Ridge to Brumewood Hollow. Next to the gate is a fallen dead tree, which points directly at the dig spot.
Mountain guardian.
Dark forest whispers below.
Look to the lone pine.
coordinates (64.87, 50.99)
The mountain guardian is the lone watchtower in Stoneveil Ridge, overlooking Brumewood Hollow. The dig spot is on the east side of the tower.
Clouds bow to the stone.
Heights where gryphons dare not fly.
Above all, it waits.
coordinates (69.21, 26.71)
This dig spot is at the tippy top of the tallest mountain in the zone. If you’re using Skyriding, you will likely want to stop and let some charges refresh at one of the plateaus partway up the mountain.
Horde
Between mighty tusks.
A doorway shimmers and hums.
Look where the carts park.
coordinates (53.73, 50.22)
This is very close to the portal to go back to Orgrimmar. The dig pile is near a cart to the side.
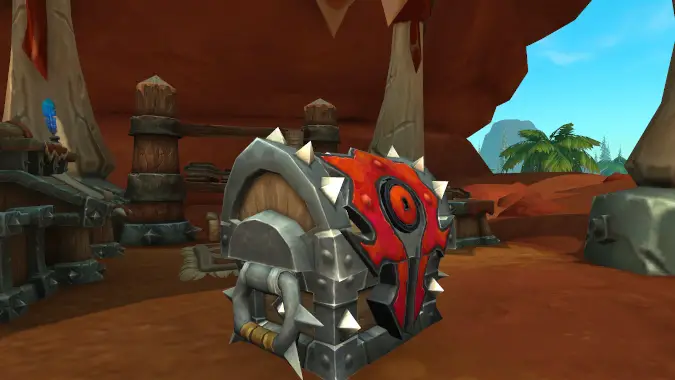
Where kodos take rest.
Past gate marked with bone and fire.
Dig near hay bale.
coordinates (57.15, 58.27)
Down the path directly east of the town center and north of Plot 16, there is a huge hay bale with a pole sticking out the top, which is where your dig site is. This is right next to a set of two poles stuck in the ground with no crosspiece above to finish the “gate,” but there are torches and the skull of a long-dead kodo to mark it.
Two towers stand guard.
Worn bridge spans the falls below.
Go smell some flowers.
coordinates (55.59, 49.79)
The road directly east of the portal to Orgrimmar passes over a small stream, then up to one of the two towers mentioned in the riddle, before the bridge spanning a river. The dig spot is in the flowers just off the bridge to the north, before you cross over.
Below the towers.
Townsfolk guarded from the spray.
Dig in awning’s shade.
coordinates (55.57, 52.40)
Directly north of the town center, you can see the three massive watchtowers sitting next to cascading waterfalls. The dig spot is on the same level as the town center, far below the tower in the center, under a hide and tusk awning.
Though it may have leaks.
Wooden wall diverts the stream.
Check the ledge below.
coordinates (56.40, 48.02)
The wooden wall is a little bit to the east of the portal back to Orgrimmar. It’s holding back the water from flooding the Cragthorn Highlands. The dig spot is on the platform halfway up the rock wall.
Near where farmers toil.
Beast of burden raises young.
Seek the broadest shade.
coordinates (50.96, 61.56)
If you follow the road from Plot 41 to the town center, you’ll see a signpost that points in three directions: Ragewater, The Common, and Runetotem’s Bounty. Across the street is an open hut and a cart, and a kodo and her calf. The dig spot is under the awning of the hut.
The Bloom subzone
Penned in desert bloom.
Loyal steeds water and feed.
Needles in haystacks.
coordinates (59.05, 73.66)
In the small town square where The Bloom flight point is, there is a small area containing kodos, raptors, wolves, etc. There is a small open shed with a haystack under it. Half underneath the haystack, only visible from inside the animal pen, is the dig spot.
Through an arch of bone.
A stream cradles what once moved.
Search the vertebrae.
coordinates (60.72, 64.62)
Follow the road past Plot 4, over both bridges. Just over the second bridge, to the right you’ll see an arch made of a set of ribs joined by a vertebra. Pass through the arch and near the water there’s a skeletal animal, with the dig spot (and a floaty flamingo) next to it.
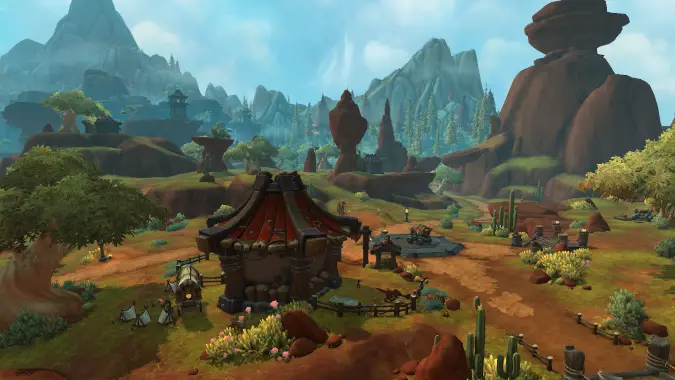
Three huts in spire’s shade.
Wooden overlook curves out front.
Search near a planter
coordinates (64.53, 69.21)
On the eastern side of The Bloom, just west of Plot 14, there are three huts directly under one of the stone needle-like structures. The dig spot is on the ground between the one in the middle and the southernmost hut, next to a planter.
Life stirs from dry soil.
Camp where fishers may take rest.
Fire warms the treasure.
coordinates (58.66, 69.49)
This riddle’s dig spot is in the middle of The Bloom, just south of Plot 10. There’s a small camp along the road with a campfire and a basket of fish to one side.
Where the desert blooms.
Fire burns at circle’s center.
Look to the shadows.
coordinates (57.76, 63.45)
Just north of Plot 34, you can see a circle in the road. There’s an open air construction with a fire burning under it in the center. The dig spot is just to the northeast, underneath a rocky cliff.
Cragthorn Highlands subzone
Mist threads through the pines.
Sellers ring the roundabout.
Search the succulents.
coordinates (63.88, 51.80)
West by northwest of Plot 44 is a ring of vendors, arranged around an area paved with cobblestones around a slatted wood floor. One of those vendors, Nisala the Vulpera, has a shop decorated with potted plants, including cacti. The dig spot is under their little tent.
Three falls feed the flows.
Fishers hunt with spear and trap.
Look below the traps.
coordinates (63.60, 44.81)
This directs you to a cute vignette called Four Sisters, right next to plot 46. There’s a small dock with spears and traps next to a waterfall. The dig spot is under the dock.
Below forest deck.
Secret straw-floored writer’s nook.
Seek the wheelbarrow.
coordinates (63.73, 56.23)
In the backyard of Plot 20. From Plot 20 you can see the top of the deck southeast, with the hidden nook beneath and the wheelbarrow so much depends upon just beyond.
From a sagging rope bridge.
Torches mark a steep descent.
Search the water’s edge.
coordinates (70.29, 49.80)
The rope bridge mentioned in the riddle is the one connecting Plot 39 to the rest of Razorwind Shores. Underneath the bridge are the torches marking the path down to the water. The dig spot is at the shore.
Cedar scents the air.
Where kneaded muscles soak deep.
Search between tubs.
coordinates (68.93, 52.48)
Between Plots 23 and 38 there is a small spa-like vignette on the cliffside, featuring two sets of two luxurious soaking tubs looking east out oven the ocean. The dig spot is between the two sets of tubs.
Platform high above.
At the edge of sea and wood.
Look where the lights sway.
coordinates (72.12, 41.65)
Behind Plot 39 there is a path northeast to a small party deck vignette with edison-style lights hung on poles. The dig spot is closest to the pole furthest from Plot 39.
Six tables are dressed.
Conifers observe the feast.
Compliment the chef.
coordinates (62.29, 48.90)
Across the river from Plot 31, there is a construction site with a small cafeteria or open air mead hall next to the river, hung with those edison jar lights. The dig spot is in the grass close to the fire, in front of one of the bars.
Back steps to the wood.
Above needled canopy.
Stop halfway and search.
coordinates (57.99, 48.91)
There is a path that passes directly in front of Plot 31. If you follow that road west, you’ll come to a signpost that points one way to the Bloom and the other way up stairs to The Common. The dig spot is halfway up the stairs to The Common.
Deep in the forest.
Where the hookah haze rises.
Treasure waits below.
coordinates (64.65, 58.04)
North of Plot 53, just after the Y-shaped crossroads on the map, there’s a small structure around a tree, with a viewing platform and then some cafe tables and kegs below. The dig spot is well hidden, underneath the platforms. There are a few fires and a lot of sausages, but I did not see any hookahs.
Ragewater Springs subzone
Steam bursts toward the sky.
Blue pools swirl with ancient heat.
Look for the tether.
coordinates (51.96, 74.96)
Ragewater Springs is the area with geysers directly south of the main town, west of plots 40 and 29. The tether described in the riddle is connected to the wooden dock floating in the largest lake, almost immediately below the large diving board. The dig spot is right next to that tether.
Runetotem’s Bounty subzone
From atop the falls.
Stargazers peer past the palms.
Dig through their notes.
coordinates (44.80, 56.96)
There are three major sets of rivers going through Razorwind Shores. The river to the west of town splits into one skinny island directly west of Plots 36 and 25, then another, larger island with housing on it to the south. On the bit of smaller island, to the north above the waterfall, there is a telescope pointing to the sky next to a tent, which is where you’ll find the dig spot.
Where clear waters churn.
The earth opens wide to breathe.
What waits in its maw?
coordinates (45.55, 56.94)
To the east of Plot 28 is the base of two enormous waterfalls, with a small landmass separating them. There’s a cave in that landmass, and just inside that cave is the dig spot.
Oasis Watcher
Perched above crystal waters.
Find the bench below.
coordinates (41.39, 67.95)
On the western side of the map right next to plot 0, is an Orc watchtower. Far below the eastern side of the tower, next to the water, between two tall palm trees and at the end of a path up the cliffside, is the bench the riddle talks about.
Old watering hole.
Take a swing or take a dive.
Hold your breath and dig.
coordinates (42.63, 50.39)
In the northern tip of the subzone, just north of Plot 2, is a swimming hole featuring a rope to swing on and a diving board. The dig spot is underwater beyond the diving board, almost in the waterfall.
Overlooking fields.
Bushels brim with bloom and seed.
Check for stock in back.
coordinates (49.54, 60.04)
If you follow the main road out of town going west, at the first fork, you’ll see just ahead a large platform and two NPCs selling plants: Glin Doomwish and Tzurg Lowlock. Around the larger platform, just behind a huge potted cactus, is the dig spot.
Oasis bears fruit.
Seek not the greens, but purple.
Harvest at center.
coordinates (47.18, 59.70)
You’re looking for the big farm, which is along the road north of Plot 41. Before the road turns from sand to red rock, take a left and stay on the sand. You’re looking for the patch of purple cabbages, which is next to the river. The dig spot is in the center of the purple cabbages.
Where palm trees grow thick.
Platform sits on stone’s old spine.
Look to the low flame.
coordinates (44.75, 66.36)
On the path north from Plot 11 is a big wyvern roost spot at the top of one of a rock pinnacles, the only one in the middle of this subzone. It has a few wooden platforms on it, and is just past the hut with a hide roof, coming from Plot 11. The dig spot is in the bushes just below the lowest hanging torch.
Across gentle falls.
Bridge broken, chains given way.
Look to the east end.
coordinates (43.25, 69.44)
Just north of plot 11, there is a bridge across the river, which is fully intact with no dangling chains, making this riddle particularly infuriating. Though, the dig spot is on the east side of it, so I guess it’s one for two.
A secret beast den.
Hidden behind narrow falls.
Search the oasis.
coordinates (39.34, 57.61)
The waterfall in the river is the one that rises behind Plot 9. The secret cave with the dig spot and a frankly worrying amount of bones is midway up the cliffside. NOTE: this dig spot was placed incorrectly when I did the quest, so the coordinates may be slightly off.
Wooden mask tends bar.
Pineapples lift the spirits.
Dig near the fire pit.
coordinates (57.93, 86.28)
This points you toward the island occupied by Plot 19. The bar is off to the side, with no vendors present but plenty of drinks in pineapples. The dig spot is next to the bonfire in the center of the island.
Scorchsong Isle subzone
Near the scorching songs.
Arbor frames the setting sun.
Dig beyond the vows.
coordinates (38.65, 80.26)
On the southwest coast of the zone is a small island called Scorchsong Isle, with a ton of bar and party NPCs. On the southwest side of Scorchsong Isle is a small island with an ivy-covered arbor and several rows of seats — wedding venue or cultist altar, only N’Zoth can tell which vow you’ve just sworn. The dig spot is past the altar, under the lone palm tree.
The fire never ends.
Gather for sorrow or mirth.
Search behind the fuel.
coordinates (40.03, 78.51)
This is another riddle that sends you to Scorchsong Isle to the southwest. The big fire in the middle is fed with a huge pile of wood, which is hidden beneath a rocky outcropping to the west of the fire.
Stone mouth, wooden teeth.
Mast as toothpick, should it eat.
Go down its gullet.
coordinates (39.51, 70.14)
This one is designed to point you toward the smugglers on the west coast who sell Alliance decor, on the coast to the north of Scorchsong Isle. “High Tides” Ren sells you the good stuff, lounging outside the cave described as a mouth in the riddle. The dig spot is toward the back of the cave.
Smugglers scheme above.
Tortollans tend bar below.
Search through the seaweed.
coordinates (39.24, 74.01)
Dive off the dock next to the smuggler’s den on the west coast, to the north of Scorchsong Isle. Below you’ll find a tortollan bar. The dig spot is on the sea floor below the bar platform. An NPC named Brandoch is having a drink at the bar, if you need a /target to help find it.
The Bluffs
Oceanside Ravine.
Pirate camp awaits above.
Anchor marks the spot.
coordinates (50.39, 83.02)
This one is just west of The Bluffs flight point, but on a lower tier, or just south of Plot 32, but a higher tier. In the eastern cliff face there is a hide and tusk awning with a crow’s nest leaning against it. The dig spot is next to the base of the crow’s nest, between an overturned canoe and table with a treasure map.
Hot air fills the canvas.
Where boardwalk crowns stoney arch.
Look where the paths cross.
coordinates (52.17, 81.77)
This dig spot is along the path leaving from The Bluffs flight point, next to the crossroads.
Highest wyvern perch.
Circling above the sea.
Look to the center.
coordinates (50.97, 89.63)
The highest wyvern roost is at the top of the tall mountain next to Plots 22 and 49 at the south of the zone. There’s an area with some nests and detritus in the middle, along with the dig spot.
Down below the bluffs.
Water flows below stone bridge.
Dive to the shipwreck.
coordinates (51.73, 80.05)
The natural rock bridge is the one coming down from the The Bluffs flight point. The dig spot is below, in the small waterfall further away from the wooden fishing bridge. There’s an overturned rowboat in the waterfall, and the dig spot is underneath it.
Just like Thunder Bluff.
Tower watches three swaying paths.
Look to the platform.
coordinates (50.36, 76.80)
The watchtower in the riddle shares a plateau with Plot 30. The dig spot is around the back of the tower, near the wooden deck.
Saltfang Shoals subzone
Salt and sea collide.
Tower guards the fisher’s catch.
Dig at the front steps.
coordinates (53.80, 88.12)
While you’d think the huge building covered with trussed up sharks and mutliple tiers of front steps would be the goal you’re looking for here, the tower mentioned in the riddle is between Plot 49 and 22, and the dig spot is at the front steps of that tower.
Seagulls await ships.
Tower watches, fountain spits.
Look where wyverns perch.
coordinates (68.17, 75.74)
The dig point is located almost directly beneath the flight path for Saltfang Shores, East — and I mean directly below. The wyvern roosts for the flight point are on a dock, and the dig point is tucked below the dock. Even further below the deck, directly under the watchtower called out in the riddle is where you’ll find the decor NPC Lonomia, who sells cursed decor, mostly spider webs, and a few creepy gray items. Yuck.
Wave-swept sandy knoll.
Follow the bridge to nowhere.
Dig among the palms.
coordinates (68.25, 68.95)
East of Plot 14 is a small bridge that leads to another little sandy island. On that sandy island is… nothing, really, which is the point of the riddle. Except your dig spot, of course, which is under the palm trees.
Seek the bone tunnel.
In sight of a broken hull.
Trace the sunken chain.
coordinates (47.77, 88.39)
Just north of Plot 24 is a huge skeletal rib cage. In the middle of that skeleton is an anchor connected to a chain that goes into the water. Follow the chain to find your dig spot, in the water.
Dead hulk in the tide.
A mast lies against the dunes.
The crow’s nest sees all.
coordinates (44.22, 86.76)
This is another near Plot 24, but this is on the side closer to Runetotem, closer to the shipwrecks further down the beach. The dig spot is on the west side of the broken off mast on the shore, near the spot where the main mast joins the sail crosspiece, next to the crow’s nest.
One boardwalk above.
A second boardwalk below.
Search near the canoes.
coordinates (64.81, 73.04)
Directly north of Plot 13 is a small cove with two boardwalks. The higher one is where you’ll see the kites flying. The dig spot is on the north side of the lower deck, next to the canoes.
Nature carved a gate.
Sea and sand mingle below.
Search atop the arch.
coordinates (61.87, 78.66)
This one is between Plot 5 and Plot 3. Like the riddle says, there’s a rocky outcropping above the beach, and the dig spot is on top of it, slightly closer to Plot 5.
Sea’s greatest hunter.
Hanging in the salted air.
Search below the deck.
coordinates (53.80, 82.05)
This one is at the big fisherman vignette with the big shark strung up over the sea, near Plot 6. The dig spot is a bit far from the shark mentioned in the riddle, in the sand underneath the multi-story dock.
Boasting two bridges.
Isle’s lone palm leans toward the shore.
Search the coconuts.
coordinates (58.01, 79.95)
Leading from the mainland to Plot 51, there is a bridge, a small island with just one palm tree, another bridge, then the island with plot 51. The dig spot is beneath the palm tree.
Two huts crowd the isle.
Beach grass sways in the sea breeze.
Swim with the starfish.
coordinates (62.04, 88.70)
This is the island all the way to the south with two huts on it. Fuller the mussel vendor is there, but not much else. The dig spot is close to the shore near Fuller’s dock.
Please consider supporting our Patreon!
Join the Discussion
Blizzard Watch is a safe space for all readers. By leaving comments on this site you agree to follow our commenting and community guidelines.


