Spectral Insight: Havoc and Vengeance Demon Hunter Artifact quests
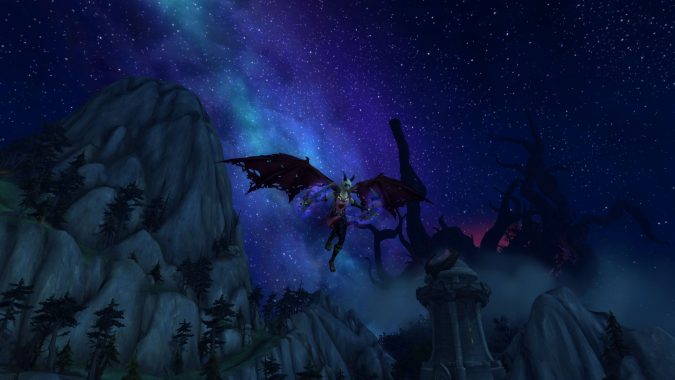
Hello current and future Demon Hunters! Last time we took a brief detour from the story to talk about our two different playstyles. Today, we’re continuing where we left off with the Demon Hunter story: after our dramatic escape from the Vault of the Wardens, we jump directly into our Artifact weapon quest.
Compared to most classes, the Demon Hunter artifact quests are relatively quick to complete and can be finished in 15 minutes or so; however, this is balanced by the Mardum experience, which clocks in at roughly two hours the first time through. But enough talk! Let’s dive into obtaining warglaives that would make Illidan jealous.
What’s this?! A Spoiler Goblin! Avoid it, quickly, readers! Or its knowledge… will be yours.
As a quick refresher, the Mardum experience ended with your merry band of Demon Hunters escaping the Vault of the Wardens and meeting everyone’s favorite Medivh in disguise Mage, Khadgar. He tells you that the world is in great danger and he wants your help, so you are to meet him in Dalaran. Should you decide to do so (and really, you have no other choice), you’re promptly sent to your newly designated Illidari leader over at Krasus’ Landing.
Here, you pick which Artifact weapon you’ll be questing after — and, thus decide which spec you ultimately want to spend the first portion of Legion as.

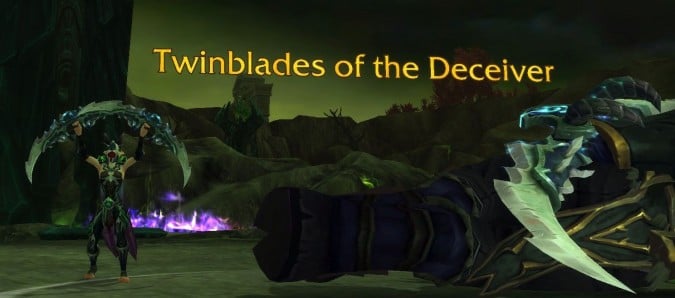
(Re-)Slaying Varedis for the Twinblades of the Deceiver
Should you choose to pursue the Havoc artifacts, you’ll be asked to track down a well-known Demon Hunter thought to have died at the Black Temple: Varedis Felsoul. If that name sounds familiar, it’s because Varedis was the target of a difficult group quest back in the Burning Crusade expansion pack. Turns out Kil’jaeden wanted Varedis on his side and raised him in the Twisting Nether to return a servant of the Deceiver. As an added bonus, his weapons were imbued with power from Kil’jaeden himself.
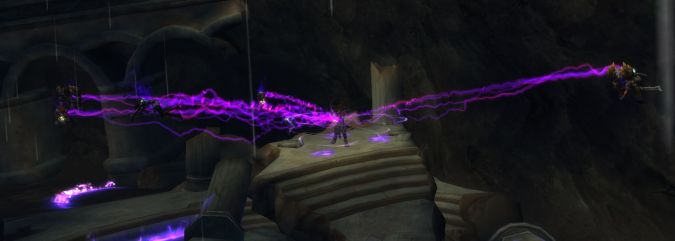
In order to slay Varedis (again), you need to make your way into Suramar. As any respectable bad guy does, Varedis has a shield protecting himself so you need to disable all three wards before you’re able to attack him. The first ward is pretty easy to get to but once you take it down, fel fire will rain on you periodically, which adds a minor but constant challenge to navigating the land and dodging enemy attacks. The second ward is guarded by a fel lord who uses some very impressive-looking abilities against you and tests you a bit more heartily than the first ward.
And the third ward? In its way are waves of demons, an intimidating speech from Varedis himself, and the lives of your allies used to summon the Fist of the Deceiver. It’s your toughest challenge yet except… you can skip it all. Unintentionally, I side-stepped the first adds and beelined for the ward. Varedis had only just finished summoning the Fist of the Deceiver when I took the third ward down and a cut-scene played, allowing me to bypass a fight with the Fist of the Deceiver. Moreover, it felt as though I needed to wait until Varedis created a bridge across the fel lava to engage him in combat, but I could just use Fel Rush to make my way across and attack him quickly.
The Varedis fight itself was not overly complicated; it honestly felt like fighting a more powerful version of yourself. Varedis uses all the standard Havoc Demon Hunter abilities and it’s actually somewhat fun to see how well you can do just mirroring his abilities. The fight is a bit tough, though, so you will need to make sure you’re actively engaged in your rotation while still managing to dodge whatever Varedis throws at you. When you succeed, his weapons are yours!
If there’s one complaint I have about the Havoc scenario it’s that it, oddly enough, doesn’t quite feel as on-the-rails as it should. The scenario takes place in an open area with a pseudo-path you need to follow from objective to objective. The problem is that there aren’t enough demons filling in the space to make it difficult to just skirt around enemies and skip to objectives. The other complaint I have is a bit unavoidable — and not that major — but a complaint no less. Having gone through the entire Mardum experience as Havoc, the artifact chain doesn’t exactly feel “new.” It is a logical extension of what you’ve done, but it doesn’t challenge you to use new abilities the same way the Vengeance scenario does (more on that below). All in all, this is not a big issue; if you’ve been Havoc thus far, the chain itself feels like a solid culmination of the Demon Hunter experience.
Putting your soul into Vengeance
But of course, Havoc is only one half of the picture. The other half is Vengeance, which not only presents its own Felsoul to conquer but also brings forth a glimpse at new lore: the Aldrachi. An ancient race that stood against the Burning Legion, the greatest champion of the Aldrachi withstood all but Sargeras himself. After this champion’s fall, Sargeras took his weapons and passed them down to his greatest followers. Caria Felsoul, a former Illidari, is now in possession of the Aldrachi Warblades and uses their power to drain souls and gain more and more power. You need to stop her.
This begins with a brief trip to Khadgar to gain a Crystallized Soul that will give you access to a Legion Communicator. While this is just a brief side trip, it does reveal what a pack-rat Khadgar is (notoriously doing absolutely nothing of value with all those Apexis Crystals). With access to the Legion Communicator, your contact Allari the Souleater informs you that it’s pretty much news as expected from below: everything is awful and you’re their only hope. But don’t worry, your allies are expendable and you need only worry about obtaining the Aldrachi Warblades (Demon Hunters are a pleasant bunch).
Instead of flying to Suramar, you fly below to a portion of the Broken Shore. After rescuing Allari (who needs some time to recuperate), you need to close Legion portals that are spewing forth demons. For the most part, this just involves solo-killing waves of small adds with occasional bigger adds. The focus here seems to be testing your ability to use AOE spells to take down the small adds while practicing your primary rotation to stay alive against the larger enemy. All in all, it actually feels like the most edifying portion of the Vengeance scenario.
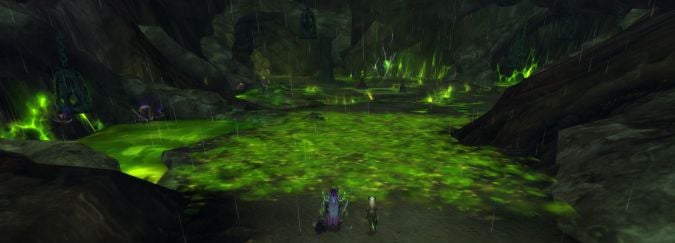
Next up, you need to cross a dangerous pool of fel energy to reach your targets. I’ll be honest, this part felt a little odd. It seemed like I should be making use of Double Jump, Glide, and Infernal Strike to cross the gap but in reality, I could just… walk on the hills to the right and left. Similarly, the next two challenges felt full of unreached potential. The first of two back-to-back mini-boss encounters has you up against Doomheralds Saera and Taraar, working to complete a ritual. With Allari now back in action and at your side, this seemed like it would be a challenge of my ability to hold aggro on two targets; however, it didn’t really end up feeling like that because once I had aggro, I never lost it and Allari’s damage didn’t feel all that significant of an addition to mine.
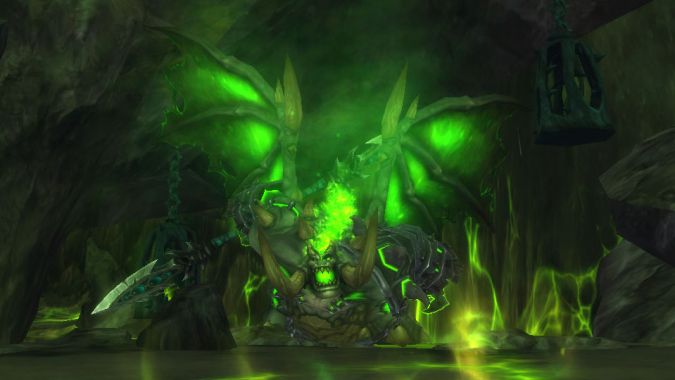
The second mini-boss is a Pit Lord named Gorgonnash, the result of the ritual you failed to interrupt on time (way to go). His major shtick seems to be that he occasionally stuns and will require proper active mitigation to defeat. But again, his implementation doesn’t seem to live up to his design and he’s largely just a pushover. A few more add waves and another (slightly forgettable) mini-mini-boss later and you’re up against Caria herself. I’ll be honest, I don’t remember much about her encounter outside of its introduction and scenery being pretty cool. She’s a fairly easy one-on-one fight and you end by taking her Warblades and flying back to Dalaran.
If I sound a bit negative, that’s not my intention. The Vengeance artifact scenario is a decent little excursion and the idea that the Aldrachi once stood against Sargeras himself is a majorly cool lore addition. The problem right now just appears to be the fine-tuning. All the pieces are in place to make this an excellent test of your Vengeance skills and give you practice in your future tanking endeavors. Unlike the Havoc chain which — although also good — feels slightly redundant after Mardum, the Vengeance chain truly has potential to be in line with other classes’ artifact challenges. Blizzard just needs to make sure the tuning matches the design.

Back to Mardum
Both artifact quests end as all classes’ do: with an introduction of your class hall. In Demon Hunters’ case, our class hall is the Fel Hammer back on Mardum. It’s recently received a bit of a visual makeover to give it the appearance of aging. Gone is the green glow from ten years prior, replaced with a worn down look. It’s a nice touch that only recently was added to alpha, but it gives the place a real sense of time.
More importantly, it is a very cool way to make use of the space that could have easily been left behind (cough Gilneas cough). From there, your journey into full-on Legion territory begins. It’s an exciting (and ever-changing) journey, but it’s one that will have to wait to discuss until next month. Until then, glide on, my friends!
Please consider supporting our Patreon!
Join the Discussion
Blizzard Watch is a safe space for all readers. By leaving comments on this site you agree to follow our commenting and community guidelines.


