Diablo 4 Season 7 is the Season of Witchcraft — here’s everything you need to know to jump into the new season

Diablo 4 Season 7 kicked off on Tuesday, January 21 and lasts through April 15, 2025. This is the Season of Witchcraft, and it’s packed with severed heads and piranha powers. (Okay, there’s just one piranha power, but I’m very excited for it.) How could you possibly say no to a duo like that?
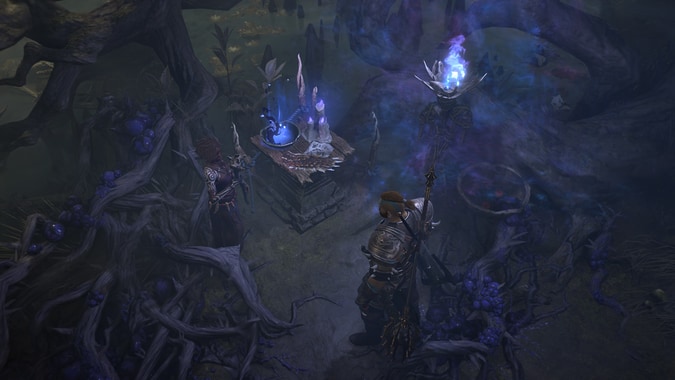
The premise of the season is that our buddy the Tree of Whispers is losing its heads. And those heads didn’t just roll away: no, they’ve been set loose and now they’re roaming Sanctuary, taking on new, twisted bodies made out of whatever they can find (which looks just as horrifying as it sounds). You’ll help the Witches of Hawezar track down these lost heads so they can fulfill their debt to the Tree, and learn some witchcraft along the way.
Sound like fun? Here’s everything you need to know about Diablo 4 Season 7.
How do I get started in Season 7?
Create a new seasonal character and find the Witch Gelena in Gea Kul. She’ll get you started on the seasonal quest to befriend these witches and track down some heads. As you progress through the seasonal questline and help the coven return heads to the tree, you’ll earn Coven’s Favor reputation which will unlock new Witchcraft Powers and other rewards.
When you’ve earned sufficient favor with the Coven you can unlock altars around the Tree of Whispers that grant these powers. There are also lost powers unknown to the Tree or the Coven that you can unlock by finding forgotten altars, which can spawn randomly in dungeons. (Which includes the much-coveted piranha power.)
Leveling in Season 7 is as fast — or faster — than it’s ever been in Diablo 4. Headhunt zones are dense with mobs and Whispers to complete, as well as Headless bosses — you’ll be racking up the XP and repeatedly filling your inventory with loot. To level as quickly as possible, we recommend sticking to Headhunt zones unless you have objectives that absolutely require you to do something else, and to keep your difficulty on the low side so you can move quickly without dealing with any time-consuming deaths. Here are our tips for succeeding in Season 7!
All of the Witchcraft Powers you can earn in Season 7
The big draw to this season is the new Witchcraft Powers to play with. There’s a wide selection of powers to earn, and you can equip five of them at one time from a UI tab in your inventory screen. (This will be very familiar if you played during the Season of Blood, when vampiric powers were managed in the same way.) Each power can be upgraded using Restless Rot, a new currency that you’ll earn by killing Headrotten (more on this in a minute).
Here are all of your witchy new abilities, which fall into four categories:
- Eldritch Powers: Offensive abilities.
- Firebat Servants
- A deadly swarm of Firebats swarm enemies every 3 seconds, inflicting 20% total Fire damage over 1 total attack.
- At Higher Ranks: Enemies are Stunned for 3 seconds after being hit 5 times by your Firebat Servants.
- Abyssal Resonance
- Every 250 Resource spent, release an explosion dealing 400% Shadow damage. Each explosion triggered within 10 seconds of the last increases the size and damage by 130%. Stacking up to 3 times.
- At Rank 10: The third explosion pulls enemies towards you before detonating.
- Wave of Woe
- Release a Wave of Woe when damaging an enemy with your skills. Wave of Woe deals an additional X Shadow damage and echoes this damage to all other nearby enemies of the same type.
- At Rank 5: Damage is increased by 15% each time damage is echoed and is guaranteed to echo at least 5 times. May strike the same target multiple times.
- Purging Touch
- Eldritch Effects X increased damage against Headrotten.
- At Rank 10: This damage bonus now extends to all monsters.
- Shaken Soul
- Eldritch Effects apply Vulnerable to enemies for X seconds.
- At Rank 10: Damage from Psyche and Growth & Decay Effects will also apply Vulnerable at half the duration.
- Hex of Flames
- Lucky Hit: You have up to an X chance to apply Hex of Flames. Hex of Flames deals 40% additional Fire damage each time you deal damage to the target.
- At Rank 7: Hex of Flames explodes dealing damage to all nearby enemies when you land a Critical Strike.
- Doom Orb
- An ominous orb of pure Eldritch energy circles you, damaging any enemy it touches for 400% Fire damage. Doom Orb may launch itself at distant enemies before returning.
- At Rank 5: Kills or damage to Bosses empower the orb’s damage by 5%. After 100%, the orb explodes dealing 5,200 damage to nearby enemies before reforming 3 seconds later.
- Firebat Servants
- Psyche Powers: Defensive abilities and crowd control.
- Life Link
- Automatically link your life force with up to 3 nearby enemies. X of the damage you take is shared with the linked targets as physical damage. Cannot Life Link to enemy Players.
- At Rank 15: For 10 seconds after using a Defensive, Macabre of Subterfuge Skill, any linked damage will be a guaranteed Critical Strike.
- Hex of Shattering
- Damage done by your Witchcraft Effects afflicts enemies with Hex of Shattering causing them to deal X reduced damage for 5 seconds.
- At Rank 8: When any Hex Effect is applied to Headrotten, all damage will be guaranteed Critical Strikes for 5 seconds.
- Aura of Misfortune
- Enemies near you have X chance for their attacks to be interrupted. Does not work on bosses.
- At Rank 5: Aura of Misfortune increases your Movement Speed by 5% and Slows enemies by 30%.
- Aura of Lament
- When you first strike an enemy, it is afflicted with an Aura of Lament that Slows it and other nearby enemies by 70%. For each enemy inside Aura of Lament, you gain 3 Primary Resource each second. If the initial enemy dies, Aura of Lament is passed onto another nearby enemy retaining the duration. Lasts X seconds.
- Only 1 enemy may be afflicted at a time. May only occur every 30 seconds.
- Vengeful Spirit
- Every 19 Seconds, a Vengeful Spirit Servant appears for X seconds. While active, all damage taken is instead taken by the spirit. Vengeful Spirit Servant deals 750% 500% damage.
- At Rank 5: When the Vengeful Spirit’s Life is fully depleted, it rushes towards up to 8 enemies dealing 2,000 Shadow damage.
- Twilight Warding
- Every X seconds, gain a Barrier for 5 seconds absorbing 100 damage.
- At Rank 12: Twilight Warding reflects enemy projectiles while active.
- Life Link
- Growth & Decay Powers: Buffs and debuffs.
- Poison Frog Servant
- Summon a Poison Frog Servant that attacks and Poisons enemies for 150% damage over 3 seconds. On death, the frog explodes violently dealing X Poison instantly damage to nearby enemies. This explosion will always Critically Strike.
- At Rank 5: Poison Frog attacks will pull enemies towards itself and Taunt enemies for 1 second.
- Soul Harvest
- Feed upon the life force of nearby enemies whenever you use a skill with a cooldown, increasing your primary stat by 3% per monster for X seconds.
- At Rank 9: Soul Harvest does not lose duration so long as enemies are nearby.
- Hex of Whispers
- Dealing damage to an enemy afflicts them with Hex of Whispers that deals X Shadow damage the next time damage is dealt. Afterwards, Hex of Whispers will jump to another enemy up to a maximum of 6 times. Hex of Whispers may only be applied once every 5 seconds.
- At Rank 7: After bouncing onto 6 enemies, the hex bounces back to you granting 15% Fortify and removing all crowd control and negative status effects.
- Decay Augmentation
- Your Witchcraft Effects deal X of the damage dealt over 5 seconds. The damage type is based on your class.
- At Rank 10: When your damage-over-time effects exceed 85% of the target’s total Life, they immediately die.
- Grow
- After casting an Ultimate Skill, your Servants, Minions, and Companions are empowered with dark magics. Growing larger in size and dealing X bonus damage. Lasts 15 seconds.
- At Rank 11: Your Servants, Minions and Companions gain 100% Critical Strike Chance while enlarged.
- Aura of Siphoning
- Conjure an aura of decay that deals 80% Poison damage to enemies every second.
- At Rank 10: Each time Aura of Siphoning deals damage, you are healed for 1% of Maximum Life.
- The Cycle
- Dealing any damage with your skills has a 15% chance to grow a flower from the ground. When an enemy is near, the flower deals X Poison damage to that enemy over 5 seconds. If an ally is near, the flower Heals for 6% Maximum Life. The flower withers away after use. A flower may grow once every 2 seconds per enemy.
- At Rank 5: The damage and healing affects all enemies or allies near the flower.
- Poison Frog Servant
- Lost Powers: An assortment of rare powers, lost to the Coven.
- Breath of the Coven
- Dealing damage or applying a Crowd Control effect with any of your Witchcraft Effects increases your Attack Speed by X for 10 Seconds, stacking once per unique Witchcraft Effect.
Witchcraft Effects are Eldritch, Psyche, and Growth & Decay. - At Rank 8: Gain 40% Lucky Hit chance while bonuses from Eldritch, Psyche, Growth & Decay are active at once.
- Dealing damage or applying a Crowd Control effect with any of your Witchcraft Effects increases your Attack Speed by X for 10 Seconds, stacking once per unique Witchcraft Effect.
- Hex Specialization
- Increase the potency of your Hex Effects by X.
- At Rank 10: Increase the Critical Strike Chance by 10% against enemies afflicted by your Hex Effects.
- Aura Specialization
- The size of your Aura Effects are increased by X.
- At Rank 10: Increase the Critical Strike Damage by 50% against enemies inside your Aura Effects.
- Piranhado
- When an enemy is afflicted by both a Hex and an Aura Effect, a Piranhado is summoned pulling enemies towards it and dealing X Physical damage over 12 seconds. May occur once every 20 seconds.
- At Rank 5: Piranhado moves itself towards nearby enemies.
- Breath of the Coven
The lost powers are a little tricky to obtain: you’ll earn them by interacting with special Forgotten Altars in dungeons, which have a very low spawn rate. The best advice for getting them is to up the difficulty to Torment 4 (if you can handle it) because they have a higher spawn rate in higher difficulties, then drink a Draught of Whispers to boost your chance even further, and then run the shortest normal dungeon you can find, such as Hoarfrost Demise in Fractured Peaks. Run through the dungeon as quickly as possible looking for altars, and if you don’t find one reset and try again. No need to kill the boss: just run through the dungeon, check for altars, then leave.

How to hunt the Headrotten (and earn Restless Rot)
These abominations will be found in Headhunt zones throughout Sanctuary, which are packed with Whispers to complete — these are zone takeovers that will be marked on your map. You should spend most of your time in Headhunt zones, which are the best place to rack up Whispers — and thus the best place to quickly earn XP and gear. It’s the only place to collect the new Restless Rot currency, which drops from Headrotten and is used to upgrade your Witchcraft powers. You’ll need a whole lot of it, so it makes sense to stick to these zones.
Completing Whispers in these zones will spawn Exposed Roots, with a chance to spawn Uprooted Cocoons, which can spawn Headrotten Bosses. Headhunt zones also have Rootholds, special seasonal dungeons that you can enter with Whisper Wood sigils you’ll collect from Whisper Caches and Silent Chests — Rootholds always have Headrotten Bosses at the end. These bosses may drop a head which you can return to the Coven for extra rewards, including the materials to craft Occult Gems.
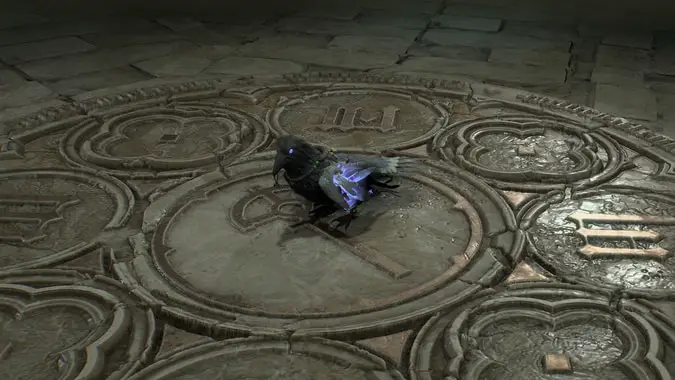
Conveniently, there’s a new way to turn in Whispers inside these zones: you’ll find a friendly raven sitting in a tree who will accept the heads you have collected and provide your due rewards.
How to craft powerful Occult Gems
These new gems fit in jewelry sockets, and they’ll synergize nicely with your Witchcraft Powers. Each one provides 160 armor and 8% resist all in addition to its other effects, so you don’t need to feel like you’re missing out on anything to pick up their unique powers. Crafting them is really just about participating in the season: when you turn heads in to the Coven (which you earn by killing Headrotten Bosses in Headhunt zones) you’ll be rewarded with materials needed to craft Occult Gems.
Here are all of the Occult Gems you can craft in Season 7:
- Wicked Pact
- Your Non-Unique Eldritch Witch Powers gain 25% Potency.
- Heart of Anima
- Your Non-Unique Psyche Witch Powers gain 25% Potency.
- Toadling’s Wish
- Your Non-Unique Growth & Decay witch Powers gain 35% Potency.
- Phantom String
- You deal 15% more Overpower damage to Hexed enemies.
- Elder Sigil
- Your Agility, Corpse, Incarnate, Mastery, Weapon Master, and Wrath Skills deal 25% increased direct damage to Hexed enemies.
- Killing Wind
- While you have three or more Eldritch Witch Powers slotted, gain 25% Movement Speed and 15% Critical Strike Chance.
- Witching Hour
- While you have three or more Eldritch Witch Powers slotted, every 1 5 seconds, the next Core Skill you cast gains the Eldritch tag.
- Raging Enigma
- Your Unique Witchcraft Powers deal 40% more damage.
- Voice of the Stars
- While you have an Aura active, your Ultimate Skills gain each Grimoire tag and deal 10% more damage.
- Mind Wreath
- While you have three or more Psyche Witch Powers slotted, your Defensive, Macabre, Trap Skills gain 20% Cooldown Reduction.
- Spiral Coin
- While you have three or more Psyche Witch Powers slotted, gain 30% Control Duration and 20% Lucky Hit Chance.
- Cornucopia
- While you have three or more Growth % Decay Witch Powers slotted, you generate 30% more Barrier, gain 30% more Fortify and have 30% more Thorns.
- Vulture Talon
- While you have an Aura active, you deal Damage Over Time 50% faster.
- Pointed Finger
- Your Summons deals 15% more direct damage to Hexed Elites.
- Vile Phylactery
- While you have a Witch Power with the Summon tag slotted, if you would take fatal damage, instead prevent that damage. Then gain a Barrier equal to 100% of your Maximum Life and disable your Witchcraft Powers with the Summon tag for 6 seconds. This can only occur once every 75 seconds.
- Friend of the Bog
- While you have three or more Growth & Decay Witch Powers slotted, you gain 10% primary stat, 10% Maximum Life and you are always Unhindered.
- Moonlight Ward
- For each rank in your slotted Unique Witchcraft Power, you gain 3% Damage Reduction and 0.5% Maximum Resistance to All Elements.
- Dust Stone
- For each of your Auras and Hexes an enemy is afflicted by, they take 2.5% increased damage from you.
- Hungering Void
- While you have an Aura active, pull Nearby enemies toward you every 8 seconds.
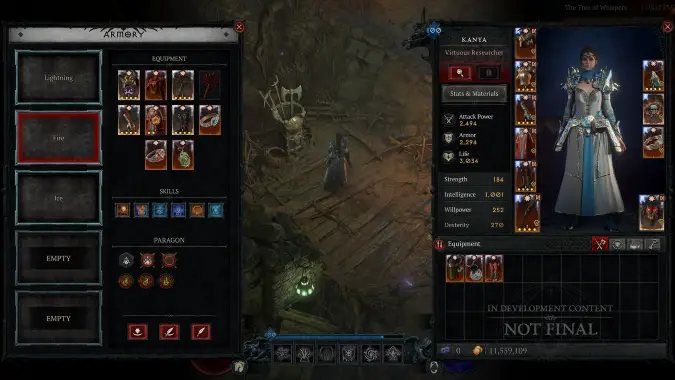
The Armory arrives in Diablo 4 (plus other quality of life improvements)
The game’s long-awaited Armory feature is now in the game for both Eternal and Seasonal characters with the Season 7 patch. This will allow you to swap gear, skills, and paragon points with a single click — and without any respec costs. It will be a great way to hop from build to build, which is frankly impractical with all the clicking you have to do to respec all of your paragon points otherwise. You’ll be able to access the Armory to make these swaps from any major city.
The seasonal patch also has some other nice improvements for both Eternal and Seasonal players:
- The Tree of Whispers area has an improved layout with more amenities, making it a mini-city of its own.
- Finishing class quests will unlock them account-wide for future characters when they reach the appropriate level. This works for both Eternal and Seasonal characters. (If you want to do the quest anyway still can, and you’ll be rewarded with a cache which includes gear, a tempering manual, and some crafting materials.)
- Unique items with Greater Affixes will be more powerful: each Greater Affix will improve the minimum roll of the unique power.
- Improved Ancestral item drop rate
- Players who own Vessel of Hatred will find new and updated Runes.
- The Welcome Back Booster, which lets returning players instantly boost an Eternal realm character to 50 and deck them out in level appropriate gear, is now here to stay. This was formerly a limited-time deal, but players will now find it available at any time. You can only boost one character (or two if you own Vessel of Hatred), so if you’ve already taken advantage of this you won’t get an extra boost. Interact with the Fated Reliquary in the tavern in Kyovashad to claim your boost.
Rewards for playing Diablo 4 Season 7
There are a lot of great things in Diablo 4 Season 7, but there’s one thing I’m looking forward to more than any of the rest: Dorian, a pet raven that you can earn by completing the Destroyer tier of the Season Journey. I feel recent Season Journeys have been unrewarding, lacking cool cosmetics to earn, so I am glad to see Blizzard putting things like this back into the — completely free — Season Journey for anyone to earn. Unfortunately because there is such a cool reward at the end of the Season Journey, Blizzard thinks the later tiers of the journey should be more difficult. We’ll have to see how tough it is to earn Dorian in practice.
As usual, players will also find a selection of Season Blessings to earn for Season 7-specific power ups. These are also completely free, earned by progressing through the Season Journey. Season of Witchcraft adds three new Blessings to the rotation, including an increased chance for better Whisper rewards, an increased drop rate for Masterworking materials, and an increased drop rate for the Restless Rot currency for upgrading your Witchcraft powers.
A new season always means a new Battle Pass with the standard 90 Reward Tiers (28 Free Tiers and 62 Premium Tiers) to progress though. The Battle Pass is free, but you’ll have to pay for the Premium Battle Pass ($10) to unlock all of the rewards. The cosmetics on the Battle Pass are always great looks, but I leave it to you whether they’re worth the cash.
Originally published January 16, 2025. Updated February 4, 2025.
Please consider supporting our Patreon!
Join the Discussion
Blizzard Watch is a safe space for all readers. By leaving comments on this site you agree to follow our commenting and community guidelines.


