How to solo raids and dungeons in WoW
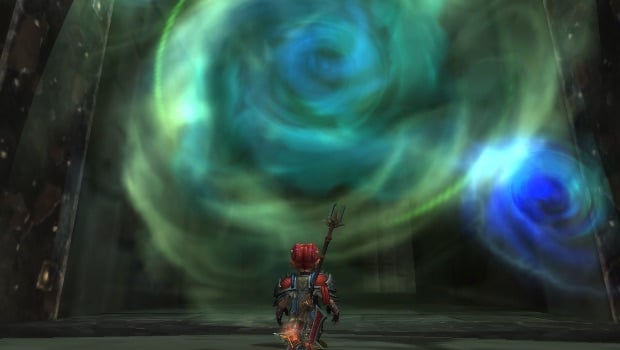
With all of the content Warlords of Draenor has to offer, you might wonder why you’d go back to revisit old content in earlier dungeons or raids. However, there are plenty of reasons:
- To collect transmog gear, especially tier sets.
- To collect pets, like those needed for Raiding with Leashes achievements.
- To collect mounts, which you would have had to be extremely lucky to get in an actual raid group.
- To collect music rolls for your garrison’s jukebox, some of which drop from raid bosses.
- To earn reputation, which a number of raids and dungeons provide.
- To earn achievements, of which there are many.
- To earn gold by looting and selling everything you come across.
- Because it’s just fun to kick raid bosses in the face after they give their dramatic speeches about why you’ll never defeat them.
Whatever your current game goals are, there are reasons to go back and hit old content… and since most group content before Mists of Pandaria raids is easily soloable, why not give soloing a try?
Can I solo old content?
To be a good soloer, you need to be able to take the hits the dungeon’s biggest mobs can dish out while also doing enough damage to take them down. While most classes specialize in doing one or the other — at least at max level — all classes have some ability to solo older content. Tanks can absorb massive amounts of damage, healers can heal and shield to keep themselves going, and DPS classes can just burn down anything in front of them — and as you outlevel content, you’ll find that taking damage and dishing damage out are both easier to do.
For level 100s, most solo content isn’t even challenging enough to push your abilities to the limit: as your level increases, the monsters that used to hit you hard will become little more than annoying insects while bosses will talk big but often go down with a single hit. In general, once you’re 10 or more levels above a piece of content, it should be possible to run through solo — and at 15 to 20 levels above content, soloing’s a piece of cake.
Still, that doesn’t mean soloing is always easy, even if you’re max level and well geared. Tackling higher level content, like 25-player Cataclysm raids or 5-man Mists dungeons, can prove real challenges for even the most savvy player — but if you want to push your skills to the limit, you can always give Mists raids a try. They can be soloed with the right class, gear, and skill, but it’s not a challenge for the faint of heart.
If you’re looking to tackle tougher solo content, take the time to review your skills, talents, and glyphs before diving in. It may be time to dust off abilities that don’t get much use in your regular rotation: anything that can mitigate damage, heal, or boost your DPS can be a boon when you’re in a tight spot. AoE abilities will help speed things up, too, though more so in lower level content where everything’s dying quickly and you can pull whole rooms without trouble. Whatever level content you’re tackling, be sure you’ve got all the skills you need bound to an easy-to-reach hotkey in case you run into trouble — burning a cooldown is a lot cheaper than paying a repair bill.
Also, don’t forget to use any buffs available to you from skills, items, food, or potions. While they aren’t necessary for a lot of solo content, they will give you an edge that could really help in higher-level content — or just help speed you through it.
What should I solo?
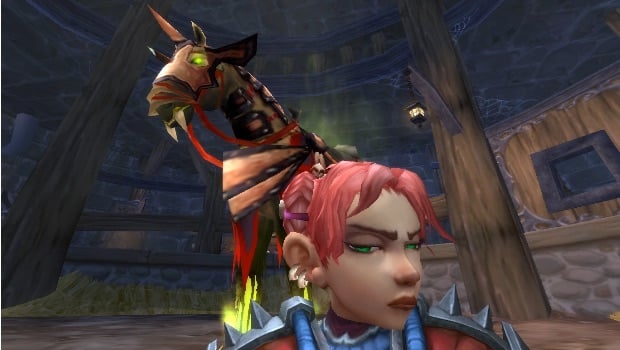
If you’re used to hitting up raids and dungeons using the group finder or raid finder, soloing dungeons is a bit different: you have to head out to the dungeon entrance and zone in through the instance portal. For some instances, this is easy, but others are harder to find if you haven’t been there before — for example, Black Temple’s entrance is in a crumbling wall rather than the more obvious doorway. In short, if you’re intending to hit a dungeon you’ve never been to before, it probably pays to look it up so you know exactly where you’re going.
Many raids and dungeons — anything from late Wrath of the Lich King era forward — will have size and/or difficulty settings. Dungeons have normal and heroic variants, and raids may have 10-man and 25-man sizes. You can choose what you want to run by right-clicking on your character portrait, selecting Raid Difficulty, and then selecting size and difficulty level you want. Some gear or achievements will require you to run in a specific difficulty, but if you can get what you need in a lower difficulty, that’s what we recommend (unless you’re specifically looking for a challenge) — it will help you clear the raid faster, so you can go on to doing other things. Like soloing other dungeons!
While there are too many individual dungeons in the game to list, we’ve rounded up World of Warcraft‘s solo-friendly raids (everything pre-Mists), where to find them, and why you might want to run them. Though we’ll be linking guides and including tips on these dungeons, this isn’t a complete guide to any of the dungeons mentioned — so if you need more details, click through on the guides we’re linking. Additionally, if you’re really into soloing old content, we definitely recommend picking up the appropriate version of BigWigs Bossmods or Deadly Boss Mods, which will provide notifications and timers for boss abilities which can help you avoid mistakes (like standing in the fire). If you’re having trouble, check out the videos or guides linked — or head to YouTube and search for “solo <boss>” to see how other players have tackled it. Having trouble getting past a door or summoning a boss? Often if you run into a snag like this, you’ll find you must talk to specific NPCs, use specific items, or kill specific monsters — most notably bosses — before you can trigger the next step. If you backtrack, you probably missed something.
Remember that raid lockouts mean you can only run these raids weekly (you can check your in-game calendar to see when your raids will reset), but if you’re looking to collect just about anything, there are lots of raids to cycle through. If you’re going in for reputation or for cash, it’s worth spending the extra time to clear the trash which will often still provide rep (though sometimes only up to certain levels) and will always drop gold and items to sell. Clear your bags and take the time to loot everything as you go — even if you just vendor most items, you can make a profit, and crafting materials (especially cloth) and BoE items can sell well on the auction house.
Now, on to the raiding!
Molten Core
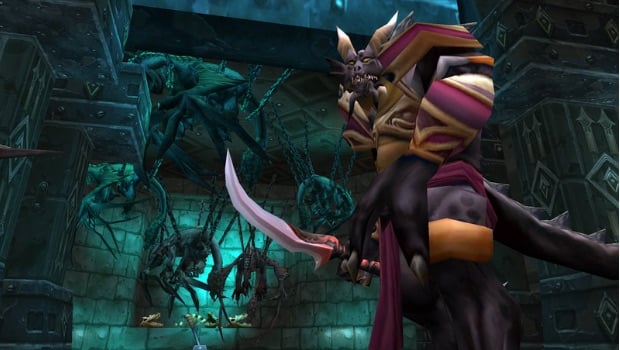
Difficulty: Level 60, 40 players
Located: Inside Blackrock Mountain in Eastern Kingdoms. From the meeting stone in the center, fly or walk to the platform just over the lava and talk to Lothos Riftwaker to head into the raid (you may need to do the attunement quest first).
Reputation: Hydraxian Waterlords
Notable drops: Tier 1 raid set, tier 2 raid set (legs), three pets for Raiding with Leashes, and two legendaries — Thunderfury and Sulfuras
Tricky bits: Nothing, really. Though the instance is large, there are no dead-ends — every path leads to a boss, and they can be killed in almost any order — so it’s difficult to get lost in. Majordomo Executus must be forced to submit (by killing his companions) before you can convince him to summon the final boss, Ragnaros.
Blackwing Lair
Difficulty: Level 60, 40 players
Located: Inside Blackrock Mountain in Eastern Kingdoms. Fly up like you’re heading to Upper Blackrock Spire and then take a right and run until you reach a dead-end and an orb. Touch the orb and you’ll be teleported to the entrance.
Reputation: None
Notable Drops: Tier 2 raid set (except legs, which are in Molten Core), three pets for Raiding with Leashes
Tricky Bits: The first boss, Razorgore, is a challenge regardless of level. You need to mind-control Razorgore using the orb at the end of the room and make him destroy the eggs in the rookery. The trick? Your mind control only lasts 90 seconds and while Razorgore is destroying eggs adds will spawn and attack him — and if he dies, you die. To solo this, you’ll want to regularly stop mind-controlling Razorgore to kill adds before they can take him out… and then jump back on the mind control to keep destroying eggs before Razorgore winds up killing you. Once you’re past Razorgore, the rest of the instance can be brute forced.
The Ruins of Ahn’Qiraj
Difficulty: Level 60, 20 players
Located: Southern Silithus in Kalimdor. As you walk into Ahn’Qiraj, the Ruins will be the instance on your left.
Reputation: Cenarion Circle
Notable Drops: Nothing, but you may want the reputation.
Tricky Bits: None
The Temple of Ahn’Qiraj
Difficulty: Level 60, 40 players
Located: Southern Silithus in Kalimdor. As you walk into Ahn’Qiraj, the Temple will be the instance your right.
Reputation: Brood of Nozdormu
Notable Drops: Tier 2.5 raid set, three pets for Raiding with Leashes, and four Qiraji mounts, which are only rideable in Ahn’Qiraj but do count towards mount achievements. The red one even has a feat of strength!
Tricky Bits:
- Most of these bosses can be brute forced at max levels, with a couple of exceptions. Optional boss Viscidus (who drops a pet) requires frost damage to kill — if you don’t have any frost spells, enchant a weapon with frost (or skip him).
- The final boss C’Thun can also be easily soloed without much effort, but has multiple phases. When you’re sucked into his stomach, kill the tentacles and then stand on one of the platforms to escape and get back to the fight.
Karazhan
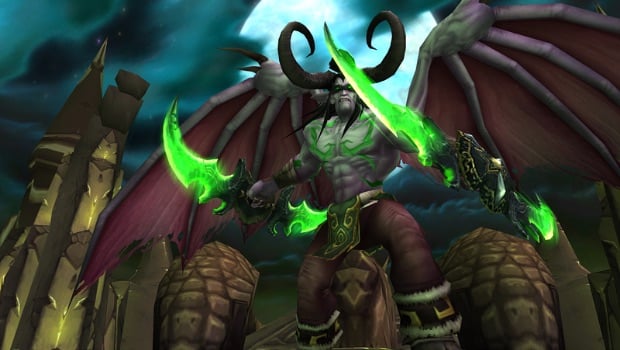
Difficulty: Level 70, 10 players
Located: Deadwind Pass in Eastern Kingdoms. Head for the tower.
Reputation: Violet Eye
Notable Drops: Tier 4 raid set (gloves and helm), Fiery Warhorse’s Reins from the first boss, four pets for Raiding with Leashes II, Karazhan Opera House music roll from the opera event.
Tricky Bits:
- Karazhan is large and multi-level, which makes it a bit of a maze. (Okay, it makes it a lot of a maze.) We like this map for finding our way around.
- You’ll need to talk to Barnes at the stage door to start the opera event (and, while a number of Karazhan bosses are optional, you’ll need to have killed Moroes before he will). Opera can be several different scenarios, some of which you’ll have to talk to an NPC (after Barnes finishes his speech) to trigger.
- The only really difficult part here is the chess event, which takes some luck for a solo player to manage. The event involves playing a game of chess against Medivh, who happens to cheat. Typically in a raid group, each player controls a different piece and winning isn’t hard — but when it’s just you, you have to jump from piece to piece to get the job done… and hope for some luck. It may take you a few tries, but it’s very doable: this video guide will walk you through it.
- Beyond that, you should have no trouble, though you can’t summon optional boss Nightbane without completing a quest chain.
Magtheridon’s Lair
Difficulty: Level 70, 25 players
Located: Hellfire Peninsula in Outland. Head to Hellfire Citadel in the center of the zone and find the entrance on the western side, ground-level.
Reputation: None
Notable Drops: Tier 4 raid set (chest)
Tricky Bits: As the name implies, you’ll only find a single boss here — and he’s easy at level 100.
Gruul’s Lair
Difficulty: Level 70, 25 players
Located: Blade’s Edge Mountains in Outland, north of Ruuan Weald and Veil Ruuan.
Reputation: None
Notable Drops: Tier 4 raid set (shoulders and legs)
Tricky Bits: There are two bosses within, and they’re both easy.
Serpentshrine Cavern
Difficulty: Level 70, 25 players
Located: Zangarmarsh in Outland. Head to Coilfang Reservoir and swim down the pipe in the middle of the lake. When you emerge, the raid entrance should be directly in front of you.
Reputation: None
Notable Drops: Tier 5 raid set (legs, gloves, helm), three pets for Raiding with Leashes II
Tricky Bits:
- Be careful getting on and off the elevators. No, really, the elevators have a huge kill count.
- Optional boss The Lurker Below must be fished up… but is easy once you’ve gotten him.
- The final boss, Lady Vashj, is time-consuming to solo — especially for melee classes — but not particularly difficult. At 50% health you won’t be able to damage her until you’ve taken down her shield using Tainted Cores from Tainted Elementals that spawn on the outer edge of the platform. Watch for the green poison bolts they shoot to locate them and kill them quickly, or they’ll despawn. You’ll need to deactivate four shield generators with four Tainted Cores before you can finish her off… and in the meanwhile she’ll grow in power (but probably not so powerful as to cause a problem).
Hyjal Summit
Difficulty: Level 70, 25 players
Located: Caverns of Time in Tanaris in Kalimdor. When you’re inside the Caverns of Time, talk to the dragon to fly you down (or do it yourself if you prefer). Hyjal is to the north and should be marked as The Battle for Mount Hyjal on your map.
Reputation: Scale of the Sands
Notable Drops: Tier 6 raid set (gloves, helm), three pets for Raiding with Leashes III
Tricky Bits: Though most of the fights themselves are straightforward, you will have to speak to the faction leader in the Alliance and Horde towns to trigger the encounter and then fight off waves of enemies — some of which attack from different directions — before the boss appears. This will require some running around, even for ranged classes, but none of the fights are particularly tough at level 100.
Tempest Keep: The Eye
Difficulty: Level 70, 25 players
Located: Eastern Netherstorm in Outland. The Eye is one of several dungeons that make up Tempest Keep, but the raid dungeon will be found in the largest of the buildings, hovering in the center of the complex. (Look for the green, rather than purple, portal.)
Reputation: None
Notable Drops: Tier 5 raid set (shoulders, chest), the infamous Ashes of Al’ar mount.
Tricky Bits: A complicated fight with lots of adds, Kael’thas can be problematic if you can’t get him down quickly — but you probably can. Watch out if he gets around to casting Gravity Lapse (which he’ll do after 50% health) — it can kill you with fall damage.
Black Temple
Difficulty: Level 70, 25 players
Located: Shadowmoon Valley in Outland. Head to what looks like an entrance to the temple and then take a sharp right — the actual entrance is in a hole in the wall.
Reputation: Ashtongue Deathsworn
Notable Drops: Tier 6 raid set (shoulders, legs, chest), the legendary Warglaives of Azzinoth, six pets for Raiding with Leashes III, The Burning Legion music roll.
Tricky Bits:
- You need to talk to Akama before you can start the Shade of Akama and Illidan fights.
- If you hit a locked door you can’t get past, you’ve skipped a boss — backtrack and find what you’ve missed. (I frequently forget Teron Gorefiend, who’s tucked away in a dusty corner.)
Sunwell Plateau
Difficulty: Level 70, 25 players
Located: Isle of Quel’Danas in Eastern Kingdoms. Look for the entrance marked on your map.
Reputation: None
Notable Drops: Tier 6 raid set (bracers, belt, boots), the legendary bow Thori’dal, three pets for Raiding with Leashes III.
Tricky Bits: None, though sometimes killing things quickly means you have to wait for scripted events to play out — most notably when you jump down to fight with Brutallus and then Felmyst — while you wonder if you’ve done something wrong or gotten lost. It’s hard to get lost and if you find yourself stuck after killing Brutallus just wait it out.
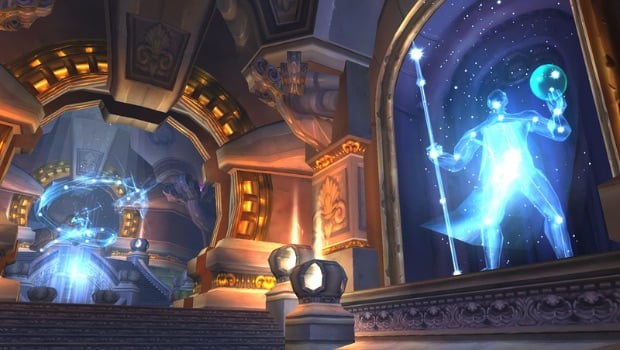
Naxxramas
Difficulty: Level 80, 10 or 25 players
Located: Dragonblight in Northrend. Naxxramas hovers over Wintergarde Keep and is marked on the map.
Reputation: None
Notable Drops: Tier 7 raid set, three pets for Raiding with Leashes, Wrath of the Lich King music roll.
Tricky Bits: Whether you’re playing in 10- or 25-player variations, there’s nothing challenging here for level 100s, as you can safely ignore most of the mechanics of fights. The Kal’Thuzad fight can sometimes be a bit buggy for solo players, as he can despawn in phase 2, when you actually get to fight him. If this happens, just wait for him to respawn and try again.
The Obsidian Sanctum
Difficulty: Level 80, 10 or 25 players
Located: Dragonblight in Northrend. Head to lowest level of Wrymrest Temple — the entrance is on the north side and Obsidian Sanctum is straight ahead when you walk in.
Reputation: None
Notable Drops: Reins of the Black Drake in 10-player mode if you don’t kill the drakes, Reins of the Twilight Drake in 25-player mode if you didn’t kill the drakes.
Tricky Bits: Just head in, skip past the drakes, and attack Sartharion. Most players should find it easy to solo so long as you’re quick about it — though the twilight realms spawned by the drakes require two players to deal with, so if you don’t kill Sartharion quickly enough to avoid them you have a problem.
The Eye of Eternity
Difficulty: Level 80, 10 or 25 players
Located: Western Borean Tundra in Northern. Head for The Nexus in Coldarra and look for the highest instance entrance.
Reputation: None
Notable Drops: Reins of the Blue Drake and Reins of the Azure Drake.
Tricky Bits: The fight with Malygos isn’t difficult, but it does involve several potentially confusing phases. In phase 1, DPS as normal. In phase 2, attack adds at range or jump on a platform to fly and kill the rest. In phase 3, the ground will vanish but you’ll have a dragon mount. Use the dragon’s abilities to finish off Malygos. Once you’ve looted, fly to the portal and click it to leave. For more details, check out this video to walk you through the fight (warning: language).
Vault of Archavon
Difficulty: Level 80, 10 or 25 players
Located: Wintergrasp in Northrend. The Vault is in the center of the fortress on the northern end of the zone, but is only accessible when your faction has won Wintergrasp.
Reputation: None
Notable Drops: Reins of the Grand Black War Mammoth.
Tricky Bits: The only hard part about this is making sure your faction controls Wintergrasp.
Ulduar
Difficulty: Level 80, 10 or 25 players, with some hard modes that award better loot if players choose to make the encounter tougher (rather than setting difficulties as we do today). For example, not destroying the towers on Flame Leviathan makes the encounter harder, and thus rewards extra loot and special achievements.
Located: Northern Storm Peaks in Northrend. You’ll see it on the map.
Reputation: None
Notable Drops: Tier 8 raid set, legendary mace Val’anyr, mount Mimiron’s Head, and Reins of the Rusted Proto-Drake and Reins of the Ironbound Proto-Drake from achievements.
Tricky Bits:
- Flame Leviathan involves using a vehicle kill the boss — and fights like this are always tricky to solo. We definitely recommend starting this one on 10-player mode and not trying to do it with towers up on your first attempt (or attempts). Instead of explaining it, we direct you to this video of a hunter soloing the 25-player version at level 90 — so you know it’s possible (warning: language).
- Mimiron is a complicated, multi-stage fight that can be particularly difficult for melee as during phase 3 Mimiron is at range. Use any ranged abilities you have, but if that’s not enough, kill adds and loot their magnetic cores, which can pull Mimiron down to you. Here’s a video of a paladin killing Mimiron at level 90 to give you a feel for the fight.
- Yogg-Saron, the final boss, is also tricky. Kill adds until Yogg spawns, then kill tentacles (use AoE to break away if they grab you) until portals spawn. Hop into a portal, kill illusions, and then you’ll have access to Yogg-Saron’s brain. DPS until another portal spawns — go through it and finish DPSing him down. If you’re having trouble with insanity, you’re not killing him quickly enough. To see this complicated fight in action, here’s a video of a warlock soloing him.
Trial of the Crusader
Difficulty: Level 80, 10 or 25 players, with a heroic difficulty
Located: Icecrown in Northrend. Head to the Argent Tournament grounds in the northeast section of the zone and look for the raid entrance on the eastern side of the coliseum.
Reputation: None
Notable Drops: Tier 9 raid set
Tricky Bits: The final boss, Anub’arak, can be problematic because his Leeching Swarm ability, which he starts using at 30% health, will drain 10% of your health every second. Burn him down fast to avoid problems.
Onyxia’s Lair
Difficulty: Level 80, 10 or 25 players
Located: Southern Dustwallow Marsh in Kalimdor. Look for the Wrymbog on your map — Onyxia’s Lair isn’t marked by name, but the cave is shown just below Wrymbog.
Reputation: None
Notable Drops: Reins of the Onyxian Drake
Tricky Bits: During phase 2, she can only be hit by ranged attacks — but with the damage you’ve done in phase 1, this probably isn’t a problem so long as you have some minuscule bit of DPS you can do at range.
Icecrown Citadel
Difficulty: Level 80, 10 or 25 players, with a heroic difficulty
Located: Southern Icecrown in Northrend. Don’t confuse the raid entrance for 5-player dungeon entrance: the raid is at ground level. Look for the Argent Crusade bashing the door down.
Reputation: Ashen Verdict
Notable Drops: Tier 10 raid set, legendary sword Shadowmourne (for death knights, paladins, and warriors only), Invincible’s Reins, Invincible music roll, and Reins of the Bloodbathed Frostbrood Vanquisher and Reins of the Icebound Frostbrood Vanquisher from achievements.
Tricky Bits:
- Another vehicle encounter, the Gunship Battle has the Alliance and Horde facing one another from their respective gunships. To win this one, pick up rocket pack before combat starts by talking to the NPC on your ship — equip it, which will let you hop between ships during the fight. When you start the encounter (another NPC conversation), hop in a cannon and start firing — use 1 to generate heat and 2 to use that heat for a big attack. Eventually an enemy mage will lock you out of your guns — hop to the enemy ship to take out the mage, then hop back to your ship to kill adds. Repeat with the canon and rocket pack hopping until you win. Struggling to figure this one out? Here’s a solid solo strategy video from 2012 — which should give you an idea of how soloable this fight is now.
- Professor Putricide is an easy fight, just remember there’s a button in Festergut and Rotface’s rooms you need to press to unlock Putricide’s door.
- Valithria Dreamwalker is a backwards kind of fight: you must heal Valithria win this one. If you have no healing abilities, bandages will do in all but the highest difficulty levels — just be sure to bring some along with you. If you’re having trouble with Valithria, however, she is skippable.
- Arthas is an easy win in lower difficulty levels — and even becomes completely yawn-worthy at times while you wait for your chance to do damage between scripted moments. Primarily, you want to avoid getting knocked off the edge of the platform and falling to your death: look out for shadow traps (in heroic, phase 1), ice spheres during remorseless winter, and necrotic plague (which he’ll cast when there’s more than one player — or a pet). DPS him and be patient during the scripted bits. Here’s a video of a solo kill in 25-player heroic mode, in path 6.0.2 (warning: language).
The Ruby Sanctum
Difficulty: Level 80, 10 or 25 players, with a heroic difficulty
Located: Dragonblight in Northrend. Head to lowest level of Wrymrest Temple — the entrance is on the north side and Ruby Sanctum is the first instance on the left when you walk in (you’re looking for a red portal surrounded by dead guards).
Reputation: None
Notable Drops: None
Tricky Bits: None. Go forth and slaughter dragons, for victory!
Now we’re about to venture into Cataclysm-era raids. While these are all completely doable, especially at lower difficulty levels, this is where you’ll start to run into opponents that aren’t paper thin and can prove a challenge — however, these provide some of the greatest rewards, too, especially in terms of cash. For classes with a tanking spec, that’s often the easiest soloing due to survivability. For classes without good self-healing, gear with leech — if you can find it — can help you keep yourself going. Make sure you take time to review the encounters before you jump in, because often you can’t completely ignore fight mechanics and brute force everything down.
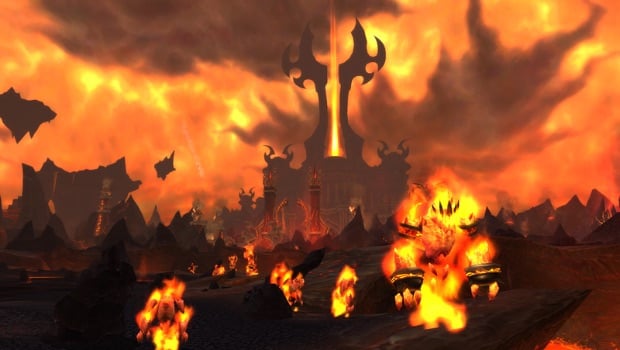
Baradin Hold
Difficulty: Level 85, 10 or 25 players
Located: Tol Barad, which is accessible from portals in Orgrimmar and Stormwind. The hold is in the center of the zone and only accessible when your faction controls Tol Barad.
Reputation: None
Notable Drops: None
Tricky Bits: None
The Bastion of Twilight
Difficulty: Level 85, 10 or 25 players, with a heroic difficulty
Located: Twilight Highlands in Eastern Kingdoms. Head to the top of the tower in the lower left the map.
Reputation: None
Notable Drops: Tier 11 raid set (partial)
Tricky Bits: Sinestra is only available if you run the raid on heroic. When unlocked, the only trick to her fight is that you need to kill the eggs in phase 2 before you can go back to DPSing Sinestra.
Blackwing Descent
Difficulty: Level 85, 10 or 25 players, with a heroic difficulty
Located: Blackrock Mountain in Eastern Kingdoms, but don’t go inside as you would for other Blackrock Mountain dungeons and raids — instead, fly around to the eastern side of the mountain until you find Nefarian’s balcony. The instance portal is in the back.
Reputation: None
Notable Drops: Tier 11 raid set (partial), Legends of Azeroth music roll.
Tricky Bits:
- Talk to Finkle Einhorn (in the cage behind Chimaeron) before starting the fight — it’s not necessary, but it will help on harder difficulties.
- Nefarian is a multi-part fight. Start by clicking the glowy orb to kick off the encounter — you’ll have to jump down to the center platform to get into the fight, and the lowest platform, where Nefarian is located, is the best place (though if you have anything to slow fall, that works too!). Once you’re there, kill Onyxia, then jump on a platform as the lava starts to rise and kill adds. When the adds on the first platform are dead, move to the next and repeat until the adds on all platforms are dead, triggering phase 3. Now you just have to burn Nefarian down. Here’s a good video of a warrior doing the fight — though it has a lot of warrior-specific information, it will give anyone a good idea of how the fight works.
Throne of the Four Winds
Difficulty: Level 85, 10 or 25 players, with a heroic difficulty
Located: Uldum in Kalimdor. The raid flying over the southern side of the zone and clearly marked on the map. Can’t find it? Hop on your flying mount and head up — the entrance is near the top of the tallest tower.
Reputation: None
Notable Drops: Reins of the Drake of the South Wind
Tricky Bits: This two-boss raid is fairly straightforward. Go forth and hit things!
Firelands
Difficulty: Level 85, 10 or 25 players, with a heroic difficulty
Located: Mount Hyjal in Kalimdor. Head for the area in the south labeled Sulfuron Spire on your map — the raid instance is at the bottom of the tower.
Reputation: Avengers of Hyjal
Notable Drops: Tier 12 raid set, legendary staff Dragonwrath, Flametalon of Alysrazor, Smoldering Egg of Millagazor, Corrupted Egg of Millagazor from achievements.
Tricky Bits: Though 10-player modes are easily soloable, 25-player modes can pose a challenge.
- Shannox only spawns once you’ve killed trash mobs in the zone. Primarily difficult because of the number of adds and their ability to CC you in a Crystal Prison. Dodge these traps and you should be fine.
- Beth’tilac can also be problematic due to Cinderweb Spinner adds which can chain-stun for 25 seconds. Burn her down quickly to avoid this.
- Balearic hits hard, even on level 100 players — good mitigation will help with this fight. Here’s a video of a level 90 warrior soloing him (and several other Firelands bosses) to give you a feel for the fight.
- Staghelm is simple once you understand how the fight works. When Staghelm reaches 100 energy, he’ll spawn a fire pool that you need to move out of. He has a huge health pool, so be prepared to spend a few minutes kiting him around.
Dragon Soul
Difficulty: Level 85, 10 or 25 players, with a heroic difficulty
Located: Caverns of Time in Tanaris in Kalimdor. When you’re inside the Caverns of Time, talk to the dragon to fly you down (or do it yourself if you prefer). Dragon Soul last dungeon entrance to the left down the northeast tunnel.
Reputation: None
Notable Drops: Tier 13 raid set, The Shattering music roll from Deathwing, legendary rogue dagger set Fangs of the Father, Experiment 12-B, Reins of the Blazing Drake, Life Binder’s Handmaiden, Reins of the Twilight Harbinger from achievements
Tricky Bits: As with Firelands, this raid isn’t difficult in 10-player modes, but can become challenging in 25-player modes — still, almost all bosses can be burned down with enough DPS. Spine of Deathwing is the encounter most soloers stumble on because of the specific mechanics. Your goal is to remove armor plates from Deathwing’s back, which you do by killing Hideous Amalgamations, causing a Nuclear Blast which breaks an armor plate off. To kill Amalgamations, you want to let 9 Corrupted Bloods spawn and then kill them. Drag the Amalgamation through the residue the bloods leave behind and off goes an armor plate. Destroy the Burning Tendon to prevent the armor from reattaching and then repeat the process. Throughout the fight, Deathwing will roll — make sure to hop into one of the fiery spots previously filled by a tentacle to root yourself so you don’t fly off. For a visual explanation, check out this soloing video (warning: language) which will show you exactly what the fight looks like. If you prefer text-based explanations, we like this guide from Ikralla.
For more solo tactics (or inspiration), you can find a lot of dedicated soloers online. Here are some that are definitely worth checking out:
- The Cranky Tank has warrior-centric soloing guides and videos.
- Mione demonstrates impressive acts of soloing on YouTube, including Garrosh and other challenging Mists of Pandaria content.
- Ikralla has soloing guides and videos for warlocks and monks.
- Hunters should check out Warcraft Hunters Union’s extreme soloing guides.
- Saz has an impressive collection of level 90 shaman soloing videos.
Have your own raiding tips, tricks, or resources? Let us know in the comments! And, of course, good luck out there and happy soloing!
Please consider supporting our Patreon!
Join the Discussion
Blizzard Watch is a safe space for all readers. By leaving comments on this site you agree to follow our commenting and community guidelines.


