The making of a handmade Pepe plush
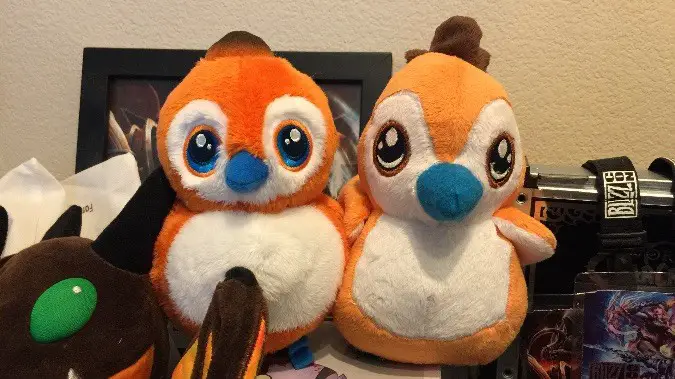
By now, you know our love for all things Pepe here at Blizzard Watch, so it’s really no surprise we have yet more Pepe-crafts to highlight this week. Today we’re talking with Jen, a plushie-maker who first caught our attention because she was making handmade Pepe plushes before Blizzard introduced their own. And while we’re charmed by Blizzard’s Pepes, handmade items have an undeniable charm of their own.
While Jen’s stopped selling Pepes of her own, the story of Pepe’s creation — learning how to put him together as she went — is a great one. You can still find Jen on Etsy selling avian jewelry, geeky statues, and a particularly adorable Splatoon-inspired plush, but for now there’s not a Pepe in sight. But read on to find out just how and why this Pepe plush came to be — and led Jen to discover a love for sewing.
Which Blizzard games do you play, and as what?
I play Hearthstone for the most part, but I’m in the Overwatch beta so I play that sometimes too. I used to play World of Warcraft until WoD where I found out about Pepe.
How did you get started making plushes?
My husband mentioned one day that a wearable Pepe hat type thing would be really cool and we came to the conclusion that a stuffed animal would be a good idea. I went out and bought fabric, thread and some needles and started sewing by hand. I had taken apart a stuffed animal that looked similar to Pepe and used those pieces as a starting pattern. I copied that pattern exactly and made it out of muslin and eventually produced a plushie that looked somewhat like the one I took apart. I made a few adjustments and started to sew one in the colors of Pepe.
I stayed up until 5:30 in the morning working on the first Pepe because I was so excited to see how it would turn out. I ended up with a plushie that looked reminiscent of Pepe but it wasn’t good enough. I knew that if I was going to be making a lot of these I was going to need to sew faster so I bought a cheap sewing machine to iterate on the Pepe design. A few weeks and several Pepe versions later I had one that really captured the look of the in-game model of Pepe. I loved it so much that I decided to put them up for sale on my Etsy store. Eventually I sold enough to get a better sewing machine with an embroidery attachment so I could embroider Pepe’s eyes on instead of painting them.
Why a Pepe plush?
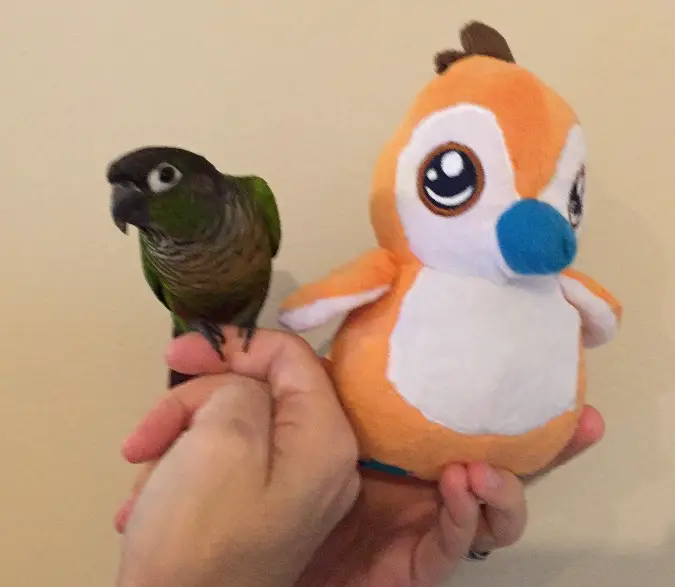
I loved Pepe from the day I saw him in my garrison. I love him especially because I have a pet parrot that loves to sit on my head so I would sometimes call him Pepe. (See a finished Pepe next to my parrot Ruby above.) I decided on a plush because he translates well into one; he’s cute and looks cuddly. Even when he’s not being used as a headband he can still be a toy.
What’s your Pepe made of?
Pepe is made out of a very soft, fuzzy minky fabric and sewn with shiny rayon thread. I stuff him with a poly-fill stuffing. In earlier versions his eyes were cut out of black felt and had highlights painted on with white fabric paint. In later versions, after I got my embroidery machine, he has eyes embroidered to look like his in-game eyes.
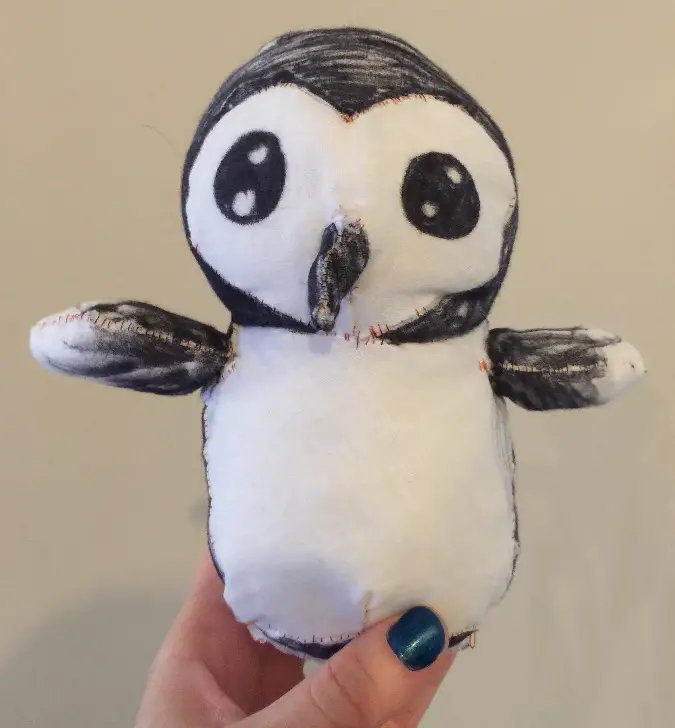
Could you give us a step-by-step on what was involved in making him?
First, I bought a stuffed owl plushie that looked like this and I took him apart to see what the pattern pieces looked like. I copied the pattern exactly and hand sewed it out of a cheap material called muslin. The above is what he turned out to look like. (I drew on him to look like a penguin because all I had was black sharpie.)
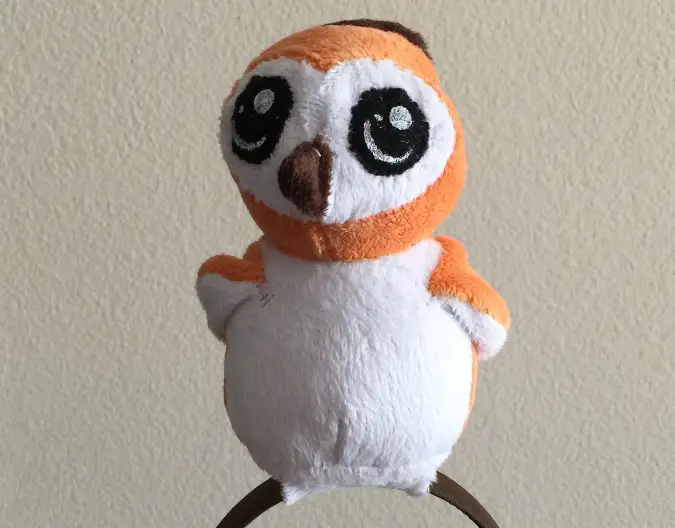
For the second version of Pepe I used the colored fabric I bought. I stayed up until 5:30 in the morning working on him. Everything was hand sewn at this point. Still doesn’t have the proportions of Pepe, but he’s getting there!

This is the progression of Pepe heads and bodies until I got some good proportions going on the one all the way to the right.
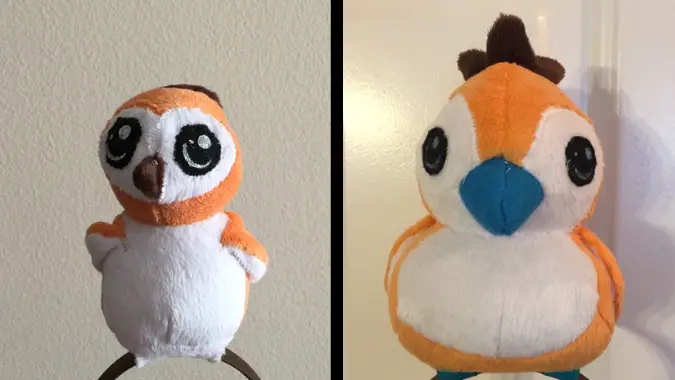
Another iteration later and here’s the comparison from one of the first Pepes I made to the finished product. The eyes are still made of felt with fabric paint on top.
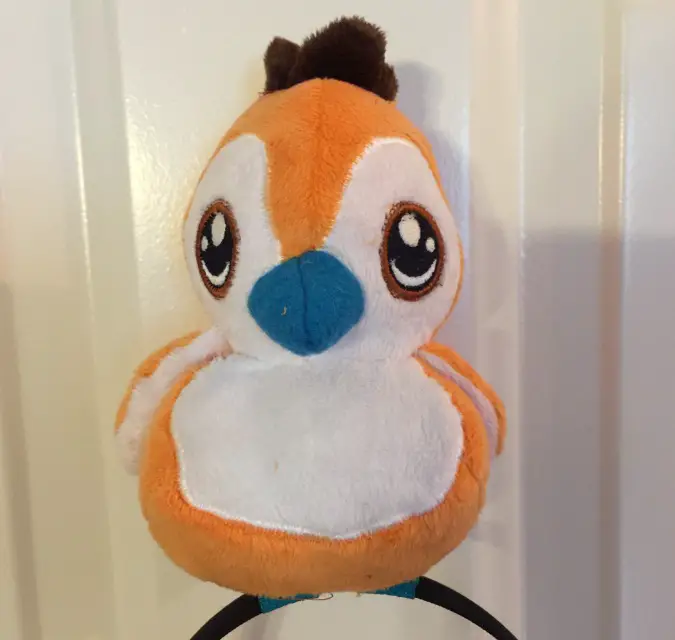
I eventually sold enough on my Etsy store to buy a better sewing machine with an embroidery attachment! Here’s a finished Pepe in all his glory.
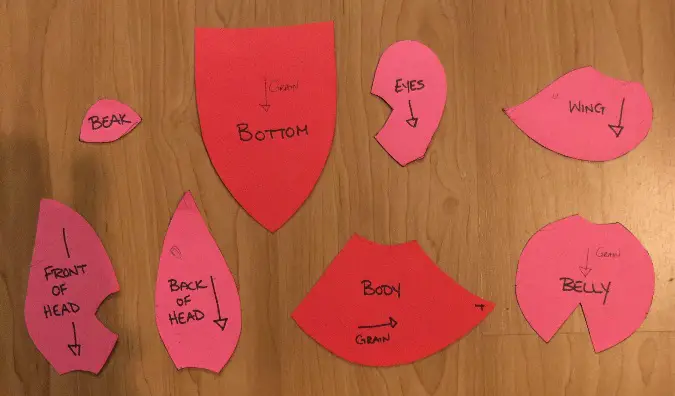
Above you can see my pattern for Pepe. The arrows point to the direction the grain of the fabric is going. I needed to make sure the minky fabric was all going in the right direction.
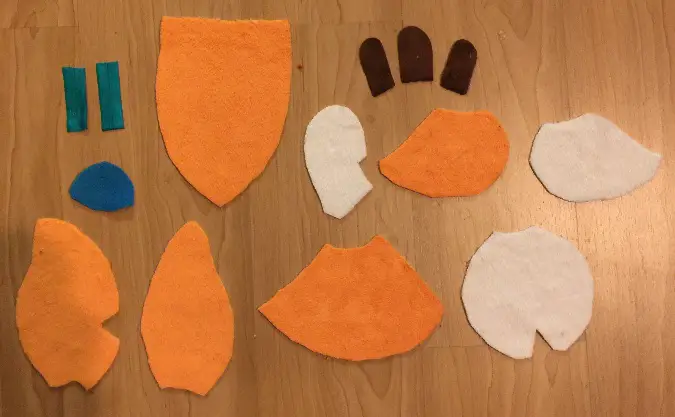
Here’s the pattern when cut out. The feet are made out of elastic to stretch over a headband
A few weeks after I started selling my Pepes on Etsy, Blizzard came out with their own official Pepe plush. Knowing I wouldn’t be able to compete with that, I took down my Pepe listing. I do have a few things up there, but they don’t have anywhere near the popularity that Pepe had. I don’t entirely mind though, as I had started a new full time job and when I wasn’t working I was at my sewing machine — so it freed up some time for me.
Pepe helped me discover my love of sewing and making plushies and it’s opened some doors for new opportunities for me. My Pepe and Blizzard’s Pepe now hang out together with all my other Blizzard stuff!
How long did the Pepe plush take to make?
The process of figuring out how to make a Pepe took a few months. Once the pattern pieces were finalized each Pepe took about an hour and a half to make.
You mentioned working on an Illidan costume for Pepe — how are you progressing?
I recently started a new full time job which has been eating up most of my free time so Illidan Pepe unfortunately hasn’t been started. Illidan Pepe may have to wait though, because I just started a new project making a plushie for a pro Hearthstone player.
What are you working on next?
See my answer above. I don’t want to give away too much. ;)
That’s all for BlizzCrafts today — but check back next week for another selection of cool Blizzard-themed crafts! Have Blizzard arts and crafts of your own you’d like to see on Blizzard Watch? Send them our way– submissions and suggestions should be sent to liz at blizzardwatch dot com.
Please consider supporting our Patreon!
Join the Discussion
Blizzard Watch is a safe space for all readers. By leaving comments on this site you agree to follow our commenting and community guidelines.


