Shadow Word: Tips for unlocking the new challenge Artifact appearance
Greetings, Shadow Priests! It’s been a while, hasn’t it? But 7.2 is here now, and more importantly, so is Thwarting the Twins, the quest that will allow us to unlock our newest ‘hidden’ Artifact appearance. Personally, I’ve been a huge fan of this appearance since it first showed up in the files, so I’m diving right into the challenge of unlocking it. Unfortunately, taking part in the challenge requires the Mage Tower to be up — and it only lasts for three days.
Since the Mage Tower just went up yesterday in the early hours of the morning, that doesn’t give us much time to complete it. Thankfully, I’ve put together a bit of a primer for any Shadow Priests looking to test their might in this particular challenge. Trust me, it’s not going to be easy.
Video courtesy of Reddit user 5erade
The fight
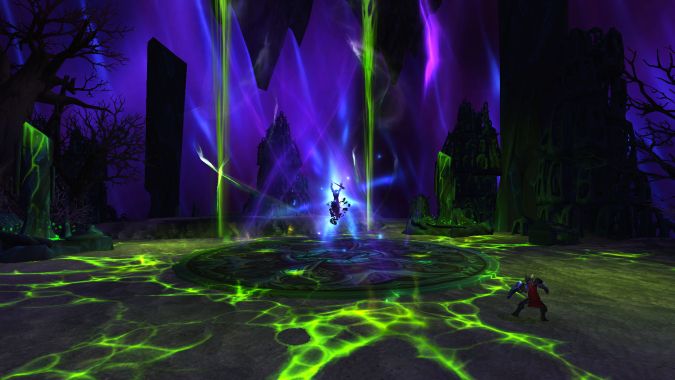
The fight is a follow-up to the initial class quest involving Raest and Karam that ended with you unlocking your 36th trait. Karam has gone ahead of you into the Twisting Nether to confront his brother. In a twist that will surprise almost no one, this doesn’t go well for Karam — he ends up getting Mind Controlled by Raest, and this is where the fight begins. Once combat begins, the fight can be broken down into roughly 4 phases, each with their own mechanics to keep in mind.
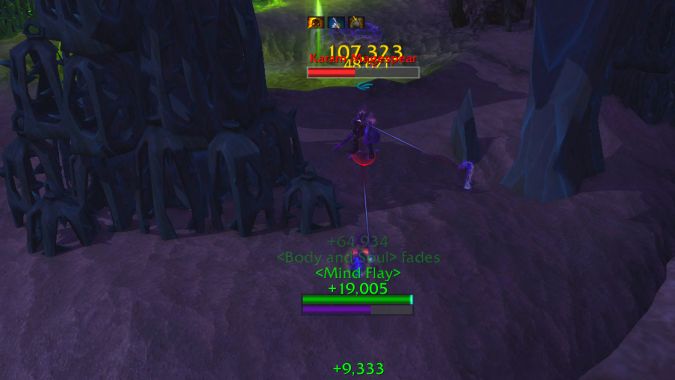
- Phase 1: Kiting Karam
The beginning of the fight is fairly straightforward, and only involves Karam since Raest is immune to all damage during this phase. Karam will villain-walk toward you slowly, steadily gaining increased speed the longer he’s up. He’ll also occasionally spawn pools beneath him that will slow you if you walk through them. Right now, it’s unclear if these are intended to only slow the player or if they’re meant as a way of slowing Karam — but for now, they only slow the player, so don’t bother kiting him through them.
This phase is all about keeping distance between yourself and Karam. If he reaches you, it’s pretty much a one-shot.
- Phase 2: DOTs everywhere
When Karam falls low enough (roughly 33% health), he’ll become invulnerable and you’ll have to switch to Raest. Unfortunately, it’s not quite that easy, as Raest spawns a large number of Shadowfiend-like enemies that move slowly and need to be DOT’d up. He will spawn groups of these adds several times, which makes this phase all about keeping DOTs up on Raest while you kite and DOT the adds. The adds themselves move slowly enough that once you have a bit of distance, it’s okay to focus your casts (Mind Flay, Mind Blast, Void Bolt, etc.) on Raest over the adds. It’s worth noting that this phase is relatively short, so make sure to get DOTs on adds and damage on Raest as fast as possible.
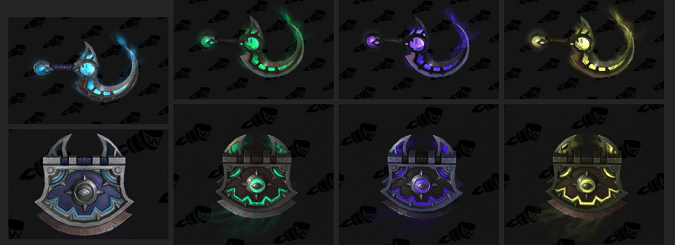
Shadow challenge appearances via WoWHead
- Phase 3: Grasping to survive
The third phase of the encounter has Raest once again invulnerable while Karam slow-walks his way back into the fight. However, you’ll also have to deal with the adds Raest summoned in phase 2 and a new add, Hand from Beyond. Hands from Beyond will be summoned several times throughout the remainder of the fight, one at a time. They are stationary, but they’re one of the deadliest parts of the fight thanks to their cast, Grasp from Beyond.
Let me make this clear: Hands from Beyond must not get their cast off. If they do, it’s likely going to wipe you. The only ways around this are to either interrupt the cast, Disperse (or Prydaz) through the damage, or kill the Hand.
Honestly, phase 3 is where things really ramp up. Raest won’t summon new adds during this, but you’ll need to DOT/kite all the leftovers from phase 2, kite/DOT Karam until he falls low once again, and make sure to kill/interrupt the Hands before they kill you. It’s a lot to do at once, and it’s only going to get harder.
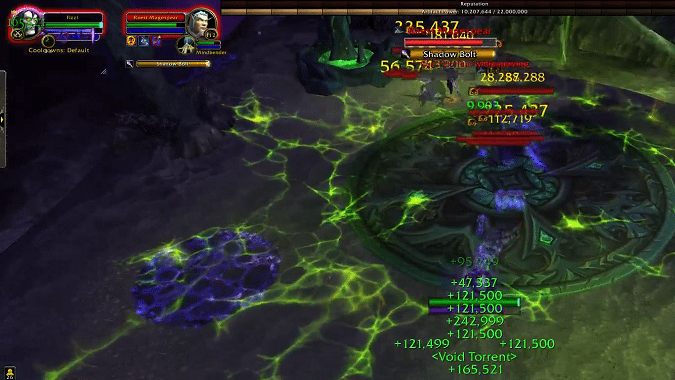
- Phase 4: Everything above and then some
Once Karam hits 33% a second time, he’ll once again channel Purgatory to regain health. When he does this, you have a small intermission-like window where you’ll be facing Raest and his adds, similar to phase 2. However, you’ll have to deal with one new mechanic, a Rune of Summoning. These Runes appear on the ground and need to be stood in, otherwise a large Faceless enemy will spawn. You don’t want that to happen. As soon as Karam begins to chase you again, it’s basically a race to finish the scenario before everything overwhelms you.
In the final phase, you’re put to the test with an amalgam of all the mechanics you’ve had to deal with up to this point. This means you must kite Karam, DOT the small adds, interrupt/kill the Hands, stand in the Runes, and kill Raest.
Note: The scenario is over when Raest dies — even if adds are up, even if Karam is still chasing you, you win the second Raest falls.
Useful talent builds and legendaries
Here’s where there might be some disagreement. The talents you choose will come down to what playstyle you’re most comfortable with. That being said, here are the pros and cons in each of the different talent tiers:
- Tier 1: This one’s easy: Always go Twist of Fate.
- Tier 2: I prefer Body and Soul, as it gives an on-demand speed boost that you choose when to use. However, you do generate a decent amount of Insanity later on, so Mania isn’t the worst, especially if you don’t have Sephuz or the legendary feet. Do not go Masochism, you won’t really have time to cast Shadow Mend.
- Tier 3: Another easy one: Mind Bomb is imperative to helping kite Karam and the small adds.
- Tier 4: This will heavily depend on your level-100 talent choice. If you go Surrender, then pick Reaper of Souls. If you’re more comfortable with a Legacy of the Void playstyle, Lingering Insanity is a good pairing choice. I would avoid Void Ray here, though.
- Tier 5: Considering the number of adds in this encounter and the amount of movement required, Auspicious Spirits is likely the best option. San’layn can be a bit useful if you don’t have Prydaz (thanks to Mental Fortitude) but I still would recommend Auspicious Spirits. Similarly, Shadowy Insight isn’t that great here.
- Tier 6: This is one that you may disagree with me on, but I like going Mindbender in this tier. The reason for this is that Mindbender + Fade is a great way to distract Karam and give yourself some breathing room when you need it. If find yourself not needing to use this combo, though, Power Infusion is the one most Shadow Priests will end up choosing, and it’s a solid choice all around.
- Tier 7: Despite the plethora of adds, this tier comes down to Legacy of the Void and Surrender to Madness, since the small adds move quite slowly and have sizable health pools. Surrender to Madness is the one you’ll want to go for if you’re incredibly comfortable with its rotation. With how crazy phase 4 gets, nuking on the go is incredibly helpful — but it requires you to not mess up, lest you die horribly. For this reason, I’ve been going with Legacy of the Void, which is less stressful in phase 4 and more useful in the other phases. But again, this tier comes down to your comfort level with each given playstyle.
In addition to the talent suggestions, there are a few legendaries you’ll find more useful than others. Granted, beggars can’t be choosers here, but if you have them available to you, Prydaz and Sephuz (once the laughing stock of legendaries) are both very good here. The shield from Prydaz is essentially a get-out-of-jail-free card if you mess up any of the one-shot mechanics, while the speed boost from Sephuz gives you invaluable mobility when kiting. Outside of those two, it’s more or less up to you depending on how much you value utility over damage. I’ve experimented with The Twins’ Painful Touch for easy DOT spreading and Zenk’aram, Iridi’s Anadem for the unreal amounts of healing it can provide if I’m ever hit with something that drops me to 1% health.
I’ll likely swap out the latter, however, since there are few occasions I’ve found myself dipping to 1% and being able to cast VE and being in Voidform. If you don’t need the utility and are going for pure DPS, the belt and shoulders are going to be your best two choices.
Other tips to conquer the twins
There are certainly more things to keep in mind, but the below are the ones that immediately jump to mind as worth noting before heading into the scenario:
- Make focus macros: This one’s not 100% necessary, since the default UI places important name-frames on the right side of your screen, but I still find it useful to make focus macros as a quick way of DOTing Raest without needing to switch off of whatever add I’m currently fighting. For the unfamiliar, a focus macro looks something like this: /cast [@focus] SPELL_NAME — I make one for each of my DOTs as well as one for Void Eruption (“Void Bolt” as the spell name doesn’t work).
- Watch out for bugs: Sadly, I’ve encountered a couple of bugs already, all of which resulted in me dying. It’s frustrating to say the least, but it’s something you’ll want to watch for if you find yourself dying with no discernible reason.
- Use keybindings: I hope this doesn’t need to be said for a challenge of this level, but if you’re not already keybinding, you should change that ASAP. It’ll be nigh impossible to beat this if you click to cast.
- Don’t forget buffs: Another obvious one, but one easy to forget nonetheless. Be sure to stock up on flasks, food, augment runes, and even some potions before entering the scenario. Bear Tartare has proven surprisingly useful for some, and Drums should never be forgotten either.
Doable, but not Shadow-friendly
In theory, the fight sounds chaotic but doable. In practice, it’s both of those — but to an even higher degree. This is not an easy encounter, and that’s especially true for Shadow Priests, who can only interrupt every 45 seconds and don’t exactly have the strongest AOE. Obviously, higher gear levels, tier bonuses, and legendaries will all make this easier — but if you find yourself struggling to make it past the first phase or two, don’t feel bad waiting until the next time the Mage Tower comes around.
Until next time, always remember: Dying repeatedly only brings you closer to Ny’alotha.
Please consider supporting our Patreon!
Join the Discussion
Blizzard Watch is a safe space for all readers. By leaving comments on this site you agree to follow our commenting and community guidelines.


