What to expect in the first wing of UIdir LFR, open now
The first wing of Uldir LFR is now open, and for many people this will be their first steps into Uldir. (And if you’re Alliance this may be the first you’ve even heard about Uldir.) We’re going to take a quick look at the three bosses you’ll be facing in the Halls of Containment wing (killing all three gets you the Halls of Containment achievement).
And more importantly we’re looking at their shiniest loot!
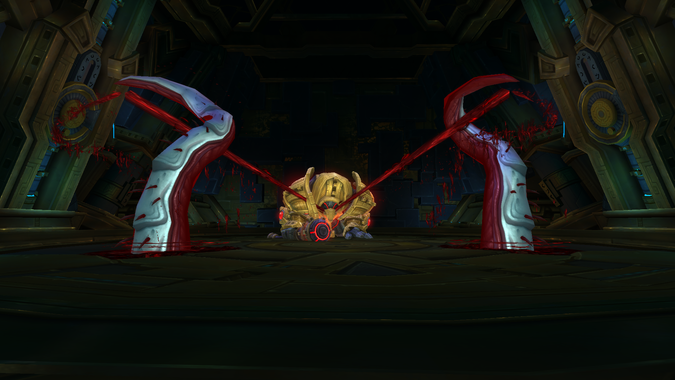
Taloc
As you enter the instance you’ll find Taloc, the Titan construct that you tried to blow up in Nazmir. Since this is the first raid fight of the expansion it’s nothing too difficult — Especially since the Goblin mech blast and fall through the ceiling has left him at 60% health. He’s a three phase fight, with the first and third phase almost identical.
Phase One: Blood Storm will target random raiders, take it out to the edge so you keep the area clear. When he throws his weapon at a tank, don’t be between him and the weapon because you’ll take damage when he goes to get it.
Phase Two: When you get him down to 35% Taloc will power down and you’ll get a fun elevator ride! He takes 99% reduced damage until you reach the bottom. Deal with the Coalesced Blood that spawn, and after 70 seconds you’ll be in phase three.
Phase Three: He keeps all his abilities from the first phase — but you’ll have Blood adds left after your elevator ride so it’s probably a good idea to use your Timewarp at the start of it.
Tanks: You’ll want to try and keep Taloc in the middle of the room — don’t worry about where he faces, because he doesn’t have a cleave. When you’re targeted by Cudgel of Gore make sure that you try and find the biggest group of blood puddles on the ground, as it will soak them all up and free up some more space in the fight. Make sure you’re picking up the Coalesced Blood in the elevator phase and you’ll win!
Healers: Make sure that you keep an eye on the tanks when they’re going to soak up the puddles — and be prepared for the raid to take a hit of damage with every Cudgel of Gore. There’s also a big hit when the elevator reaches bottom.
Damage: Take you casts of Blood Storm away from the group, and try and keep them together so the tanks have an easier time to soak them up. When the Coalesced Blood shows up, make it dead.
Once you show him that you’re bigger, badder, and better than any old Goblin mech you get your loot! If you’re lucky you can also get a Mace specifically for transmogging that looks like his weapon. This is only for transmog and will be much much weaker than the other gear he drops. Here are some of the highlights:
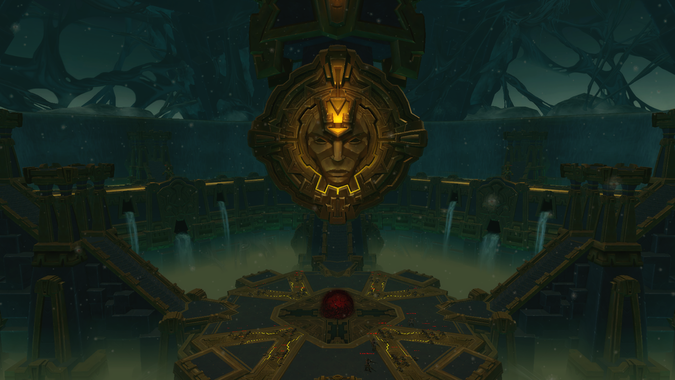
M.O.T.H.E.R.
MOTHER is in charge of the facility. Like every other Titan construct who’s been in charge of one of these facilities she’s not ready to help us until we show her that we’re not corrupted. In her mind, the best way to make sure that we’re free of taint is to; purge the area with fire, lots and lots of fire. She will begin charging up defense matrixes in each of the three sections of her arena. When a section is fully charged you get all that promised fire. Between each room there’s a Defense Grid that causes a little bit of raid damage and spawns an add to fight — every time someone crosses it. On the beta this could easily cause a wipe if people crossed over too quickly. Try not to send more than five people at once through the grid, and make sure that you keep a tank and a healer on each side.
Room One: MOTHER can activate a wind tunnel that pushes you into incinerators — run against it so you don’t get turned to ash. She’ll also mark spots on the ground with fire. Don’t stand in the fire. She’ll do both of these abilities in each room.
Room Two: In the second and third room there are wall lasers — find the break in the laser grid and you’ll avoid the damage.
Room Three: MOTHER has expended all of her energy powering rooms she’ll take double damage for the rest of the fight. This is is a good spot for Timewarp.
Tanks: One will hold the boss in the current room, while the other moves on to the next to deal with the Remnant of Corruptions that spawn from the defense grid. The tank who is in charge of MOTHER needs to make sure that she’s not pointed at the raid when she does Sanitizing Strike. You’ll want to try and keep her positioned in the middle of the room — it makes it easier to stay out of the incinerators.
Healers: Be prepared for the raid to take a lot of damage if people cross into other rooms too quickly, or if one of the Remnants cast their spell. Figure out who is staying with the MOTHER tank so they still have a healer until ready to cross.
Damage: Be on your toes to dodge all the fire and lasers, and kill whatever is in front of you. If you’re dealing with the Corruptions, remember that they can be stunned and interrupted so try not to let them get a cast off. Your healers will thank you.
MOTHER drops the very first raid glaive — Demon Hunters rejoice! She also has a couple other agility weapons, and a spell book off hand.
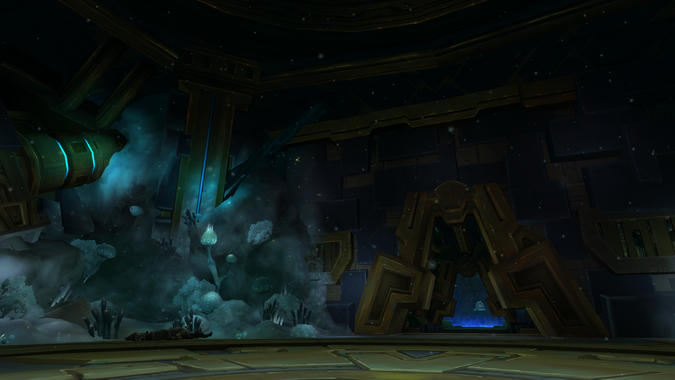
Zek’voz, Herald of N’zoth
Zek’voz, Herald of N’zoth, is the final fight in this wing. After beating MOTHER the raid will head left around the ring to his room, which is a giant Titan knowledge vault! The Herald encounter is three phases, one for each Old God that we’ve fought — or are going to fight, looking at you N’zoth.
Phase One: Watch out for Eye Beams just like the ones in the C’thun encounter. On LFR difficulty they won’t increase in damage with each jump, but spreading out is still a good idea. Throughout all three phases you’ll be dealing with shadowy rings that explode after a couple of seconds. stand near the edge of the ring as it’s exploding, so that you can dodge to a safe area right after. At 65% you move into the next phase and no longer have to deal with Eye Beams.
Phase Two: Members of the raid will get a debuff called Roiling Deceit. When that debuff expires you’ll leave behind one of the green clouds from the Yogg-Saron encounter. Anyone who stands in it will spawn a Guardian of Yogg-Saron, this will need to be tanked and killed to avoid a bunch of raid damage. Ideally you leave the clouds on the outside of the room so people don’t trigger them.
Phase Three: For the final 30% an Orb of Corruption will begin bouncing around the room. Standing under the orb will bounce it back up into the air and give you a double damage buff. After thirty seconds though you’ll be mind-controlled and the raid has to beat you up to free you. While mind controlled you’ll try and cast a single target fear — this should be interrupted so you don’t run out into one of the green clouds from the last phase. When you’re brought to 50% health your mind will be your own again.
Tanks: make sure to face the boss away from the group. He has a tentacle slam combo that leaves your armor shattered — so make sure to swap after the combo is over. Don’t forget to keep and eye out for the Guardians of Yogg-Saron.
Healers: If Eye Beam goes off in the raid you’ll see some hurt people but it shouldn’t be able to kill anyone. Players with Roiling Deceit will take damage as they run it to the edge, try to make sure that you’re within range if they were low. In the final phase the Titan discs around the edge of the room are overcharged and constantly zap the raid and do a little damage. As long as the raiders are dodging the mechanics you should have plenty of mana to deal with this.
Damage: Just like on MOTHER you want to avoid as many of the mechanics as possible: get out of the group when you’re targeted by the Eye Beam, drop Roiling Deceit clouds on the edge of the room, catch the bouncing ball to avoid raid wide damage, and make sure to not stand in the shadow rings. Don’t forget to break the mind control and you’ll be sitting pretty on a dead bug.
After exterminating Zek’voz it’s time for the loot! The polearm he drops appears to be the spiritual successor to the Dark Edge of Depravity from Ulduar, but there’s some other cool loot, too:
Hopefully these brief overviews will help you to succeed in Uldir. Remember that it’s just launched so don’t beat yourself up if you make a mistake. Good luck and happy looting!
Please consider supporting our Patreon!
Join the Discussion
Blizzard Watch is a safe space for all readers. By leaving comments on this site you agree to follow our commenting and community guidelines.


