Bosses in 5 Seconds: Fetid Devourer, Vectis, and Xul Reborn
The second wing of Uldir LFR — The Crimson Descent — has opened up for our raiding fun! Just like the Halls of Containment, we’re getting three bosses here. Luckily none of the bosses are as finicky as MOTHER is. Here’s a quick outline of what to expect in each fight so you can hit the ground running.
And because I’m sure you want to know, I’ll tell you know which weapons and trinkets each boss drop so that you know where you might want to use those bonus rolls.
Let’s get into it.
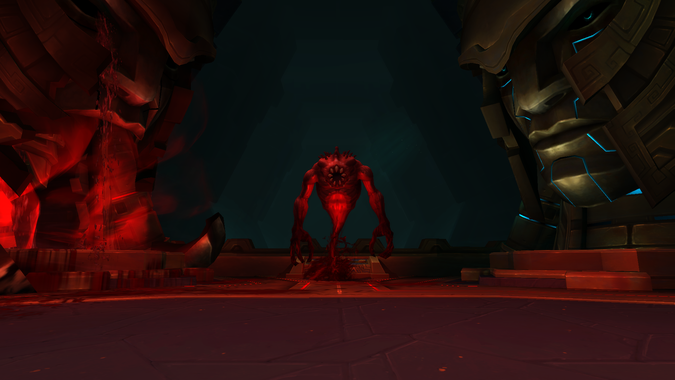
Fetid Devourer
Up first in the new wing you’ll find the Fetid Devourer. He’s a great dancer and loves to boogie down, but all that dancing has made him a little hungry. Unfortunately, the best thing around to eat is you!
Phase One: I mentioned how the best thing to eat is you — but you’re not the only thing to eat. Periodically the garbage chutes around the room will dump out a Corruption Corpuscle, which immediately starts casting Enticing Essence. If that cast finishes the Fetid Devourer will live up to namesake and go devour the Corpuscle — healing and getting some energy. Subsisting on all this gross food means that he’s got a bad case of an upset stomach, every time his energy bar reaches 100 he’ll use Rotting Regurgitation, this is a big cone attack that you won’t want to stand in. At 50% the boss enters a Fetid Frenzy where he takes more damage but also deals more damage. Use Bloodlust here and you’ll maximize your damage and hopefully save your tanks some stress.
Tanks: Stand together because every four attacks he does a Terrible Thrash. This hits the target closest to whoever has his attention for a giant amount of damage. There’s no tank swap mechanic, but you’ll want the tank who gets the Thrash to be one who has a form of mitigation up for each hit. Make sure that when the Corpuscles arrive in the garbage chutes you take the boss over to one so the cleave damage can kill it before he eats it. You’ll be taking a lot more damage after the 50% mark so save your cooldowns.
Healers: The room you’re fighting the Devourer in smells terrible — to the point where it starts to affect your raid. Players will randomly get a debuff called Malodorous Miasma — that eventually leads to a case of Putrid Paroxysms. You’ll take some damage and healers will have to make sure you don’t succumb to the disease. Tanks will be taking a lot of extra damage after the 50% mark so make sure that you’re ready to help them survive.
Damage: Stay off of the tanks — if you’re close to the primary target you can be hit by the thrash — and it really hurts. When the boss is moved over to a new Corpuscle kill it before the boss eats it. Rotting Regurgitation will knock you back and give you a case of Malodorous Miasma. Step to the side to avoid and you’ll make your healers lives easier. They have enough to worry about with the tanks.
Once the devourer is out to lunch you’ll get the spoils of your victory. They include a trinket that gives agility classes their very own Terrible Thrash and a staff that you might want to wash off really well before you actually use it. Maybe someday Hunters will be able to tame this guy like Chimaeron from Blackwing Descent. His lion head is quite ferocious! Here’s the most noteworthy loot:
Vectis
Uldir seems to be more than just a research facility. It also has a plague vault where some of Azeroth’s most deadly contagions have been stored. Unfortunately — as we’ve come to learn — these Titan facilities have a terrible habit to get corrupted from the inside out. Uldir has been no exception. When a sample of G’huun was accidentally combined with a sample of the blood plague that ravaged the Trolls — we got Vectis. He’ll leave you feeling weak and achy all over.
Phase One: As the fight starts Vectis will infect someone with the Omega Vector. This is a nasty disease that does damage over time and then jumps to the person closest to you. There’s no cure, and it leaves you with the Lingering Infection debuff which makes you more susceptible to any further disease damage for the rest of the encounter. There’s no harder hitting phase later, so use Bloodlust when you start. The meat of this fight is about making sure that you’re not spreading the disease to people with high stacks of the lingering infection. If Gestate hits someone near you, move a few yards away so you don’t take damage when the Plague Amalgam spawns. After a minute and a half Vectis transitions to the second phase.
Phase Two: Vectis casts Liquefy and will move to a new location around the room. Don’t stand in the puddle of Vectis you’ll quickly get stacks of the Lingering Infection. He’ll launch several waves of Plague Bombs that need to be soaked by a player, or they’ll spawn a Plague Amalgam. To make things even more exciting he’ll be sending Blood Geysers out in random directions. Getting hit by one of these geysers will give you a stack of Lingering Infection. You’ll have to dodge and soak for 35 seconds before he’ll pop back up, ready to start phase one over again.
Tanks: Keep Vectis where he spawns to give the raid lots of room to spread out behind him. Swap after three stacks of Evolving Affliction, and then every time your debuff falls off. You’ll have to grab the Plague Amalgam spawned by Gestate quickly so that it doesn’t go and chew on your healers. In the second phase make sure that you’re ready to grab any Amalgams that come from unsoaked Plague Bombs. It’s important to try and stay away from anyone with the Omega Vector, and dodge the Blood Geysers in the second phase. Lingering Infection increases the damage you get from Evolving Affliction.
Healers: If you get the Omega Vector try and drop it on a damage so that you can focus on keeping everyone alive. As the fight lasts longer the raid will have more stacks of Lingering Infection. Hopefully, your tanks were good at dodging the geysers so you can focus more on keeping the raid alive. Contagion will pulse and do nature damage to the whole raid — be ready for big hits near the end of the fight.
Damage: Make sure that you’re taking care about who is closest to you when Omega Vector jumps to a new body. Help kill any Amalgams that spawn during the fight. If you’re standing in the Plague Bombs you won’t see any of them in the second phase.
There’s no cure for the common cold, but the judicial application of force appears to be the cure for Vectis. Healers seem to really like his trinket, and he’s got a shield that pairs well with the axe from Fetid Devourer.
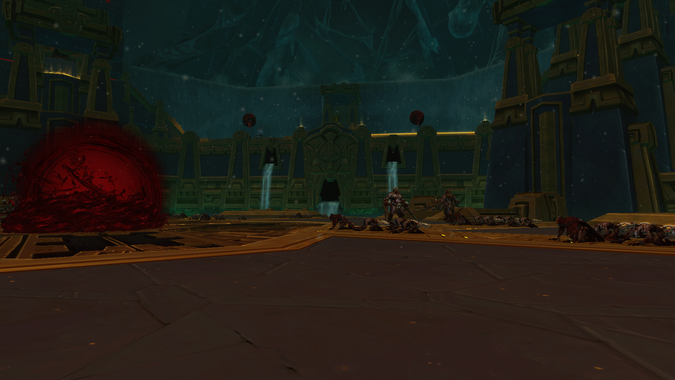
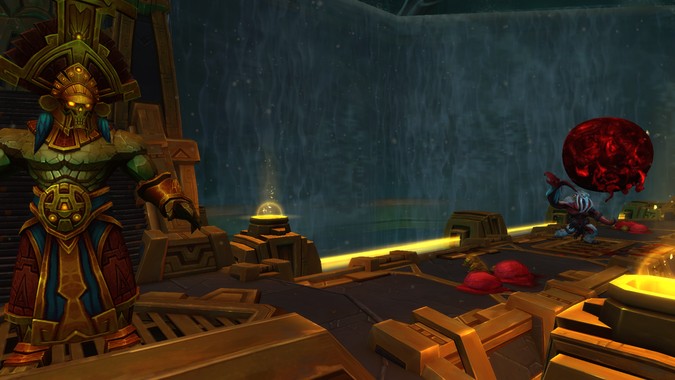
Zul, Reborn
Now that you’ve cleared out the outer ring it’s time to move down into the center of Uldir to deal with that ominous sphere of blood. Slay the horde of Blood Trolls that are spread around it. Watch out for the Nazmani Dominators. They buff their friends when they’re close by, so try to keep them farther away. They also have a leap attack that can knock you off the edge, so be careful about where you stand. Once you’ve put an end to whatever ritual the Blood Trolls are attempting, be ready to come face to face with your good friend Zul. He’s got a brand new body, but the same old bad attitude.
Phase One: For the first phase Zul, Reborn is an add encounter. He’ll spawn three types: Nazmani Crushers, Bloodthirsty Crawgs, and Nazmani Bloodhexers. Tanks can keep them on top of Zul so that you’re getting lots of cleave damage and pushing him to the second phase. The top priority is dealing with the Nazmani Bloodhexers. When their energy bar fills up they’ll summon a blob that attempts to get towards Zul. If the blob reaches him, it’ll use Ichor Transfusion to heal Zul. He’ll also be casting Dark Revelation, a debuff on a random player that does damage to the raid based on how close they are when the debuff expires. Run to the edge of the room so you don’t do excessive damage. When Dark Revelation expires, it will spawn several Minions of Zul which fixate on random members of the raid. If any of these Minions reach their target, they’ll cast a fear on anyone within five yards. At 40% Zul moves into the second phase and you’ll stop getting new adds.
Phase Two: Use Bloodlust to finish up any of the help that Zul has summoned. He starts off by casting Locus of Corruption. You’ll get a small knockback — so watch the edge — and everyone in the raid will get Corrupted Blood until the fight is over. How many stacks of Blood you get depends on how quickly you reached phase two. Have the raid stack up behind him and end him as fast as possible. The biggest thing to watch out for is a new ability called Deathwish. He works some voodoo on a pair of targets and forces them to walk to the edge of the encounter — if they reach the edge they’ll jump off. It’s up to the healers to make sure that they cleanse the Deathwish and save the target. Just be ready for more Minions of Zul to spawn.
Tanks: During the first phase you’ll just be dealing with the various adds that Zul spawns. You can keep the Crushers in the group, just make sure you don’t point them at the raid since they have a cleave. Gather up the Crawgs and Hexers and make it easy for the damage to cleave them all down. Once the second phase begins Zul will need to be tanked, try and keep him in the center so that the players who get Deathwish have further to walk. Rupturing Blood is a cone attack that leaves you with a debuff, after three stacks you’ll want to have the other tank pick him up. When the debuff falls off you’ll drop a large puddle of Blood on the ground, so move to the edge of the arena just as you’re about to drop it. Hurry back, because the other tank will be reaching the third stack just as yours falls off.
Healers: Priests and Shaman can and should use Purge and Mass Dispel to kill the Minions of Zul. This’ll let the damage focus on killing the other adds and get you into the second phase faster. Be ready to top the raid up after the Dark Revelation goes off. In phase two dispel anyone with Deathwish, but remember that Minions will spawn from where they were. Let the player walk closer to the edge before dispelling so you have time to deal with the adds. Keep an eye on the tanks that are running out the debuff, it can hurt so make sure that they’re topped off.
Damage: Prioritize killing the Bloodhexers in the first phase. If you can kill the Bloodhexers quickly enough they won’t get the chance to summon the blobs and you’ll have a much easier time. If you’re a Shaman or a Priest you can use Purge or Mass Dispel to remove the shields from Minions of Zul, which instantly kills them. Mage spellsteal also works– but definitely should not be used. When the shield goes away — you’ll die. Stack with the group in the second phase to make healing easier and finish up any extra things left over.
Zul might’ve come back from the dead once — but with his boss on your hit list — this will probably be the last we see of him. He’s got a pair of daggers: one for stabbing, and one for looking pretty while spell casting. Here’s the lot:
All that’s left in Uldir is to jump into the yawning hole that opens up and take the fight to Mythrax and the Blood God himself. We’ll get to tackle them in two weeks when the final wing opens. Until then — slay well, and don’t let the Crawgs bite!
Please consider supporting our Patreon!
Join the Discussion
Blizzard Watch is a safe space for all readers. By leaving comments on this site you agree to follow our commenting and community guidelines.


