How to conquer the Revisited Horrific Vision of Stormwind
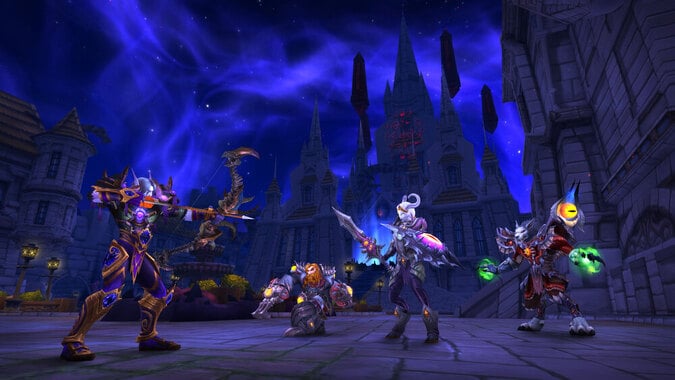
N’Zoth sure has done a number on Stormwind, hasn’t he? In the Stormwind Horrific Vision, once-pristine canals are full of monstrous fish, and tentacles and tumors await anyone unwary enough to try traveling the roads. Lucky for us this is just a potential vision of things to come, not the world we have to live in. However, there are still rewards and power to be gained by venturing deep into the vision, so let’s take a tour of N’zoth’s vision of Stormwind to break down how to reap all the rewards this vision has to offer.
When the Stormwind Horrific Vision is available, you can dive in by visiting Soridormi in Dornogal, just south of the Coreway (marked on your map by an orange eye). You’ll have to do a quest chain starting with Truly Horrific to Behold to unlock Horrific Visions, but after that you can enter at any time. Here’s what you’ll find inside.
Entering the Stormwind Horrific Vision
You start in Cathedral Square. There’s not much of a trick here, just head forward clearing out the minions of N’zoth and trying not to get stunned by the guards standing outside of the Stormwind Cathedral. The enemies you’ll fight in the zone are nice and easy — just pay attention to the Priests and their fear ability.
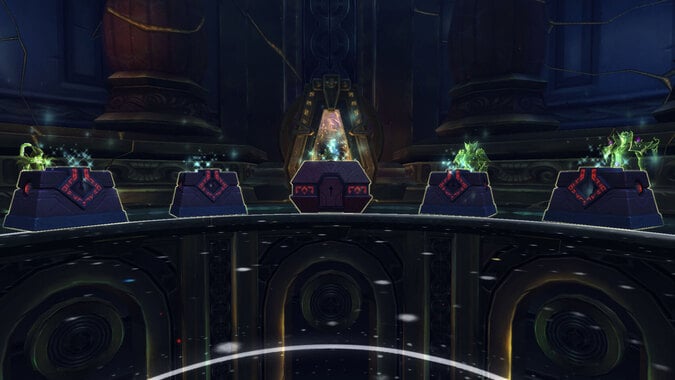
With the low sanity drain happening in the area this is your best chance to look around for the mystery potions. These are colorful potions sprinkled around the entire vision of Stormwind. There are five different colors and each potion has a different effect. Three of them will give you a buff, one of them will give you 100 points of sanity, and the final one is a poison that will drain sanity. Now for the bad news, you have no way of knowing which potion does which until you drink it. The colors randomize their effects at the start of each run, so you have to engage in a little trial and error. Once you figure out what the color does in that run though, it’ll stay doing that for the rest of your visit to the horrific vision.
Keep an eye out for buildings with their doors open — these are often hiding secrets. Sometimes it’s slightly tougher enemies who will give you a buff when you defeat them or an Ethereal who will pay you for finding odd crystals scattered around Stormwind. If you’re paying attention these should be fairly easy to spot in the other districts as well. If you’re in a good position sanity-wise take a moment and poke your head in, you may just get an amazing buff that will help you with the rest of your run.
If you’re a mount hunter, you’ll want to look for the mailbox next to the Righteous Plates store by the fountain; clicking this can spawn a small number of enemies, but the one we’re interested in is the Mail Muncher, who drops the mount of the same name. On the right hand side of the Cathedral, there is also a clickable pile of trash; this nondescript small grey pile of garbage can yield a Nesting Swarmite that drops a mount as well. Finally, with at least one Faceless Mask active, there will be a clickable horseshoe in the grass southeast of the fountain; this is one of four that you will need to eventually spawn an enemy that drops a mount in the Dwarven District area.
If all you want to do is fight Alleria and complete the Horrific Vision as soon as possible (if, for example, this is your first time here), just kill the two guards outside the Cathedral to unblock the entrance, then go inside and fight Alleria, who in this vision has not only given into the whispers of the Void, but handed her son Arator over to it. A guide to fighting her is further below in this guide, but she’s honestly pretty easy, especially since if you fight her at this point she won’t have most of her abilities.
Now that we’ve looked around Cathedral Square, we can venture further into Stormwind.
Corrupted Areas: Dwarven District & Trade District
When you decide that you can press further into the Horrific Vision you have your choice between the Dwarven District or the Trade District. These corrupt areas have a higher sanity drain just for being in them, and you’ll have to complete objectives in each before you can fight the boss and consider the area clear.
In the Dwarven District, you’ll have to place eight different explosive devices to blow up cultist supplies scattered around the zone. Watch out in the middle of the area, there’s a nasty Dark Iron Dwarf named Forge Guard Hurrul who is guarding some forges. You don’t necessarily have to kill him, but it can be tricky to place one of the bombs if you don’t. Just avoid his leap attack and you’ll survive with your sanity intact.
Once all of the bombs have been deployed you’ll have to fight the boss of the area, Therum Deepgorge. Therum has two abilities to watch out for: he has a really gnarly case of bad breath and likes to drop explosives on the ground. You can right-click on the explosives to kick them away, and just sidestep his breath attack. As long as you don’t stand in the fire you’ll be out of the Dwarven District feeling pretty sane.
The Dwarven District is also rife with secrets, especially for mount collectors. The mailbox that can yield the Mail Muncher is in the square at the back near where Hurrul is standing; the clickable pile of garbage that spawns the Nesting Swarmite is here, too. If you have at least one Facelss Mask active, you’ll find that tucked into a corner near the Auction House is an oddly aggressive Voidfire Deathcycle; fight it until it spawns its rider, Haymar the Devout, then defeat both of them to spawn a clickable phantom version of the bike that you can send back to the real world. This starts a scavenger hunt across both Revisited Horrific Visions, requiring a mix of clickable items, items that will appear in end-of-Vision chests, and crafted items that finally rewards the Voidfire Deathcycle. You’ll also want to keep track of the anvil at the Blacksmithing hub in the center of this area; if you’re after the Void-Forged Stallion, this is where you bring the horseshoes to finally spawn the rare that drops it.
Over in the Trade District, you’ll be helping trapped citizens of Stormwind escape from the Old God Inquisition — they never expected it could happen to them. Your first task is to free Halford Wyrmbane from the clutches of Inquisitor Darkspeak. He’s a nasty fellow who has a pair of awful abilities, so the faster you can defeat him the better. First up is his channeled Agonizing Torment, which you can and should interrupt as soon as possible. If you’re playing solo you’ll likely only be able to interrupt one of them as he likes to cast it more often than your interrupt cooldown is back, so be prepared for some sanity loss. His other ability will convert you to his way of thinking. I know that getting an opportunity to kill your friends is usually the best thing ever, but try and remember that the fate of the planet is at stake and resist that urge.
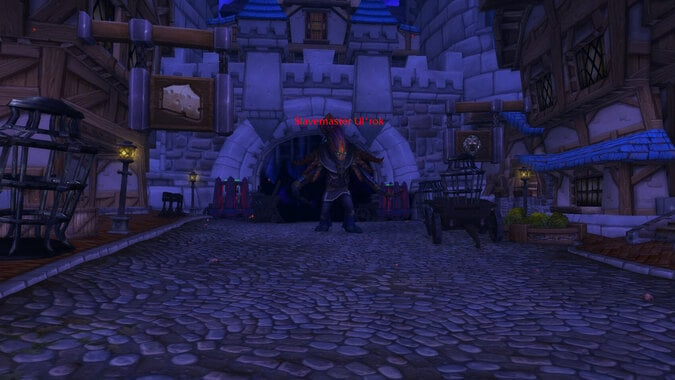
When the Inquisitor dies you’ll have to head one street over to deal with his boss Slavemaster Ul’rok. The Slavemaster has the really obnoxious ability that both silences and drags you towards him. If you touch him while he’s casting the chains you’ll be stunned at take a large amount of sanity loss. Just run against the pull and you’ll be fine. After Ul’rok falls your last step is to quickly run around and free eight prisoners from cages. When everyone is free you’ve completed the area and are ready to move on!
Well, unless you’re hunting for mounts, that is. If you have one Faceless Mask on, there is another of those clickable horseshoes on a patch of grass between the Bank and the Inn. The mailbox that can hold the Mail Muncher is here as well, conveniently. If you’re looking for a clickable pile of trash for the Nesting Swarmite, it’s near Slavemaster Ul’rok by a broken wagon. Last but not least, if you’re wearing two masks or more, you can solve a little puzzle to earn the Void-Scarred Gryphon — but you may not have the items on you, because you have to feed it first!
On the ramp behind Inquisitor Darkspeak that heads up to where the flight point is in the real world, you’ll find two notes and a food bowl. One note indicates that a certain “picky eater” only wants to eat fish, fungus, steak, or spiced meat; the second note indicates whether it wants it raw or cooked. You need to bring one of eight possible food items and place it in the bowl and then shake it to spawn the gryphon, which you can kill to get the mount. If you pick the wrong item, however, it will instead just be eaten by a swarm of starving rats, and you’ll have to try again on a future run — you only get one shot at this per Vision attempt. The foods you want to bring are:
- Fish + Raw: Fresh Fillet
- Fish + Cooked: Skewered Fillet
- Fungus + Raw: Chopped Mycobloom
- Fungus + Cooked: Roasted Mycobloom
- Spiced Meat + Raw: Spiced Meat Stock
- Spiced Meat + Cooked: Simple Stew
- Steak + Raw: Portioned Steak
- Steak + Cooked: Unseasoned Field Steak
Lost Areas: Old Town & the Mage Quarter
The two lost areas of Stormwind will test your mind to its breaking point. Before heading to them I recommend that you have gotten as many upgrades from the bronze dragons’ talent tree as possible, and having the Elite Extermination tribute raised a few levels by killing elites can make a huge difference. Each of these areas has two elite enemies and a boss, so you could earn another 600 sanity back along the way.
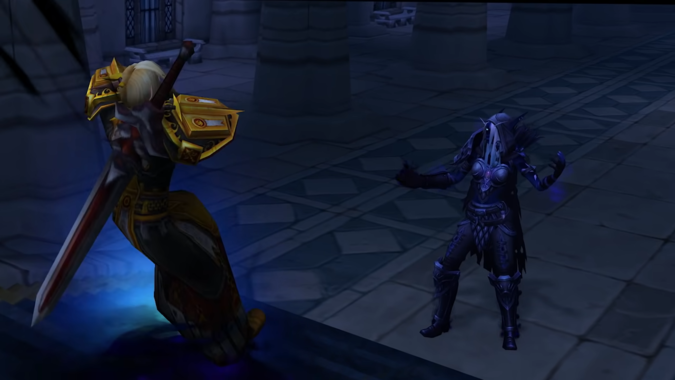
In Old Town, you’ll have to hunt down the two elite enemies to get their keys before you’ll be able to defeat Mathias Shaw. Armsmaster Terenson is the first you’ll find, right near the entrance to the area. Don’t stand in his Blade Flourish, and sidestep his Roaring Blast to prove that you don’t need any help mastering your arms. The second key is held by the Faceless minion known as Alx’kov the Infested. It guards the entrance to Mathias so you’ll have to go through it to get to him. Spread out so you don’t spread the blight it inflicts you with and get out of the Lurking Appendage as soon as possible.
With both keys in your possession, it’s time to see Mathias Shaw. Before you can reach him though, you’ll have to use both keys at the same time. If you’re playing solo, Valeera will help out and match your key turn — but she won’t help if you’re playing in a group. You’ll have to click each pillar at the same time so figure out if you’re turning the key on three, or after three. Shaw himself is relatively straightforward. He’ll randomly disappear and cause three explosions of void damage, standing in those is bad for your health. He’ll also summon Eyes of Chaos, and if you’re facing the eye while it’s channeling Dark Gaze you’ll take sanity damage. Just make sure your back is turned to them and you’ll be fine. Kill Shaw quickly though, because he summons more eyes the longer you’re fighting him.
If you’re looking for the mailbox in Old Town, it’s right by the entrance of SI:7. (If someone mailed me a giant worm, I might decide to turn to the Void too.) If you want the horseshoe for the Void-Forged Stallion, that’s near the entrance of the Pig & Whistle Tavern, lying in the grass. Last but not least, the clickable pile of trash that can have the Swarmite in it is in the middle of the road to the rght of Alx’kov.
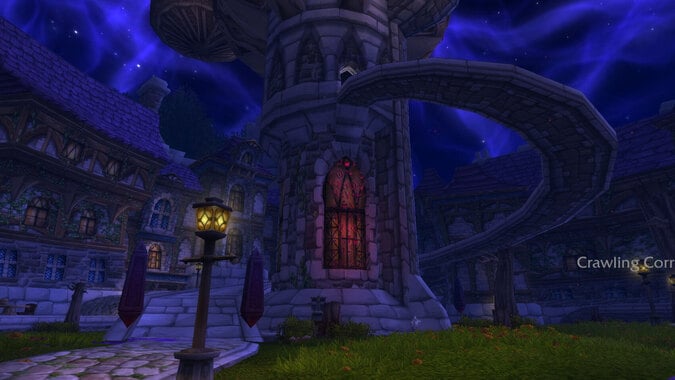
Over in the Mage Quarter, minions of N’zoth are putting all of those portals to good use. You’ll have to find and close five different portals that are scattered around the area. Four of them are guarded by regular enemies, but the fifth is protected by Zardeth of the Black Claw, a fearsome Warlock who will rain fire on you and summon demons. Try not to stand in the fire and interrupt his Shadow Bolt where possible. When all five portals are closed it’s time to head to the Mage Tower in the center of the zone. Keep an eye out for the Boundless Corruption patrolling outside of it. You don’t have to fight it if you’re running low on sanity, just sneak around and head up. But if you really want to cleanse it, don’t stand in the Chaos Breath.
At the top of the tower, you’ll come face to face with Magister Umbric. This is probably the most annoying fight of any of the areas — in either Orgrimmar or Stormwind. Interrupt his channeled Entropic Missles and Tainted Polymorph abilities, and get ready for a lot of running. As his health drops, he’ll teleport to one end of the room, from there he’ll cast Frozen Storm. He does this three times as his health drops, and each time he goes to the opposite side of the room, forcing you to run, dash, or blink your way over to him all over again. You’ll spend the bulk of this fight just running from end to end of the room, but you’ll feel so great when he’s finally defeated.
In the Mage Quarter, the clickable pile of trash is to the left of the district entrance near a balcony. If you’ve been collecting horseshoes, the fourth one you need is to the left of the entrance of Larson Clothiers, lying on the ground. If you’re still hunting the Mail Muncher, the mailbox is outside the Blue Recluse tavern, to the left of the mage tower. Also, if you’re putting together the Faceless Mask of the Nemesis, you’ll see a wanted poster on the right on your way in; clicking this will spawn Hogger, who drops one of two Nemesis Shards. The other is held by Gamon in Orgrimmar, so if you don’t already have it, you’ll have to wait until next week to get it.
Final Boss: Alleria
When you’ve gone as far as you’re going to in the vision of Stormwind, there’s only one thing left to do — stop Alleria Windrunner. After finally succumbing to the whispers of the Void, not even Turalyon and her son Arator were able to sway her from the dark path of N’zoth. If you’ve only spent time in the Cathedral Square area of the vision, Alleria will only have two abilities to watch out for. Darkened Sky will shoot out lots of little void zones; find a safe space to avoid losing sanity. These void areas can overlap leading to larger sanity losses so chose your footing carefully. Her other ability is Void Eruption. She jumps to the middle of the room and channels a large burst of void energy. Make sure you hide behind one of the pillars in the cathedral to avoid taking this hit.
When you finish the other zones in Stormwind you’ll give Alleria a new ability and 10% more health for each zone you complete. With all five up the fight can be hectic, but keep your wits about yourself and remember to hide from the Void Eruption and you’ll be fine. These are her extra abilities:
- Dwarven District: Alleria gains Explosive Ordnance. Remember that you can kick the bombs into more favorable positions before they explode.
- Trade District: Alleria gains Chains of Servitude. She’ll use this at 66% and 33% to draw you towards her. Run from it like you did before and you’ll be fine.
- Old Town: Alleria gains the use of one of the Eyes of Chaos. Keep your back to it while it’s casting Dark Gaze while otherwise ignoring it. It has too much health for killing it to be worthwhile. Luckily, unlike in Old Town, Alleria only ever has one eye assisting her.
- Mage Quarter: Alleria gains Tainted Polymorph. There’s nothing else in the fight to interrupt, so as long as you’re paying attention you should be fine.
Stormwind Horrific Vision Rewards & Secrets
When you’ve finally defeated Alleria it’s time to collect your rewards. Alongside the Displaced Corrupted Mementos you gain, there are a variety of pets and even gear that you can get for completing the vision. The more you finish, the better the gear and the more Mementos you receive. Of extra special note, completing the Old Town area has a chance to award you with the Void Edge weapon illusion. This makes your entire weapon a lovely shade of purple, much like the ghostly blue that you could get from the Shadowlands collectors edition. There are also a lot of pets that can turn up from the end-of-zone reward chests; Valeera’s can drop your own Eye of Chaos, Wyrmbane’s can contain a Void-Scarred Parrot, Alleria’s can contain a Swirling Black Bottle or a Voidwoven Cat Collar, Magister Umbric can reward a Void-Scarred Hare, and Kelsey Steelspark’s chest can contain a box labeled “Void Rat Inside.” Wonder what’s in there?
But not all of the rewards come from the end of the run. There are a few things to watch out for while you’re running around Stormwind. In Cathedral Square you can sometimes find a Void-Touched Skull on the ground near those extremely creepy orphans. It’ll be near the ones that are playing catch while standing over the body of their Matron. Just click on it and you’ll be the proud new owner of someone’s skull.
The other person to watch out for is Craggle Wobbletop the toy vendor. He’s been having a rough go of things since N’Zoth took over, but luckily he has his trusty robot companions to protect him. You’ll find him patrolling along the canals outside of the Trade District. If you try and fight him and his robots at the same time you’re going to have problems. He heals his robots very quickly, and one of them gives him a shield that you won’t be able to break. However, he hates the sound of Toy Train sets — as we all do. If you drop your Toy Train on the ground near him, he’ll have to root around in his bags looking for his Wind-up Train Wrecker. This gives you the opportunity to take care of his robot helpers while he’s distracted. He has a chance to drop the Overly Sensitive Void Spectacles that make all critters in the game look like tiny minions of N’Zoth.
If you don’t have a Toy Train, you can use some form of crowd control to lock Craggle in place, and then drag his robot companions away from him. You’ll have to go 40 yards for his aura to drop off of them, but be careful you don’t go 45 yards. They’ll evade and run back to his side.
Remember, you don’t have to do everything
There’s a lot going on in the Horrific Vision of Stormwind, remember that sometimes it’s better to play it safe and head for Alleria sooner rather than later. But there can be some big rewards for those who take risks.
Good luck — and try not to go too crazy!
Originally published March 18, 2020. Updated June 3, 2025, with contributions by Phil Ulrich
Please consider supporting our Patreon!
Join the Discussion
Blizzard Watch is a safe space for all readers. By leaving comments on this site you agree to follow our commenting and community guidelines.


