Lightsworn: Bringing the Light to Nightspire and Betrayer’s Rise
The Nighthold is a big place, but it’s almost clear of those pesky demons, uppity elves, and grandstanding warlocks. Just two wings await us — the Nightspire, where Tichondrius, Krosus, and Grand Magistrix Elisande can be found, and Betrayer’s Rise, where we can finally put an end to this alternate-timeline Gul’dan. First the peak of Hellfire Citadel, now atop the highest tower in Suramar City — he really does like his heights, doesn’t he?

Tichondrius
We’ll spend much of our time in this encounter pouring steady healing into players afflicted with Carrion Plague. Be sure to give them a little extra attention after Seeker Swarm. If you took Beacon of Faith, you may want to occasionally swap one or even both Beacons onto plagued players, as tank damage is fairly light in this fight.
Brand of Argus (on Heroic difficulty or higher) is a troublesome ability that demands both coordination and strong healing. We should use Divine Protection and Knight of the Silver Hand whenever a Brand is being detonated, and there’s certainly nothing wrong with hitting Divine Shield when helping to trigger one.
The rest of this fight is pretty straightforward for us. Hide behind Fel Spires to avoid getting nuked by Echoes of the Void, and spot-heal players who haven’t quite figured out this advanced tactic. And when Tichondrius casts Illusionary Night, simply dodge the giant laser and leave the Essence of Night buffs for the DPS. If there’s any left after the DPS have grabbed them, then sure, go ahead and get one — they increase healing done and mana regeneration — but in general, give them to the DPS first.
Finally, move away from other players in the last phase, so if you receive Burning Soul you can dispel it immediately. It drains mana every second, so it’s better to already be in a safe place to dispel/detonate it, rather than let it drain you dry while you’re running out.
Tichondrius has our tier shoulders, a good cloak, and a decent ring.
Krosus
My raid calls this big fella Space Jam, because of his love of SLAMS, his giant fel basketball, and his penchant for dunking (players into lethal poisonous water).
Krosus will occasionally shoot a huge fel laser down either side of the bridge. It’s very clearly telegraphed and no one should be getting hit by these, so when people inevitably get hit by them, try not to scream too loudly.
Every 30 seconds, Krosus will come on and Slam, dealing heavy physical damage to the raid. During Slam, tanks have to stand under Krosus’ fists and will take extra damage, so be ready to top them up before and after the impact. It’s very bad if one of Krosus’ fists goes unsoaked, as that means the raid will take additional, possibly-fatal damage. However, we can save the day and take their place by using Divine Shield or Blessing of Protection. (Or we can just BoP a low-health tank so they can survive the Slam.) It’s okay to use healing cooldowns on early Slams, but later on in the fight it’s more important to save them for Orb of Destruction.
Oh, and Krosus also shatters the front section of the bridge on every third Slam, so…don’t be standing there when this happens.
When Krosus tosses Burning Pitch onto the bridge, spread out to help intercept them. The Burning Embers that spawn from uncaught Burning Pitch pools will spam Felblast, which can quickly overwhelm the raid if not quickly dealt with. Be ready for potential damage spikes if more than a few Embers appear.
Lastly, Orb of Destruction (the fel basketball) is a nasty, nasty piece of work. It’s not a huge threat early on, when the player targeted can run far away and minimize the proximity-based raid damage. However, by the end of the fight most of the bridge will be gone and whoever is targeted won’t have much space, jammed into the tiny remaining section that’s left. We definitely want to save our stronger defensive and mitigation cooldowns for these close-range Orbs. (Devotion Aura + Aura Mastery is a godsend here.)
This big burly boy only has three potential drops for us, but they’re all good: our tier chest, a nice neck piece, and a good set of hands.
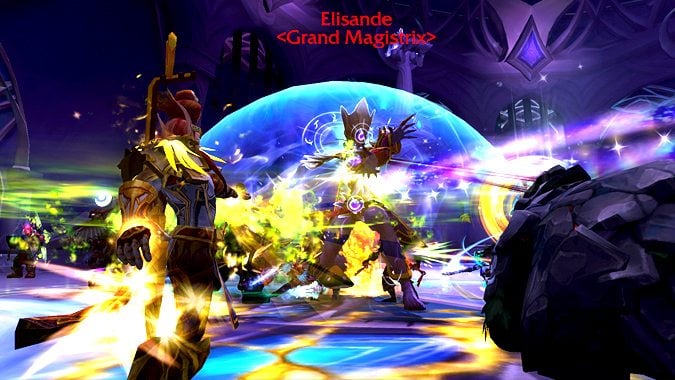
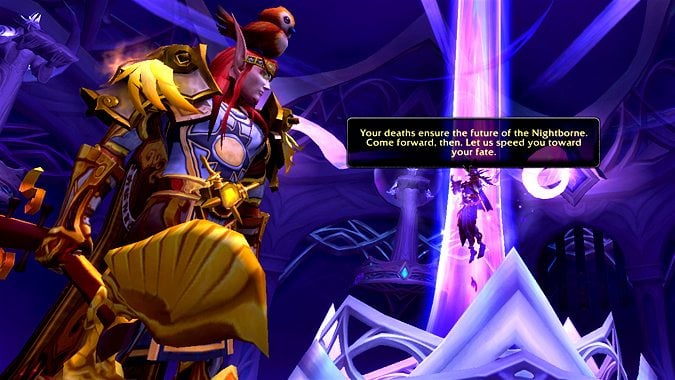
Grand Magistrix Elisande
As much as I love time magic showing up again as a mechanic and recurring theme, this fight — which you essentially have to do three times — ends up feeling pretty long.
When Elisande’s pink elementals die, they leave behind pink Fast Time bubbles. Get in these! Conversely, when her blue elementals die, they leave behind blue Slow Time bubbles. For obvious reasons, we typically want to avoid these. However, the slow bubbles do have a few benefits — stepping into a slow bubble will remove any existing Fast Time buff, allowing us to then pick up the fast buff again at its full duration. We’ll also want to position ourselves so a Slow Time bubble is between us and the outer wall, so Elisande’s Arcanetic Rings will hit the slow bubble and leave a gap of safety. It’s important to wait for this gap to appear, as running through the rings will inflict a huge, potentially-fatal amount of damage.
When Elisande casts Spanning Singularity, players should stand in the resulting pools of energy to shrink them and eventually cause them to disappear. These players will need dedicated healing, so be on the lookout for pool-soakers, or pop Divine Protection and hop in yourself. You shouldn’t do this if you have the Fast Time buff, though, as it also causes the pool’s damage to tick at an increased rate.
Elisande will gain a few more abilities as the fight goes on, but they’re easily dealt with. Catch the Epocheric Orbs that fall from the sky, aim Delphuric Beams away from other players, and continue to soak the Spanning Singularity pools. We’ll want to focus heals on players with Permeliative Torment, and players will want to use the fast/slow bubbles to stagger the explosions from Conflexive Burst. Don’t hesitate to use throughput cooldowns like Avenging Wrath or Holy Avenger to quickly heal the raid up between explosions.
Elisande drops our nicely-itemized tier helm, some good bracers and a quality belt, as well as an interesting trinket that actually makes our next Holy Light generate mana instead of costing it! Pretty fun.

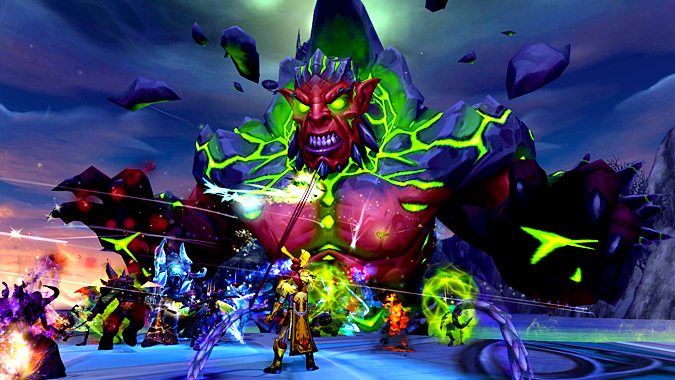
Gul’dan
The O.G. Warlock himself, Gul’dan will really push our healing mettle to our limits! There is a LOT of damage on this fight, and quite a few abilities to deal with.
The first thing we’ll notice is an extra action button, which we can use to channel a fire-absorbing Scattering Field. We can use this to mitigate some of Gul’dan’s fire attacks, such as Liquid Hellfire, Empowered Bonds of Fel, and Empowered Eye of Gul’dan.
When the fight starts, we’ll have to defeat three demon lackeys before Gul’dan joins the party. Scattering Field his Liquid Hellfires and move out of Fel Efflux, another enormous fel laser. When his demon lieutenants are dead, move in close to Gul’dan — he does a small knockback when he starts the next phase, and you don’t want to get booped off the edge!
Gul’dan’s Bonds of Fel slow players, deal ticking damage, and when the players move far enough to break their chain, they explode in fire damage. Rough stuff. This fire damage is split among nearby players, however, so be sure to go hug chained players and share the fire damage. We can Scattering Field the chain damage, but in my experience it’s more useful to save it for one of Gul’dan’s more lethal abilities. Additionally, we can Blessing of Freedom chained players to help them break their chains easier, but if they don’t have nearby players when the chain breaks they WILL die! So be careful with this. Finally, we can Divine Shield and break a Bonds of Fel solo if we need to.
Gul’dan’s Eye of Gul’dan adds aren’t anything we have to really worry about — simply spread out a bit. However, when these become Empowered, they deal huge amounts of fire damage, so Scattering Field can be a major help in surviving them.
Finally, we’ll want to heal through Gul’dan’s Soul Siphon debuffs, run Flames of Sargeras out of the raid, step into the central Well of Souls to absorb a soul to reduce the raidwide damage of Black Harvest, and run away from Storm of the Destroyer. Major cooldowns are obviously useful for Black Harvest, but I’ve found that late Empowered Eyes of Gul’dan can be just as bad.
After all that, Gul’dan can surrender our tier pants, and…two Haste/Mastery pieces. (Breastplate of the Remembered King and Ring of the Scoured Clan.) Thanks for nothing, Gul’dan.

Overall, Nighthold’s been one of my favorite raids in ages. Beautiful, an interesting mix of bosses, great story & lore relevance — it’s got it all. Here’s hoping 7.2’s Tomb of Sargeras is just as fun!
Please consider supporting our Patreon!
Join the Discussion
Blizzard Watch is a safe space for all readers. By leaving comments on this site you agree to follow our commenting and community guidelines.


