Bosses in Five Seconds: A quick guide to killing every boss in Ny’alotha wing 2
The second wing of Ny’alotha opens in the Raid Finder today. As with our previous guide to the first wing (Wrathion, Skitra, and Maut), this article assumes you are doing the Looking for Raid or Normal versions of the fight. When appropriate, I’ll toss in some notes concerning the Heroic versions and/or things that specific players will benefit from knowing.
I’ve tried to keep this guide as simple as possible, but unfortunately the second wing of Ny’alotha is definitely more mechanically intense than the first wing. However, this should be enough to keep you from ugly death… unless you let Kevin play soccer on Xanesh. Don’t do that.
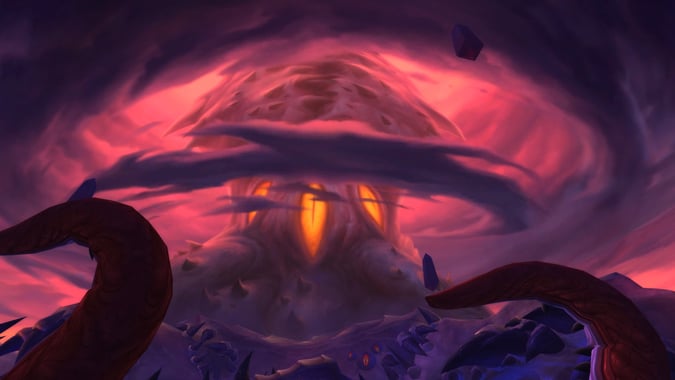
Dark Inquisitor Xanesh
For the most part, Dark Inquisitor is a tank-and-spank with a healthy dose of Avoid Bad Things. DPS the boss, stay out of Torment (big dark triangles on the ground; you’ll have time to move out of it), and stay away from the copies of people summoned by Soul Flay. The whole raid should be moving to avoid these, so just follow the tank. If you aren’t on the Void Ritual teams, that’s the entire encounter for you.
Soccer
The hiccup is the “soccer” mechanic. Periodically, Xanesh will cast Void Ritual, which summons three circles on the ground around her. Three players must stand in these circles, becoming Voidwoken. Your entire job if you are Voidwoken is to help guide a Void Orb into a “goal.” A dark orb will spawn on one side of the room and will need to be “kicked” into a goal on the other side, which only the Voidwoken players can do. The orb moves very slowly and you have time to look ahead and help kick it in the right direction; it always goes in the direction your character is facing when you touch it.
The bad news: If the orb hits Azshara (or on Heroic/Mythic, the obelisks not-so-conveniently placed around the room), it will explode and do AOE damage to the raid. Each failure increases the damage, to the point where you only get one screw-up on Heroic before the raid is toast. (Normal is a little more lenient. Mythic does not afford you even one.)
The soccer mechanic is difficult to describe in text, and I’d recommend taking a look at the Fatboss guide to the encounter to get a handle on what it looks like. We haven’t seen the LFR version of this encounter yet, so we don’t know how Void Ritual is going to work there. It’s a very PUG-unfriendly mechanic, so my guess would be that Blizzard’s nerfed the number of people required to do it, nerfed the damage if/when it fails, or may have removed it entirely.
Tanks
Tanks should taunt after each stack of Abyssal Strike. As this causes a small knockback, make sure you’re not going to get belted off the platform or into something bad (e.g., Azshara, obelisks).

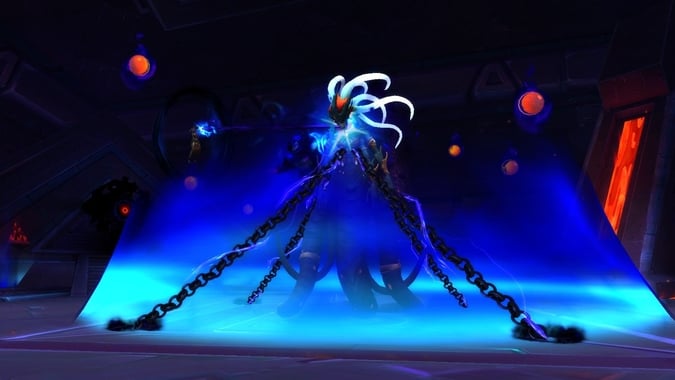
Vexiona
Another dragon fight! You don’t need to worry about a tail swipe here, but stay out from in front of her (unless you’re the tank). If you get Encroaching Shadows (a dark circle around you), run away and drop it outside of the raid. Kill adds and never be in front of the Void Ascendant (again, unless you’re the tank). The picture above is what it looks like when a Void Ascendant is casting Annihilation on this fight. If you are not the tank and a giant black beam is suddenly filling your screen, rest assured you are standing in the wrong place.
During phase two, run away from whichever part of the room Vexiona is going to breathe on. She prefers whichever lane has the most players and telegraphs where she’s going in advance; just look up to see where she’s going.
During phase three, continue to drop Encroaching Shadows away from the raid, and run away from Vexiona when she casts Heart of Darkness (a big shimmering AOE around her). Otherwise, stay stacked on her side to combat Terrifying Presence. On Heroic, help soak Desolation.
Tanks
There are multiple strategies for tanking this fight, but in a PUG, the simplest is to keep one tank on Vexiona full-time and the other tank getting adds and bringing them to the boss for cleave. Each Void Ascendant (the big purple guys) drops a Gift of the Void, which is a clickable dark orb. This gives you an extra action button that does two things: It channels a massive beam of void energy directly in front of you doing hilarious amounts of damage to everything in its path, and it clears your stacks of Void Corruption. The Vexiona tank should pick it up and use it clear stacks, making sure not to hit raid members. If you’re the add tank, make sure each Void Ascendant is never facing the raid and that it always dies somewhere the Vexiona tank can reach easily.
The alternative is to taunt-swap on Vexiona after each Ascendant dies. One tank taunts the boss; the other grabs a Gift, picks up the next set of adds, and uses the Gift both to kill the adds (again, making sure not to hit the raid) and reset stacks.
No additional Void Ascendants will spawn in phase three, so make sure that both tanks have reset stacks going into it. If raid DPS is poor, there’s a real possibility that the active Vexiona tank will die at some point to unhealable damage, so the second tank should be prepared to taunt quickly.
Healers
Both tanks take heavy damage on this fight. Whoever has Vexiona will take stacking damage from Void Corruption until they’re able to clear it, and the add tank will periodically get hit by the massive Annihilation beam when an Ascendant is active. Dispelling the add tank roughly halfway through the Annihilation cast should keep the damage from stacking too high.
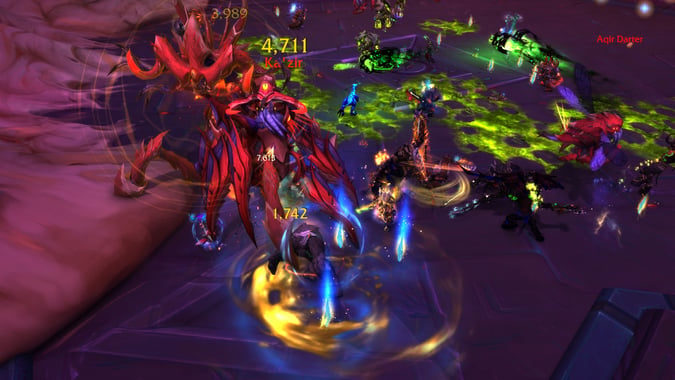
The Hivemind
This fight is mostly about add control and staying out of bad. Kill the adds when they come out (they should have priority), stay away from other players when Echoing Void is cast (small dark circles around you), and avoid the Acidic Aqir (the small greenish bugs that will roll from one side of the room to the other). Otherwise, the bosses do not share a health pool and must die within 10 seconds of each other.
Tanks
When Tek’ris has control, the bosses need to be tanked together: When Ka’zir has control, they need to be tanked apart. Tek’ris should be faced away from the raid at all times, and the Tek’ris tank should side-step the Nullification Blast (a frontal cone). The Ka’zir tank has primary responsibility for interrupting Mind-Numbing Nova but may occasionally need help when timers get tight and/or when the boss has to be moved.
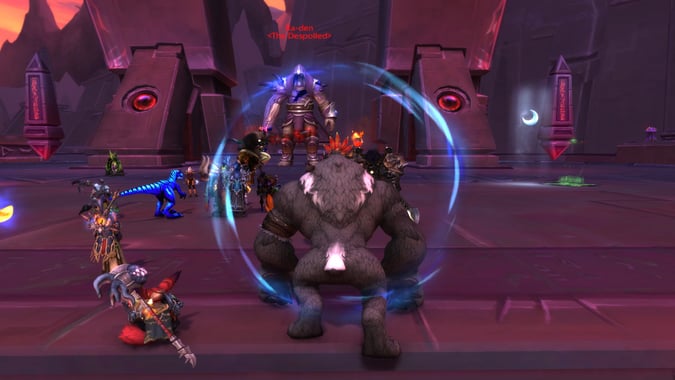
Ra-den
Our old friend (not really) from Throne of Thunder! On phase one, kill one of the orbs (either vita or void) trying to reach him. The next time they spawn, kill the other orb. You should alternate Vita/Void orb kills for the length of this phase. DPS down whatever add spawns.
When Ra-den is empowered by the Void, you can help by standing in the place where Void Missile is going to hit (a small dark circle with a blue border); only one player needs to do this for each circle and should not do it again until their debuff drops off. Stack on the player with Void Collapse (a large transparent circle with a blue border).
When Ra-den is empowered by Vita, run out of the raid if you get targeted by Unstable Vita. This is another mechanic that is very PUG-unfriendly and benefits from a quick video, though on LFR the damage is unlikely to be serious if it’s present at all.
Save big cooldowns and potions for phase two. Run out of big purple circles on the ground, and if you get Charged Bonds, run away from the other player who has it.
Tanks
On phase one, taunt after each Nullifying Strike. If you’re not actively tanking, you can help kill orbs and soak a Void Missile (which will occasionally hit behind the tanks). However, do not assist with Void Collapse as it reduces your healing taken. Taunt adds over to the boss for cleave.
On phase two, taunt immediately after the other tank gets Decaying Strike. While you are the active tank and a Decaying Strike is approaching, you may want to let active mitigation/self-healing drop to ensure you’re not at high health when it hits.
Healers
On phase two, the amount of damage taken by each tank after a Decaying Strike is amplified by how much health they had at the time of the hit. When a Strike is approaching, don’t keep the active tank topped off; they’ll need big heals after it hits and not before.
And that’s it for Ny’alotha Wing 2! Hopefully this has helped you a bit, and if you have any specific recommendations for any of the encounters, be sure to drop a comment below!
Please consider supporting our Patreon!
Join the Discussion
Blizzard Watch is a safe space for all readers. By leaving comments on this site you agree to follow our commenting and community guidelines.


