Uldir LFR Bosses in 5 seconds: Mythrax the Unraveler and G’huun the Blood God
The Heart of Corruption wing of LFR went live yesterday — we’ve breached the Halls of Containment, and endured the Crimson Descent, and now we’re ready to take the fight to G’huun. Time to end his plague for good. Luckily, there’s no trash to clear in this wing (Zul was greedy and hoarded it all).
We’ll hit the major mechanics and let you know what juicy weapons drop from each boss, so you can be prepared and ready to roll.

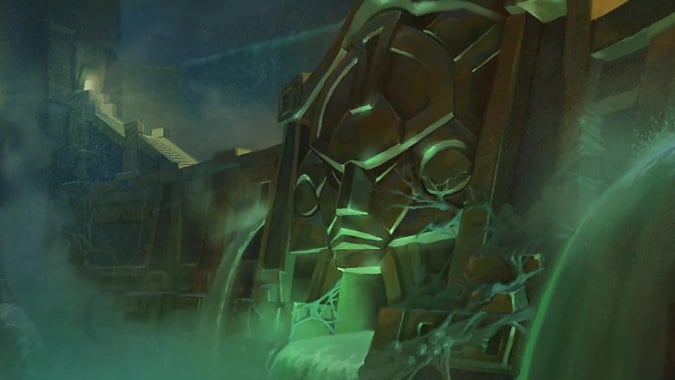
Mythrax the Unraveler
Mythrax starts at the bottom of the pit you spawn next to. His main mechanic involves you losing maximum health if you get hit by any of his abilities. Luckily, as you gain stacks of the debuff, you’ll spawn orbs that will restore your health.
Phase One: As you jump into the pit, you’ll want to spread out so too many of you don’t get caught in his Oblivion Spheres. They’ll mind control you until despawning. They can’t always be avoided, so you’ll need to be knocked out of their radius by any damage done to you by other players. You’ll also have to watch out for Imminent Ruin. Get out of the group, but don’t worry about moving too far. The spell is much weaker on LFR and only does damage to people within 12 yards of you. Spreading out also helps you avoid his giant laser beam. At 66% and 33% Mythrax will move into Phase Two.
Phase Two: Mythrax moves to the center of the room and becomes nigh invulnerable. He’ll stand there and cast his Obliteration Blast periodically while the raid deals with a pair of N’raqi Destroyers. Tanks will keep these apart so they don’t take reduced damage. Once the Destroyers are down, Mythrax can be damaged again. The phase lasts for about a minute, and then you go back into Phase One.
Tanks: Make sure not to point Mythrax at the group, his Essence Shear ability will cleave. Swap after each shear, and be ready to grab the Destroyers in Phase Two. As long as you keep them split up and interrupted, the raid will bring them down quickly, allowing you to resume damage on Mythrax.
Healers: As long as the raid is spreading out, there won’t be a lot of damage. Make sure to keep an eye on players who let their stacks of Annihilation get too high, but otherwise, this is a pretty easy fight for you.
Damage: Spread out so multiple people aren’t caught in each Oblivion Sphere. If you see a player mind controlled, throw a couple of attacks their way to help them out of the sphere’s radius. Don’t go in if you’re a melee, as you’ll just get mind-controlled too. During the second phase help the tanks with their adds.
Mythrax isn’t a very hard puzzle to unravel. When you’ve shown him that you have a right to exist, you can take his stuff. The pair of swords are nice, and this is the only trinket in the raid that has a straight survival effect for tanks. Check ’em out:
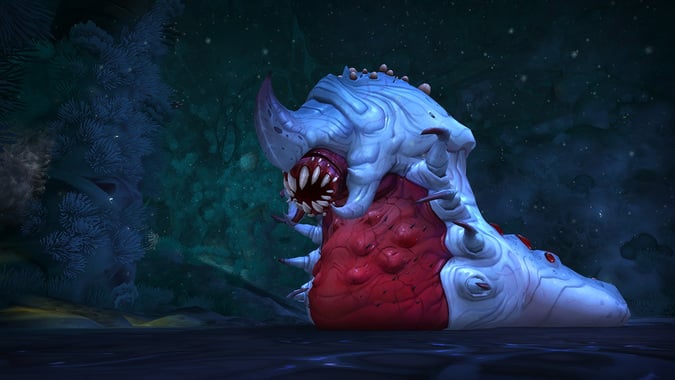
G’huun the Blood God
Finally, we get to G’huun, the force that’s been making life difficult for all of Zandalar. G’huun didn’t choose the best place to make his lair — he’s right at the heart of the Reorigination Array that sits in Uldir. We’ll use that to our advantage over the first two phases, running Power matrix orbs to power the array, and unleash powerful Reorigination Blasts of Titan energy. Unfortunately, they don’t quite make them like they used to — so we’ll have to beat G’huun the old fashioned way in the end.
Phase One: When we start the encounter, G’huun is hidden in the wall. He will regenerate any damage inflicted and spawns a legion of tentacles and plague monstrosities to deal with. Make sure that you’re interrupting and stunning the Cyclopean Terrors to lower the damage the raid is taking. Standing next to the Dark Young will give you a damage buff called Dark Bargain. Be careful not to get a second stack of it, as you’ll be swayed to G’huuns side and need to be killed (Editor’s note: The MC effect was hotfixed out of LFR). Periodically, he’ll afflict players with the Explosive Corruption debuff. After a few seconds, you’ll drop a patch of disease on the ground and launch a trio of pestilence orbs into the room. Try to drop the puddles on the edges of the room to make it easier to move around.
The fight starts with an Orb on the left side — you’ll need to designate players to run that orb to the matrix at the back of the room. After three orbs have been inserted, there will be a Reorigination Blast that damages everything in the room. It’s a good idea to stack up so the healers have an easier time keeping you alive.
Phase Two: After the first Reorgination Blast goes off, G’huun will emerge from the wall. He continues to place Explosive Corruption on players, but no longer summons in the tentacles from the first phase. The new ability to deal with is called Wave of Corruption, which will apply Putrid Blood to everyone in the raid. Putrid Blood doesn’t do much damage, but it does stack higher and lasts forever. The only way to clear it is to stand with someone being hit by Blood Feast, which places a large red circle on the player. After eight seconds, the circle will remove any Putrid Blood on players inside, but it will also spawn a Gibbering Horror that needs to be killed.
Just like in Phase One, you’ll have to run three Power Orbs to the matrix to unleash a Reorigination Blast. G’huun will take double damage during the blast, so be ready with some cooldowns. When he’s brought to 20%, the fight moves into the final phase.
Phase Three: As G’huun hits the final phase, he’ll trigger a roof collapse that breaks the Reorigination Array. It also causes three large cave-ins. Stay away from the circles to take less damage, then group up behind him. He gets one new ability: Gaze of G’huun, make sure that you turn away so you don’t get frightened by his gross face. He’ll continue with the Wave of Corruption and Explosive Corruption abilities from the last phase but will no longer cast Blood Feast. Any stacks of Putrid Blood are permanent now — so kill him quickly.
Orb Runners: Anyone can be a runner. Your job in the first two phases is to take orbs to the matrix. The longer you’re holding onto the orb, the slower you move, so you’ll need a team of two or three players. Every time you insert an orb, the next one will spawn on the opposite side of the room. Movement abilities such as Warlock Gateways and Heroic Leaps can be really helpful in getting closer to the socket. Just make sure that if you’re tossing the orb to the next player farther along, they’re ready to catch it.
Tanks: In the first phase, make sure that you’re dragging the large add around to the tentacles so that damage can help cleave. In the second and third phases, keep G’huun in the middle of the room and be ready to run out with Explosive Corruption. This works pretty well as a tank-swap mechanic — just wait for him to start casting and taunt. The Gibbering Horror needs to be tanked with G’huun so that it dies quickly.
Healers: Every time a Reorgination Blast is triggered, there will be large pulses of damage. Hopefully, the raid has stacked up to make your healing easier. As stacks of Putrid Blood get higher, you’ll have to be working harder to keep the raid alive. The final phase will be pretty chaotic by the end, so try to save bigger cooldowns for then.
Damage: Make everything dead! Keep the tentacles in the first phase interrupted and stunned to make your healers’ lives easier. In the second phase, make sure you’re clearing your Putrid Blood and dropping Explosive Corruption out of the group. When Reorgination blast goes off, G’huun takes double damage, so help push him down to 20%. For the final phase, try to save defensive cooldowns for when your Putrid Blood stacks get high. Definitely turn around so you don’t get scared by Gaze of G’huun. A scared player does no damage.
Once you’ve squished G’huun, you can take a few souvenirs to remember your time spent in the diseased halls of Uldir. Who doesn’t want to remember that? He drops a trinket that can summon a copy of one of his tentacles to damage your enemies, in the grand tradition of Old God bosses. He also has a pocket-sized Reorigination blaster for hunters! Phenomenal power to reshape the world, in the palm of your hands!
Hopefully, you’ve gotten everything you wanted out of Uldir. It’s a great raid with lots of fun boss fights. Have fun and good luck!
Please consider supporting our Patreon!
Join the Discussion
Blizzard Watch is a safe space for all readers. By leaving comments on this site you agree to follow our commenting and community guidelines.


