Bosses in Five Seconds: A quick guide to killing every boss in Ny’alotha wing 3

Who’s ready for Wing 3 of Ny’alotha LFR?! Shad’har, Drest’agath, and Il’gynoth are up next! They’re more straightforward to explain than their cohorts in Wing 2, so if you’ve got an abundance of people in the raid who haven’t seen them before, you can get them up to speed quickly.
As with our previous articles on bosses in Wing 1 (Wrathion, Maut, and Skitra) and Wing 2 (Xanesh, Vexiona, Hivemind, and Ra-den), this guide assumes you are doing the LFR or Normal versions of the encounters. Where appropriate, I’ve slipped in a few notes regarding the Heroic version of the encounters, and have also included some pointers for tanks and healers.
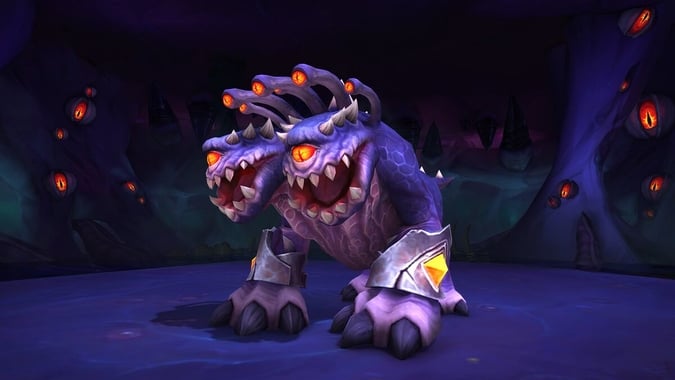
Shad’har the Insatiable
Shad’har (or “dog boss”) is fairly simple. Run out of his frontal cone breath. If you get Living Miasma (a reddish-pink globule that will fixate on a random player — you’ll see a red line between them), run away from it and away from other players. Stay out of the purple swirlies and green stuff on the ground. On phase two, help soak the purple orbs.
Tanks
Shad’har has a taunt-swapping mechanic similar to Grong. Make sure that the same tank never takes both Crush and Dissolve. When one tank takes two stacks of Crush, the other should taunt off.
On phase three, make sure the raid has enough space by moving Shad’har away from the growing ground effect.
Healers
Players who get Debilitating Spit will need additional attention. Inexperienced raids often take a lot of damage from mishandling Living Miasma, so be ready if you see that little globule making a beeline for the clump of melee players or wherever.
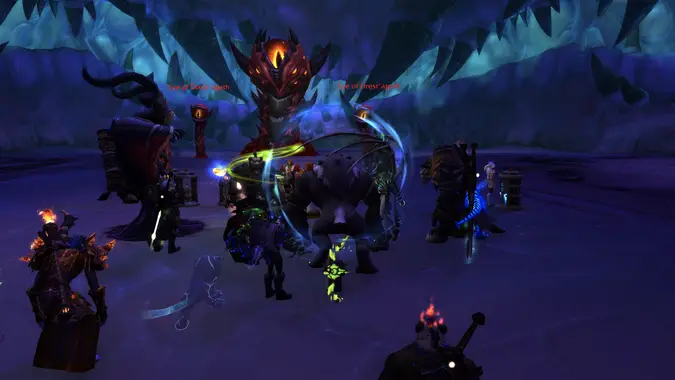
Drest’agath
Drest’agath himself can’t really be damaged most of the time due to an insane self-healing buff, and this fight is entirely about managing adds. When adds die, they drop dark blue-black orbs on the ground. Running over them (just one — don’t get greedy!) gives you the ability to deal damage to Drest that he can’t heal back. The fight mostly boils down to killing adds, getting the buff, damaging Drest as long as you’ve got that up, and then going back to killing adds once it falls off. Stay out of Entropic Crash (a big circle around Drest) when he casts it, and stay out of Void Glare (a frontal beam that will target a random player).
A few mechanics change substantively on heroic. Melee DPS should prioritize the big fat tentacles because they can’t be damaged outside a cloud they toss out. A healer should also accompany them as the cloud causes ticking damage to everyone in it. Ranged DPS should prioritize the other adds, including the Maws (which should not be killed by melee due to the 10-yard aura Mutterings of Betrayal) and the Eyes. Interrupt the Eyes when they cast Mind Flay. Due to a debuff you gain after picking up an orb, you won’t be able to keep picking them up, so expect to spend most of this fight killing adds rather than the boss.
Tanks
Drest will periodically put a debuff on the active tank called Volatile Seed (which will put a big red circle around your character). The other tank should taunt, and the tank with the debuff should immediately run to go debuff an add (priority should go to the big tentacles as they have the most health, and secondarily the Maws). When Volatile Seed expires, it leaves a debuff on anything it hits increasing damage taken by 60% for 15 seconds. Try to make sure the circle around your character is solely over adds and not over any of your fellow players when it expires. Adds are occasionally close enough to each other that you can get more than one with the same Volatile Seed.
One tank always needs to be in range of Drest, barring when you run out for Entropic Crash. Your co-tank will get Volatile Seed fairly quickly after your own debuff has expired, so don’t waste time returning to the boss.
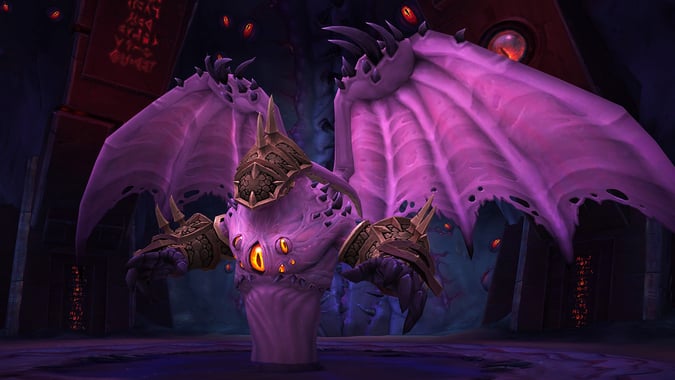
Il’gynoth
Because the LFR version of this encounter hasn’t yet gone live, I’m not sure how many of its mechanics are going to be preserved. Accordingly, this is written more with an eye toward normal/heroic: LFR will almost certainly ease or eliminate a few things.
Il’gynoth cycles between two phases. During phase one, stay away from the tanks (he has a frontal beam attack). If you get Corruptor’s Gaze (an swirly patch on the ground, followed by a dark beam that follows you around), run it away from the raid. (It’s also possible to run it in a small circle to keep it clumped; just try not to do this in melee.)
On phase two, prioritize one Organ of Corruption to be killed and assign players to baby-sit the others. (Nearly all raids start with the Organ to your left as you enter the room, and then move clockwise for each successive phase two.) Interrupt the Pumping Blood cast; it happens frequently enough that you’ll need two people assigned to each Organ. If you get Cursed Blood (a big orange circle around you), stay away from other people. Kill adds.
Il’gynoth will re-enter phase one the moment an Organ dies. They stay dead permanently, but each dead Organ continually spawns adds for the rest of the encounter. They fixate random players and can be crowd-controlled but not tanked. The final phase one is effectively a race against time to kill Il’gynoth before the raid is overwhelmed.
On heroic, Il’gynoth will also cast Touch of the Corruptor during phase one, mind-controlling players. Stay away from them (roots/snares help tremendously here) and DPS them down to 30% to break them out of it. Mind-controlled players are the top priority, because if they’re not dealt with swiftly, they can chain mind control to the rest of the raid.
Tanks
If you aren’t the active tank, stay out from in front of him. Taunt when your co-tank gets two stacks of Eye of N’Zoth. The second hit does heavy damage. You should cooldown or trinket through the second cast as much as possible, especially as the encounter advances and healers are under increasing stress.
Make sure nobody’s running Corruptor’s Gaze (the dark blue-black ground effect) into places where you’re going to be tanking. If you step into it, you’re immediately silenced and lose aggro.
Tanks are typically assigned to one of the Organs of Corruption during phase two to keep it interrupted.
If you’re not actively tanking Il’gynoth, it helps the raid tremendously to assist with crowd control and damage on adds. They can’t be tanked, but stuns/slows/snares are extremely helpful. On heroic, the same is true of mind-controlled players, but do not get in range of them: A mind-controlled tank often means a wipe. Crowd control that can be placed from range like Ring of Peace and Ursol’s Vortex are useful here.
Healers
Raid damage ramps up as the encounter goes on due to an increasing number of adds spawned by dead Organs. Any adds that reach a player apply a DOT to them, and when killed they do damage to the entire raid. Ensure that big cooldowns are up for the final phase one (which happens after all three Organs have died).
Please consider supporting our Patreon!
Join the Discussion
Blizzard Watch is a safe space for all readers. By leaving comments on this site you agree to follow our commenting and community guidelines.


